There is more to life with TurboRenault.co.uk

Register a free account today to become a member! Once signed in, you'll be able to participate on this site by adding your own topics and posts, as well as connect with other members through your own private inbox!

Clio Big Steve's RB Clio 182 Cup Restoration

Bloody rusty Renault's.. who'd have them eh?? :help.gif:

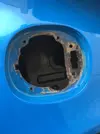
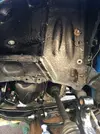
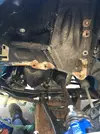
Was having a pick around the underneath of the rear of the car, checking that I'd not missed any scabs that needed attention before I packed away the underseal kit, and removed the fuel filler neck to give me better access to the rear offside arch. After I'd removed the neck, I had a closer look at the fuel door area, and saw something that caught my attention...
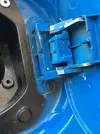
IMG_2224.webp
Tried to undo the bolts, but that wasn't going to happen... so I ended up drilling off the heads of the bolts. (At this point let me recommend some Cobalt Drill bits to you guys, they;re bloody fantastic for getting thru this old French steel without any effort!)
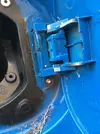
IMG_2225.webp
With the bolts removed, you can see they were never going to come un-done:
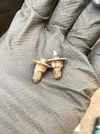
IMG_2233.webp
With the fuel door off, I could see the grot a lot clearer...
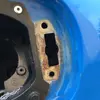
IMG_2232.webp
I then removed the rest of the filler-neck, and had a pick round with my scraper:
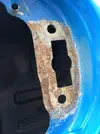
IMG_2236.webp
There was a lot more than first thought:
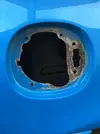
IMG_2237.webp
More painting needed.... BALLS.. :punish.gif:

Thanks for reading :)
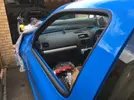
 
The rust converter had worked it's magic overnight:
IMG_2239.webp
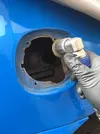
So I gave it a little sand down with my small pneumatic Dual Action Sander to remove any knibs:
IMG_2240.webp
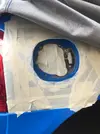
Then masked it up:
IMG_2243.webp
Before giving it a couple of light coats of zinc primer:
IMG_2245.webp
Will come back to this tomorrow.

The passenger door seal was next. It was a knackered thru a combination of corrosion bubbling up under the rubber:
IMG_2248.webp
IMG_2249.webp
...and getting bent when someone re-fitted it (badly):
IMG_2247.webp
So I replaced it:
IMG_2250_censored.webp

Thanks for reading :)
 
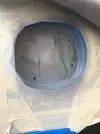
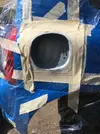
Removed the masking tape around the fuel filler neck at lunchtime today and very pleased with myself at the results!!
IMG_0487.webp
I tried an old technique I learnt when I was painting R/C Body-shells of leaving the masking tape a little proud of the edge I wanted to mask, to help hide the line... and sure enough it worked a treat!!!
IMG_0488.webp

A jolly happy camper today :grin.gif:

Thanks for reading :)
 
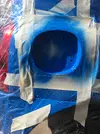
Now the fuel neck is looking so spangly, I couldn’t go fitting the fuel cap back on looking so nasty:
0EFE4723-5B8F-4C4B-9961-72D21ACBA143.webp

I’ll be putting the fuel cap back onto the car with some flanged M6 Stainless bolts, so I won’t be needing the moulded-in bolt head retainers, so I cut them off with a nice sharp blade in a junior hacksaw:
A5E291E7-8820-4653-9C87-3E6F0325E471.webp
Pleased with how they came out:
8F662D93-EC36-4D50-9D0C-934CC65BA7A8.webp
it was then a case of masking it up:
A4F6B77E-7494-4BAA-89B2-4BC934E5E664.webp
and a quick lick of paint:
D67462F1-7DF8-49D0-BD96-5070AD08BF33.webp
Will see how that turns out..!?

Thanks for reading 🙂
 
Managed to smuggle some grey insert OE Halogen headlights to @jas_racing and he's worked his usual magic on them

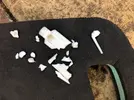
During the headlight restoration, @jas_racing found that one of the adjusters inside the headlights had broken up. A common problem on Clio 2's as the plastic material gets brittle being next to the headlight:
IMG_2315.jpg
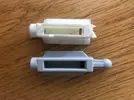
Thankfully there's a fix using a BMW headlight adjuster that's available on eBay for a couple of quid, and as you can see, it's a near identical match:
IMG_2316.jpg
@jas_racing fitted them to the headlights and now they're all ready to go back onto the car:
IMG_2317.jpg
IMG_2318.jpg

Thanks for reading :)
 
Been fighting with the front cross-member/radiator support for a few weeks now. Bloody thing was in shocking condition for a 2003 car! Looked like it had been at the bottom of the sea!! I've not showed pictures of the back of it, to hide it's embarrassment!

ezgif.com-resize (1).gif
  • Stripped the paint off around the rusty areas
  • Then treated with Bilt Hamber
  • Then heavily sanded down to look presentable
  • Rust now converted with FE123 Rust Converter
Going to see if it will accept some paint this weekend...? :punish.gif:

Thanks for reading! :)
 
Back
Top