There is more to life with TurboRenault.co.uk

Register a free account today to become a member! Once signed in, you'll be able to participate on this site by adding your own topics and posts, as well as connect with other members through your own private inbox!

21 Turbo The Scrapyard Quadra

I'll double check the measurements as I originally went by a hand written label on one of two bags that is was in.
 
Welding looks fine to me, only tips I've got are , clean , clean clean
Don't use an extension reel, i use a purpose made heavy lead and plug it into cooker socket in kitchen.....cos my garage power is pikey......on the list to sort
Proper gas, pub gas is ok for bits of brackets
Wire feed on cheaper/older budget units can be poor, make sure wire liner is good, sticky wire feed will produce pidgeon shit welds.
Weld same gauge together, the thinner you go, the more important it is.
You've invested in some quality kit, so with practice you'll get your money out of it pretty quick, takes me a while to get the feel of it if I've had time away.
I'm only self taught and I'd say I'm reasonable for a numpty, sometimes it goes well......sometimes less so, but they'll be a reason for it......you can't cut corners.

Buy a book, watch youtube, every day is a school day!
 
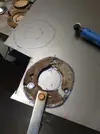
Physical Bolt measurement are
12mm on the shank so the thread is a M12x1.5 over 33mm.
Off set washer is 32mm x 5.5mm thick
Hex is 18mm & bolt overall length from under washer is150mm.
The two part numbers on the bags are 8200621875 & 7703034248 so it will be one of these
To me the measurements are almost identical so it should work.
Rich
 
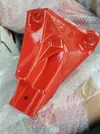
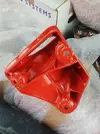
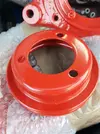
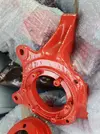
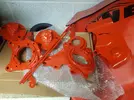
Powder coat porn. Current total of components coated in flame red = about 60 :D Brackets, mounts, hubs, covers, axles, trailing arms, pulleys, water pipes... you will NOT rust any more!

Gearbox legs

20181219_145458 (Medium).webp
20181219_145506 (Medium).webp

Water pump pulley

20181219_145608 (Medium).webp

Stub axle carrier

20181219_145620 (Medium).webp

Front ARB and subframe brace

20181219_202702 (Medium).webp

Rear beam, rear trailing wishbone things

20181219_202705 (Medium).webp

20181219_202710 (Medium).webp

Assorted stuff
20181219_202714 (Medium).webp

Subframe components

20181219_202721 (Medium).webp

Next up will be blasting, then seam welding and powder coating of the subframe I think. Will have to calm down after that as this and xmas and 2 kids birthdays in December have ruined me.
 
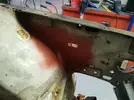
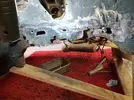
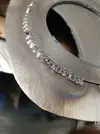
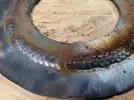
Finished off the hole in the NS inner wing, not happy with it though and had more trouble with blowing holes. I've set the welder up over again and its better now so will come back to it. It looks OK here but when you get a light behind it you can see some pinholes, it's just not neat enough.


20181222_180352 (Medium).webp

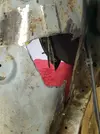
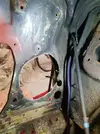
I had a bash at the other side where some of the steering arm hole had disintigrated and i'd previously made a pretty horrific repair with the old welder to get it past an MOT. No pics of that, too ashamed! Chopped it out

20181223_130400 (Medium).webp

I did have a bit of original inner wing to go here, but somehow I measured up for the hole wrong and cut it too small. What a spaz. I made a whole new bit from sheet. It's not perfect but it's not too bad either.


20181223_152241 (Medium).webp

20181223_162359 (Medium).webp

20181223_162546 (Medium).webp

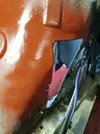
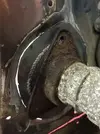
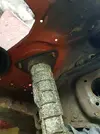
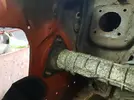
I decided to look at the decidedly ropey bit inside the drivers wheel arch. Its not pretty.

20181223_163116 (Medium).webp

20181223_175350 (Medium).webp
 
Last edited:
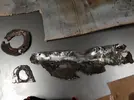
So I set about hacking it out and started making the steering rack mount from scratch.

20181223_180031 (Medium).webp20181223_180038 (Medium).webp20181224_124216 (Medium).webp

I made a reinforcing plate for the middle bit and welded that together, spot the point where I ran out of welding gas.

20181224_140412 (Medium).webp

More gas, much better

20181226_160550 (Medium).webp

Tacked the plate in

20181226_163704 (Medium).webp

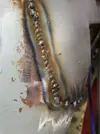
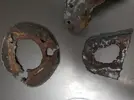
Looked OK and rack mounted up so welded it in. Blew a few holes which was frustrating but the car metal is so thin in places it's almost impossible not to

20181226_183740 (Medium).webp

20181226_183745 (Medium).webp

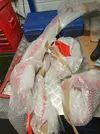
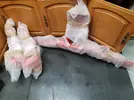
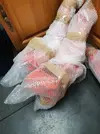
Ive seen better, but i've seen worse! Then I ran out of gas...again! The £15 disposibles are lasting like 1 day with this new rig so I need a better gas solution, it's costing far too much. I stripped 2 doors down to literally the metal and bagged all the parts in prep for the shell dip if I ever save the money up for it and that was that.

In the end I took a break from the 21 and started a bit fo work on my 1986 Renault 9 Turbo....which ironically seems to be less rusty than this thing lol.

And...Happy new year from me and the Scrapyard Quadra :D
 
Last edited:
The welding looks a lot better than any mot spec shite to be fair mate, last pics look fine. With practice it will be bang on keep at it. Get a pub bottle for gas, they arent that expensive from memory, works out miles cheaper.
 
The welding looks a lot better than any mot spec shite to be fair mate, last pics look fine. With practice it will be bang on keep at it. Get a pub bottle for gas, they arent that expensive from memory, works out miles cheaper.
Cheers matey. Trying my best.

My mate runs an engineering company and has a spare bottle for me, so I need to collect that and get it filled somehow. I can get a bottle bridge on eBay for £22 so I can steal a bit of his gas to get me going again.
 
Hobbyweld cylinders are easy to get, quite a few places stock, ( SDL Minerfern 10 mins from me , hence why I use) costs a bit to start off, from memory think it's about a ton deposit and 35 for a fill, but no rental. But if you've got a contact, then that'd be first option

Pub Co2 is Ok, but you'll never get nice welds on thin plate, argoshield is so much nicer. CO2 is cheaper obvs, I used it for years, then had a go with someones Argon mix ......it was night and day....never used CO since.

Think the reason you're blowing holes is, you're expecting too much, the gaps are far to big, you need to be as tight as possible.
When you first arc, you're creating a molten pool of metal which the wire replenishes as you pull....or push it along, that's one of the mistakes I used to make, it's not a glue gun, it's that pool that makes the nice neat flat weld.

Other than that, where you've got it right, it looks beaut, flatter the better, nice bluing shows good penetration, be careful with the grinder though, don't go too mental cos you might get surrounding area too thin......it show with blue spots. There's nowt wrong in my mind with a skim of filler to disguise where you've plated.
Flap wheels in grinder are best at dressing, and It's easier to dress when you've welded with argon mix, I read recently that it makes a softer weld than CO2........you learn summat new everyday.
 
Some good advice there Dave and by the time you get rid of all the 21's rot you will have it mastered ;)

I maybe able to help with gas if needed, have accont now £11 per month for 2 big bottles and £26 refill of choice
 
A lot of people use a powerfile for dressing back the welds, might be worth a look aswell as flap wheel
I use flap discs now, I do need a power file defo. next purchase I think. the grinder cant get in to tight places or grind in corners. I bought myself a metal bender too, which was useful already.

I maybe able to help with gas if needed, have accont now £11 per month for 2 big bottles and £26 refill of choice
I'll be in touch! Wheres that from? Take it you bought a welder then :)

Thanks, useful info. I do use Argon mix, you're right its much better.
 
and you rip me for having a rusty renault 12!... fuck me..... good work sticking fresh metal in though (y)
 
and you rip me for having a rusty renault 12!... fuck me..... good work sticking fresh metal in though (y)
Its going to be a long process mate.

I've been talking to a company about replicating OE sills, if I can get enough support from the UK & France for a group buy that would make my life a lot lot easier. It's currently my biggest concern as mine are a shambles lol.
 
Back
Top