There is more to life with TurboRenault.co.uk
You are using an out of date browser. It may not display this or other websites correctly.
You should upgrade or use an alternative browser.
You should upgrade or use an alternative browser.
21 Turbo The Scrapyard Quadra
- Thread starter DaveL485
- Start date
Andyquadra
Well-Known Member
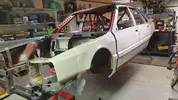
Could have at least put them on in roughly the right place, could fit a horse through that panel gap 
DaveL485
Staff member
The tabs for the studs on the bottom of the a-pillar don't have holes drilled yet, so it's sat on top of the studs...thats why it has a panel gap like an 80's Renault lolCould have at least put them on in roughly the right place, could fit a horse through that panel gap
Had the opposite problem with mine, must have been crashed so many times it’s 3 inches shorterThe tabs for the studs on the bottom of the a-pillar don't have holes drilled yet, so it's sat on top of the studs...thats why it has a panel gap like an 80's Renault lol
DaveL485
Staff member
Same!Hope I live long enough
davemaygtt
Well-Known Member
Come on Dave, picture of semi aligned panel needed! Getting there now mate!
DaveL485
Staff member
Considering popping it off the rotisserie for an offer up of the full kit inc the vented bonnet, for inspiration. Bonnet, Wings, Skirts, Bumper, Spoiler and I do have a rare PSG rear bumper splitter that I think might suit it somewhere too.Come on Dave, picture of semi aligned panel needed! Getting there now mate!
davemaygtt
Well-Known Member
Does it need to be on the rotisserie still? What's left to do underside?
DaveL485
Staff member
Can't hang bumpers on the rotisserie.Does it need to be on the rotisserie still? What's left to do underside?
Rear arches both crumbling, one rear axle mount still to weld up, the the OSF turret has a few bits needing attention.
I have a good pair of rear arches cut from another car but considering using them as templates to have a batch of replacements made for the club.
Can't hang bumpers on the rotisserie.
Rear arches both crumbling, one rear axle mount still to weld up, the the OSF turret has a few bits needing attention.
I have a good pair of rear arches cut from another car but considering using them as templates to have a batch of replacements made for the club.
defo time for the crusher
Red21
Well-Known Member
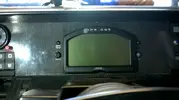
Yes, Its a good balance between the 80s hi tech look and 21st century technology.
I have a D2pro with the extra 8 channels so I can log some data and it has been a good choice.
There are a few things that are annoying in a race car like permanent display of the Odometer, a clock that relies on GPS signal but overall it has been clear to read.
To aid screen scrolling I have used the redundant trip button on the wiper stalk which allows me to flip through the five data screens and just use the coloured buttons to read min/max and to start the data log etc.
Setting it up was a bit of a brain work out on a couple of channels to get to read how I wanted but if you are going to use the CAN or Serial data input it should be easier as that data can be taken direct from the engine management with the correct lead.
I am looking to expand the the log channels so I can log EGT, AF and what ever else I get data from.
DaveL485
Staff member
I chose the Dash 2 partly because it interfaces with my ECU - so yeah should be an easy (ish) lifeSerial data input
DaveL485
Staff member
So, since the last proper update I have been k-k-k-krazy busy on other stuff.
-V6 discs & pads all round and ABS rings, plus a weekend road trip
-Meglio discs & pads all round, steering arms, track rod ends, couple of drop links
-Bought an XC90 with no keys, sorted the keys, recomissioned it and serviced all belts and fluids, fixed the washer jets, changed the intercooler, fixed the swirl flaps and MOT'd it
-Rented a skip, cleared the mountain of crap out back, moved 16 old garage panels to the skip (HEAVY) and dug out several tons of garden with a spade and wheelbarrow
-Refurbed the upstairs bathroom from a bare shell (though this was more Amrit & Dips, I was running the kettle lol)
-Stripped and cleaned the 9 engine
Also teaching my Mrs and kids to Ski, which time wise isn't so bad but it's a HUGE drain on funds!
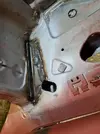
...Phew. Anyway, got a lot of ticks in a lot of boxes and I finally got to do a bit more on the 21 this weekend in the late afternoons. I decided to go after that A-Pillar rot right up under the bulkhead, as I was curious how bad it was. Turns out, for a change, not so bad
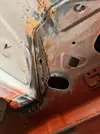
The car is on its side, on the right is the pax footwell, as you look at it the dash would be vertical.
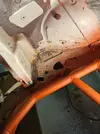
I chopped out the manky bit, couldnt find any other rot around it at all so I blasted some Hydrate 80 in there and patched over it, it's hidden so didnt bother making a flush fit.
-V6 discs & pads all round and ABS rings, plus a weekend road trip
-Meglio discs & pads all round, steering arms, track rod ends, couple of drop links
-Bought an XC90 with no keys, sorted the keys, recomissioned it and serviced all belts and fluids, fixed the washer jets, changed the intercooler, fixed the swirl flaps and MOT'd it
-Rented a skip, cleared the mountain of crap out back, moved 16 old garage panels to the skip (HEAVY) and dug out several tons of garden with a spade and wheelbarrow
-Refurbed the upstairs bathroom from a bare shell (though this was more Amrit & Dips, I was running the kettle lol)
-Stripped and cleaned the 9 engine
Also teaching my Mrs and kids to Ski, which time wise isn't so bad but it's a HUGE drain on funds!
...Phew. Anyway, got a lot of ticks in a lot of boxes and I finally got to do a bit more on the 21 this weekend in the late afternoons. I decided to go after that A-Pillar rot right up under the bulkhead, as I was curious how bad it was. Turns out, for a change, not so bad

The car is on its side, on the right is the pax footwell, as you look at it the dash would be vertical.

I chopped out the manky bit, couldnt find any other rot around it at all so I blasted some Hydrate 80 in there and patched over it, it's hidden so didnt bother making a flush fit.

DaveL485
Staff member
Then I moved on to the bit where the heater box sits in the bulkhead. There's a lip around it and a seal sits on the lip, but the seal seems to have held some damp in and it's crumbled 
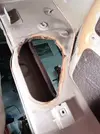
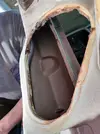
I sealed it up with some gunk a while back, to stop water leaking in to the footwell, but it's time to sort it properly - I chopped the lip off for all but the very back bit and cut a 10mm strip of steel to replace it.
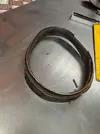
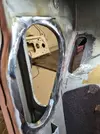
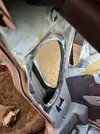
Ive seamed it right around the inner edge and around the front of the outer, I think i'll seam sealer it too. Need to test fit the heater box to make sure it still fits the hole.
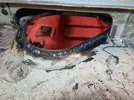


I sealed it up with some gunk a while back, to stop water leaking in to the footwell, but it's time to sort it properly - I chopped the lip off for all but the very back bit and cut a 10mm strip of steel to replace it.


Ive seamed it right around the inner edge and around the front of the outer, I think i'll seam sealer it too. Need to test fit the heater box to make sure it still fits the hole.

DaveL485
Staff member
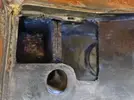
Then I started on the other rear axle mount. I did the first one ages ago, time to tackle this one. Found it a bit easier with the experience gained from the interim shenanigans since I did the other side.

Chopped out and treated
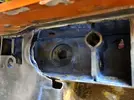
Templates
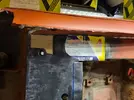
Made the bits out of some nice thick steel, the original is double layer 0.9mm but this is why its rotted when moisture got between the layers. You can see in between the 2 patches where I have pulled the top layer back a bit to get in there with Hydrate 80.
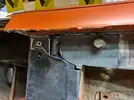
I was getting ready to weld it all in but...

Nope! Need to go get a bottle refill, so that had to wait for now. Instead of that I started trimming down the parcel shelf I was kindly given from a scrapper to patch the massive subwoofer hole some numpty cut way back before I got the car.
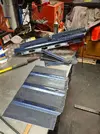
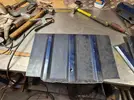
Turns out it actually sits over the hole as a bigger panel very neatly, this will save me trying to cut the exact round shape out which would be a mare.
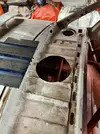
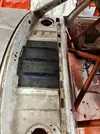
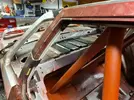
Once thats seamed and painted you won't know its there unless you look for it, good enough for me

Chopped out and treated


Templates

Made the bits out of some nice thick steel, the original is double layer 0.9mm but this is why its rotted when moisture got between the layers. You can see in between the 2 patches where I have pulled the top layer back a bit to get in there with Hydrate 80.

I was getting ready to weld it all in but...

Nope! Need to go get a bottle refill, so that had to wait for now. Instead of that I started trimming down the parcel shelf I was kindly given from a scrapper to patch the massive subwoofer hole some numpty cut way back before I got the car.


Turns out it actually sits over the hole as a bigger panel very neatly, this will save me trying to cut the exact round shape out which would be a mare.


Once thats seamed and painted you won't know its there unless you look for it, good enough for me
Similar threads
- Featured
- Replies
- 76
- Views
- 2K
- Replies
- 4
- Views
- 345
- Replies
- 6
- Views
- 877

