There is more to life with TurboRenault.co.uk

Register a free account today to become a member! Once signed in, you'll be able to participate on this site by adding your own topics and posts, as well as connect with other members through your own private inbox!

5 GT Turbo R5 GT Turbo - Complete strip down and re-build #1

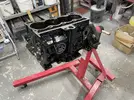
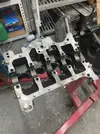
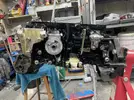
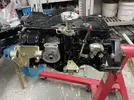
I got the block back on to the engine stand yesterday but had to do some unexpected work for my day job!
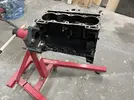
IMG_8870 Large.jpeg
IMG_8871 Large.jpeg
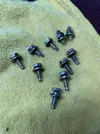
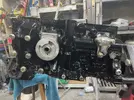
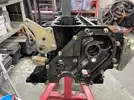
I tried again today, a got cracking with the cleaning and zinc plating of all the nuts, bolts and washers that I took off the block!
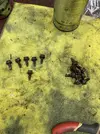
IMG_8872 Large.jpeg
IMG_8873 Large.jpeg
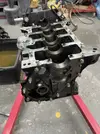
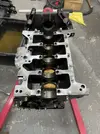
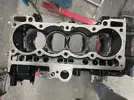
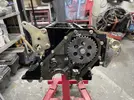
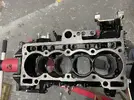
I plated the bolts and then put them in to the block after tapping the holes out with a dab of cutting oil on the tap! Hopefully this way, I won't come to put it back together and I am missing the odd bolt!
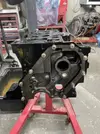
IMG_8874 Large.jpeg

IMG_8875 Large.jpeg
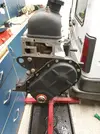
IMG_8876 Large.jpeg
IMG_8879 Large.jpeg

IMG_8881 Large.jpeg
IMG_8882 Large.jpeg
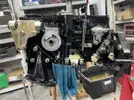
That took me most of the day! I then got the distributor out and started to give that a clean up, that can wait until tomorrow!

Thanks for reading guys!
 
Looks fantastic, how are you doing the plating?? Think I've missed something.
Hi Steve, thanks, I bought a plating kit from Gateros plating some time ago, I think it was about £100, I find its ok for nuts and bolts and small bits, but i am not proficient enough tackle anything much bigger! It saves a lot of waiting around for the platers and money!! I send the bigger stuff to the platers!!

 
If you put a bolt in the stud holes and do it up it punches through to the water jacket and then when you take the bolt out, coolant leaks out :(

Ask me how I know lol!

One of the many, many errors suffered by my very first car A754 HVC back in 1996 :)
Thanks Dave 👍🏻👍🏻
 
Did a bit today, waiting for bits to show up so can't really crash on with getting it back together, but it is giving me a chance to try and find all of the brackets and nuts & bolts and give them a clean up prior to reassembly!
Taking advice from @Brigsy & @DaveL485 I changed the studs around on the timing chain cover, I also just noticed whilst looking at a photo that there is also a different bolt with a loose washer on it below the two studs! I'll change that around! I started to sort through the box of bits and refer to photos of the strip down to start loosely bolting things back on to the block!
IMG_8885 2 Large.webp
IMG_8886 2 Large.webp
I also greased up the cam-shaft as per @sparkie 's advice, I greased it up first and gave the sprocket a clean with the wire brush!
IMG_8889 2 Large.webp
IMG_8890 2 Large.webp
I then dropped the distributor on, but not the drive for now, I had to clean and plate the bolt for this first!
IMG_8891 2 Large.webp
Then came across the dipstick, so gave that a clean and dropped it in place! Note: The alternator rubbers are in the wrong way around on this pic, I notice later in the day and corrected it!
IMG_8892 2 Large.webp
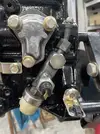
Then had a look at the lower oil pressure thingy! It looks a bit Frankenstein! any suggestions on this? What are the two sensors coming out of it?

IMG_8893 2 Large.webp
I dropped it in place with a view to replacing with a new one once I know what it is!! :)
IMG_8897 2 Large.webp
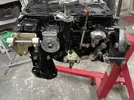
Its starting to take shape!
IMG_8898 2 Large.webp
I then got the alternator bolts and cleaned and plated them!
IMG_8899 2 Large.webp
IMG_8900 2 Large.webp
Thanks for reading guys!
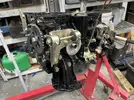
 
Assasins unknown have put an extra sensor into the turbo oil feed connector. I would bin it in favour of an unmolested one. If you need an extra oil sensor fitted there is another tapping in the other end of the main gallery between the oil filter and the end of the block.
 
Assasins unknown have put an extra sensor into the turbo oil feed connector. I would bin it in favour of an unmolested one. If you need an extra oil sensor fitted there is another tapping in the other end of the main gallery between the oil filter and the end of the block.
Like this one?

 
that appears to be the phase 1 oil pressure and level set up, if i'm not mistaken

the ph2 uses just the one sensor for level and pressure, the ph1 uses your set up.
 
how many connections on the lower pressure sensor? if its one, its the ph1 and i'll happily buy it off you lol

switch it up to the phase 2 set up, easier to find a aftermarket sensor and you can lose that lovely welded section.

You'll just need the ph2 oil feed and sensor
 
Ph2 one is the welded one, with separate barrel sensor at the bottom for oil pressure and separate sensor higher up for low oil pressure light.

Ph1/early ph2 is single barrel sensor on the bottom with 2x connections for both oil pressure gauge, and light.

Even earlier ph1 11t has the oil pressure sensor that is also a banjo bolting the feed straight into the oil gallery.
So is this correct? Should it be welded like that? Thanks. Also which Victor Reinz sealant do I need? 😬
 
Your work continues to Amaze @Chris74# !! Beautiful work on that engine, and I think you’ve got an amazing thing going on with that pickling tank and then powder coating..!!

Noticed that one of the pistons in the engine had some engraving on the top of it? So looks like someone has been in there before you.

Make sure that you properly check that the liners are achieving the right height in the block to allow the head to properly press down onto them and seal.. they can be all over the place…
 
Is this where we start the 80-post debate on preferred liner protrusions? View attachment 210160
Added to the way you measure them vs how well are they actually held down with your pikey washers and bolts vs being held down by the proper head…


Sure there’s also some room left to discuss the merits of the liner o-rings and if you should also put a smear of gasket seal around as well for good measure..

:grin.gif:
 
Back
Top