There is more to life with TurboRenault.co.uk

Register a free account today to become a member! Once signed in, you'll be able to participate on this site by adding your own topics and posts, as well as connect with other members through your own private inbox!

5 GT Turbo F4Rt - hopefully the correct decision

its not really a gasket on the f4r though, its a seal. it sits in a recess machined into the sump

Now I’ve seen it and you’ve said that I’m pretty sure it can’t be that causing the leak. I think I’ll find it’s the rear main seal.
 
All set to crack on with the task at hand tomorrow morning.

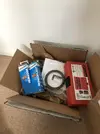
I’ve got some decent sealants from Engine Dynamics as well as the rear main seal from Renault. I also purchased a new clutch alignment kit/tool as lost the last one I had.

Planning to get engine back in by end of weekend and pray to baby Jesus that it no longer leaks afterwards.

6867CD18-AA11-41F6-AC52-8EA0C845693B.webp
 
Have you put a stainless bolt in that cover? It looks stainless - don't use those in load or stress points like suspension or engine mount points.

The alloys in steel that make it stainless also make it weaker (you never get something for nothing), they're around 75% of the strength of normal steel. Also when you connect stainless steel to steel/ally you create a small battery as they are dissimilar metals. Therefore the current flow takes away from the steel to corrode it more quickly than on it's own. Just because it's shiny doesn't mean it's good!
Stainless steel can also degrade after prolonged exposure to certain environments, in this case being salt and/or heat. Its called chloride stress corrosion cracking, and is basically where chloride ions get in between the metal grains to weaken them, which can then lead to brittle fracture of the material.

TL/DR: Stick with high tensile steel bolts for anything bearing load.
Jeez Dave, that’s some essay on bolt selection. It’s not load bearing, just a cover for cam pulleys. 😂
 
Jeez Dave, that’s some essay on bolt selection. It’s not load bearing, just a cover for cam pulleys. 😂
....that also receives the M10 bolts for the suspended engine mount. Why do you think it's held on with 4 or 5 M10 fittings and not puny M6's like most covers? To be honest that one on its own wouldn't matter too much, it was more to make the point for future reference when swapping out old bolts for new, you need to think about the bolt material and application.
 
....that also receives the M10 bolts for the suspended engine mount. Why do you think it's held on with 4 or 5 M10 fittings and not puny M6's like most covers? To be honest that one on its own wouldn't matter too much, it was more to make the point for future reference when swapping out old bolts for new, you need to think about the bolt material and application.

Understood mate, all good knowledge.
 
Managed to get a few hours during lunch today as working from home.

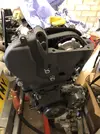
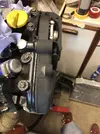
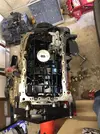
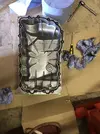
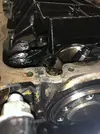
Took the sump off and have to say the OE sump seals look good and the one on there was brand new so I left it. Just cleaned up the sump itself and the block surfaces and refitted following the suggested sequence.

I sourced some decent sealant from Andy and ED. I used it on the end cap seals, using my torch you could see a gap on both sides so with any luck that’s all sealed up too.

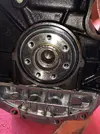
On closer inspection I can see why the rear main seal was leaking, the bottom part had been pushed in too far meaning the whole seal on the piss just enough to cause the leak. I’ll remove engine from stand this week and fit new seal. Then put it altogether and pray to baby Jesus that it doesn’t leak.

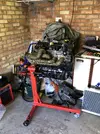
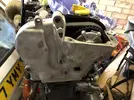
322A078A-1837-4FA1-AED3-CCBA4D4D82B3.webp1EF3B034-49E4-4074-BBDA-8C40733B772E.webp86C1D961-AF72-4E81-8D31-835994E8247F.webp12FB404D-695C-44C9-9D4B-5060A2FCAA34.webp
 
Back
Top