There is more to life with TurboRenault.co.uk

Register a free account today to become a member! Once signed in, you'll be able to participate on this site by adding your own topics and posts, as well as connect with other members through your own private inbox!

3 Door 5 Campus

I followed the instruction to the letter on my b pillars on the R26.

It was not up to that job. Maybe it was the stipple?

Either way I dusted it with a rattle can. That sorted it.
 
I followed the instruction to the letter on my b pillars on the R26.

It was not up to that job. Maybe it was the stipple?

Either way I dusted it with a rattle can. That sorted it.

The meg b pillars do not take to any trim restorer for whatever reason, its some funny kind of plastic. Will have no problems on any other trim though
 
Boring bit for me now.....
Now I've finished with heavy artillery, clearing the trenches is always where I fade....
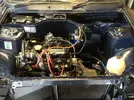
Lump in, hoist her up and drop me tackle in..........

2019-04-11 184055-2214528.webp

Before that one of exhaust studs needed renewing, wouldn't budge welding nuts on etc etc, so drill out again............

2019-04-11 113336-1599747 (1).webp

New one made out of a quality approved, pre loved bolt, cut to size and a bit of thread added.

2019-04-11 121236-2080999.webp

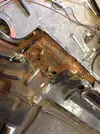
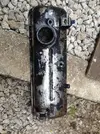
Rocker cover took some prepping, this is out of tank, bare metal is where rust was, coating clinging on still

2019-04-13 122742-3704131.webp

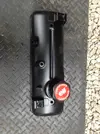
Knotted brush in grinder made short work of it though, scrub with thinners, then etch and acrylic satin.......'cos that's all I had, something tastier would have got some enamel and baked on, but this will have to do.

2019-04-14 140505-2217931.webp

Was fairly pitted, but i wasn't going to spend hours on it, bolted on it looks tidy.

2019-04-14 151105-1951273.webp

Oil and filter done, rad on, hoses with some quality assured, pre loved, new to this car, jubilees, shafts in, brakes assembled, all plastic panels and liners on, wiring loom ( what there is of it on a 5 ) exhaust downpipe, fuel lines, gear shift etc etc
Just gotta stay focused, strut tops seem to be knocking though, springs are way to short for standard 5 struts, but I had a pre pre mot/after build push and shove and what, at first seemed to be play at the wheels seems to be top of strut, even with weight on car, I know springs are short but something is amiss, trying to think what I've assembled wrong to cause it, it'll all come apart for new springs, but it annoyed me today............fucking trench clearing.........
 
Boring, boring, boring...............
Brackets and bits, and bits and brackets...........rusty poo poo

2019-04-19 132230-3095808.webp

I'm not aiming for Pebble Beach Concours, but shite like this will not do.........

2019-04-20 163323-2182475.webp

Bath, treat and satin black .

Busted mount on headlight got dremeled out and a M6 magic glued in.

2019-04-19 152054-1749107.webp

Run out of fluid when pressure bleading brakes, so thats on hold, so cavity waxed subframe and surrounding area, filled cooling system up with water and bled it, let it run for a while before i drop it and put some anti in it, cut N/S new paint in, including spot repair below window, looks good enough for me.
Clay bar on roof and a wet cut with some G3 by hand, only to get years of scum off, quick flash over with some autoglym super resin.......just makes it look smart without disappearing up my own arse chasing swirl marks

2019-04-20 161946-1697994.webp

Kick it out of garage now, as iddy biddy ickle car is now home, but it's back is well and truly broken, I can now just feck about as and when it suits me.
 
Tacked a few extra days onto BH, nice to fart about for a while, have a drinky poos, do a bit, sit on my arse for a bit.
Wasted a good couple of hours taking window winder to bits, worked out problem, reassembled it, reinforced previous repair on tube........happy as a pig in shite.....tube cracked and then snapped right on moulded join at bottom............
MIster Auto £29 delivered.........spanking new, didn't sleep and felt sick for 24 hours, only joking.....
Waiting for Gyeon trim stuff to tip up today, no sign, checked tracking number.....delivered and signed for by Mr Richardson ????.....well I ain't called Mr Richardson and it's invoiced to me, stomped round all neighbours and it turns up at number 5, not number 4.......grumble grumble.
Thanks Brigsy, not sure how you 'tag' people
Before

2019-04-24 110516-3710955.webp

During.

2019-04-24 121214-3934722.webp

Before.

2019-04-24 132152-3834939.webp

During.

2019-04-24 133354-3740191.webp

And both after....

2019-04-24 141250-1840666.webp

Scrubbed both with truckwash and hot water, and then cleaned them with celly thinners, instructions state to use their prep spray, but I didn't so if it doesn't work as well as it's supposed to , then perhaps that's why, but it looks like IPA dyed pink to me......
Really happy with result, as it dries it seems to even out a bit, I didn't put a lot on, 'cos A , I'm a tightarse and B, I thought I'd see how it looked before lathering it all over, it's invariably harder to get stuff off, than it is to slap it on, a bit like fat arses on women..............
 
Looks great(y)

I used neat APC to clean mine down as could not be arsed spending the dollar on the cleaner, seems to be holding out really well for now, yours should be grand.
 
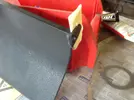
Bit of farting about......basking in the glory of a car back together, cubby hole lid had a corner snapped off, previous super glue repairs obvious, cleaned and scuffed it up,and a little 3M two pack
2019-04-24 142830-2286920.JPG

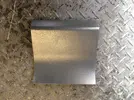
Shape it, 400 grit and some grey paint tinted to as near as ......not invisible but ...
2019-04-27 144405-2941168.JPG

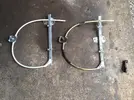
New window winder tipped up, packaged with a Gaelic shrug.....lobbed in a box twice the size it needed to be with half a dozen air pockets half hearted taped up.....it was another throw onto a van away from falling out....looked the same..
2019-04-30 134441-3454457.JPG

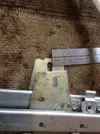
But when fitted the window flopped all over the place, loads more slop in the mech.....it wound down OK, but on the way up was drooping like an alco's prick..... ended up an inch between the back of the glass and the door frame....thunder was rising in my belly, ready to strangle somebody, back out and have a proper good look.
2019-04-30 142051-2526089.JPG

Slots where M6's go into bottom of glass bracket on the lifty bit were different, only 5mm, but one shown above was 5mm lower, and other to right ( bearing in mind pic is 90 deg rotated to how it's fitted in door ) was 5mm higher......knowing it would invalidate any warranty I just enlarged the holes and got it to work ....just.
But after putting it all back together, door card and all.....winder didn't fit as well...bit of grease.......sharp smack....wanky plastic hook bits on new part shattered....as brittle as a very brittle thing......so all back in bits and drill an M5 nut and bolt through....OE quality it was not!
About 2 hours at it this time, gave myself headache, full mardies on, ready to set fire to all the shit I own and walk off into the sunset......especially after I was holding above winder in place whilst drilling it ......and drilled into my finger...not much, but just enough so there's claret all over everything I touched.....laugh?.... I did cry
Needed to weld something, luckily front inner edge of bonnet was goosed, I'd put the feelers out for a replacement, but the likelihood of a good one turning up for my maximum price of a bag of Fizzbombs meant a repair was on the cards..
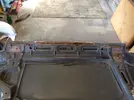
2019-04-30 110721-2104666.JPG

Fooked..........perfect for me, tickled with knotted brush, see what I could save, bit of slitty disc
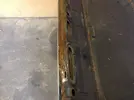
2019-04-30 113251-2041775.JPG

Decided that as outer skin was pitted on the inside, but more or less complete, I'd just pop a few repairs on it, bilt it, and rebuild inner properly, then down the line outer could be re skinned if ever needed, It's all a real rust trap, triple skin in places so I'll drown it in wax when I've done...it'll last.
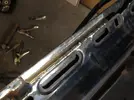
2019-04-30 175342-1493437.JPG

Tacked it in sections, keep shape, had to lose most of return on skin due to rust, but saved enough to make inner to and slip it under, seam seal along edge eventually.
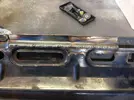
2019-04-30 180040-2258839.JPG

Some more meaningful welds after

2019-05-06 152853-2613671.JPG

All 'Orrid under skin where hinges bolt, cut outer part of inner skin off, ground it up, treated it then a fresh piece welded in,
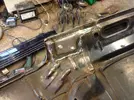
2019-05-06 173551-2554155.JPG

Same on other side, ground it back and then it's filler time, prep and blow leading edge in.
One wanky bonnet saved, won't be perfect, but looking at the construction, it'll stand the test of time, compared to if I found one that appeared better?
Picked up some PH1 front struts, so after I've done bonnet and re painted grill, think I'll move onto getting final suspension set up on.
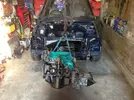
 
Last edited:
Bonnet repair finished, filled and flatted, seam sealed on very edge and a splatter of ancient white stone chip on the inside....it was on the shelf, so free..

2019-05-12 155016-1513429.JPG

Repair went a little higher after primer, but ....

2019-05-13 193326-1499841.JPG

......tough bobarr.......clay bar'd existing paint and scotched a line above repair, hopefully do the best blend I can manage, I could paint full panel, but garage is filthy....no matter how much I sweep, still end up with crap in paint, but spend peanuts .....get what you get.

2019-05-16 130115-2749807.JPG

Hard masked it a couple of inches up from end of blow in, keep rest of panel free from overspray, leave it a week and cut it in, grill done as well, He wanted it de-badging, so I obey his wishes...

2019-05-16 111729-1937842.JPG

A twazzer to prep, had some spray putty shit on it, solvent made it crinkle where it had edges, so I had to rip it back to bare plastic with 80 grit and plastic prime it, so much fun in between slats, it was.

Got a pair of Ph1 GTT front struts from fleabay, pretty sure someone was bidding me up, but I went up to what new springs alone would cost me to remanufacture, ended up with some tidy shocks to boot and all rest of set up, so stripped and a flick of paint and they can go on.
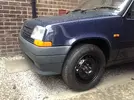
2019-05-16 130606-2010076.JPG

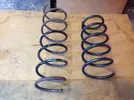
Standard Campus high rise flat specs next to GTT OE, should get car about where I want it, 165/65/14 Twingo steels are quite a bit bigger than either campus or GTT set up, so I need to be careful no fouling

2019-05-16 130658-2304700.JPG

Getting there, nice and steady now.
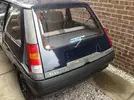
 
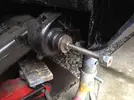
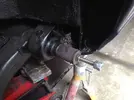
Bars out, threaded bar first to get them out level with end of arm,

2019-05-17 101246-1823155.JPG

Then a bit of tube , so I could wind them fully out, came out lovely, no wanging of slide hammers required,

2019-05-17 102250-1501840.JPG

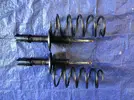
Fronts Phase one struts were tidy, so I bathed the bit of rust off and just touched them up a bit, painted springs and built using the new bearings/refurb cups etc off the ones on the car,

2019-05-16 154959-3867308.JPG

I've set rear bars to GT height ( 385mm) and it looks spot on what we wanted,

2019-05-26 094645-2238495.JPG
But.......because of lack of plastic arch on Campus, it looks a bit high .....looked better on short short springs.....hence I need some 300mm I reckon, but due to arch position on 5 that'd make it sit nose down,, although the car height is correct and matches the specs for a GT, I think I'll drive it first before altering, main concern is it handles reasonably well, i.e , that its safe for him.
If you look at the bodyline of a 5, the centre nut is about at the sill top...ish front and rear, yet the rear arch is much lower than the front, you'd need a drag stance to have the arch gaps level

2019-05-26 094710-3060783.JPG

His budget has about gone anyway, so if it concerns him that much he can get his hand in his pocket and I'll get some 300mm made.
Bonnet and grill cut and fitted, happy with them.
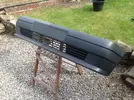
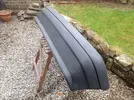
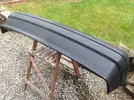
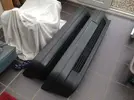
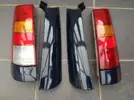
Prepped rear plastics, a little filler where moulding had dropped in area where upper fitting is,

2019-05-21 185126-1815383.JPG

Painted them and turned out quite well.......other than boot trim falling of stand when paint was still tacky, so that'll have to be flatted back and blown over again....never mind!

2019-05-26 094338-2465644.JPG

They need a flat and polish, but the plastic had really bad UV damage so it'll look much better, I was going to do mirror shells, but CBA taking them to bits to prep and paint them for what we'd gain, car is a dark colour and some of the magic liquid has brought them back to life.
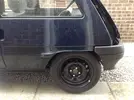
Re do boot trim, then think I'll paint wheels, there's half a litre of black and just enough two pack lacquer on shelf so that's decided what colour they'll be......
 
Last edited:
Continue fannying about, before ..........

2019-05-18 133427-3020447.webp

And after, ditch the camprust badge, wants a bit more spit and shine, but you get the idea....

2019-06-02 145633-2465340.webp

One number plate light is new, one is like a tramps toenail, so I looked up part no.........start looking on t'bay...........feck me ragged with a bent rag mans brass trumpet, HOW MUCH!!!!...............It'll be fine as it is.....
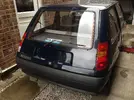
Mann Egg sticker needs to come off, but it's on heated element, so needs a bit of care, otherwise It'd had blade on it....any suggestions? Heat? thinners?
Dropped it back on trolley wheels and started prepping rims., then got exhaust to replace, apparently 3 door poverty centre sections are rare, but I've got a nice S/H promised, should be on road in next couple of months, hopefully.
 
Back
Top