Before you read this, V6Clio.net, the original author, nor me, accept any liability if you damage your car or yourself whilst jacking using this (or any other) guide.
Important to note that this is just one method of jacking the V6. You may well have your own favoured method, and the old adage "if it ain't broke, don't fix it" may well ring true. I personally (Ben) jack each corner in turn. Basically, do what you are comfortable with, and what is safest for your environment.
That said, thanks to @dalla for the following guide:
1. Make Ramps from Plywood:
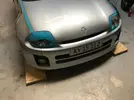
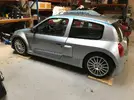
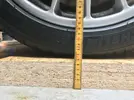
First, I made these ramps from plywood to allow the jack to fit under the car. They measure around 58 mm in height.



2. Lift the Front End:
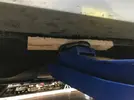
With the car raised on the ramps, I was able to get the jacks underneath the jacking points on both sides. I used the jacking points on the sills to raise the front onto the jack stands. I protected the sills with a piece of plywood. Just make sure that the plywood doesn’t “tilt” on the sills. Keep the car in gear and with the handbrake pulled when lifting.
3. Place Jack Stands under Subframe Crossmember:
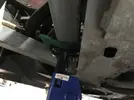
I placed the jack stands under the sides of the subframe crossmember, which should be plenty strong for this. But before placing the stands, you will have to remove the front undertray. This is straightforward; it is only fixed with six 6 mm screws. After this, my jack stands slotted in perfectly between the OEM subframe and the Clio V6-only crossmember.
4. Remove the Rear Undertray:
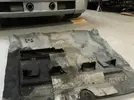
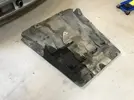
With the front supported on jack stands, the rear is quite straightforward. You just have to remove the rear undertray before lifting. This is fitted with eight screws. Please note that there is a screw in the center of the undertray.

5. Lift the Rear End:
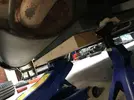
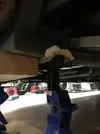
I lifted the rear end on the rear part of the crossmember. Use a long piece of wood to spread the load, and to protect the crossmember. I used a piece of wood approximately 60 cm long.

6. Final Setup:
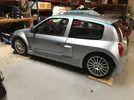
Hope this is useful for someone. I feel it is a safe and easy way of getting the car onto jack stands.





Important to note that this is just one method of jacking the V6. You may well have your own favoured method, and the old adage "if it ain't broke, don't fix it" may well ring true. I personally (Ben) jack each corner in turn. Basically, do what you are comfortable with, and what is safest for your environment.
That said, thanks to @dalla for the following guide:
1. Make Ramps from Plywood:
First, I made these ramps from plywood to allow the jack to fit under the car. They measure around 58 mm in height.


2. Lift the Front End:
With the car raised on the ramps, I was able to get the jacks underneath the jacking points on both sides. I used the jacking points on the sills to raise the front onto the jack stands. I protected the sills with a piece of plywood. Just make sure that the plywood doesn’t “tilt” on the sills. Keep the car in gear and with the handbrake pulled when lifting.

3. Place Jack Stands under Subframe Crossmember:
I placed the jack stands under the sides of the subframe crossmember, which should be plenty strong for this. But before placing the stands, you will have to remove the front undertray. This is straightforward; it is only fixed with six 6 mm screws. After this, my jack stands slotted in perfectly between the OEM subframe and the Clio V6-only crossmember.

4. Remove the Rear Undertray:
With the front supported on jack stands, the rear is quite straightforward. You just have to remove the rear undertray before lifting. This is fitted with eight screws. Please note that there is a screw in the center of the undertray.


5. Lift the Rear End:
I lifted the rear end on the rear part of the crossmember. Use a long piece of wood to spread the load, and to protect the crossmember. I used a piece of wood approximately 60 cm long.


6. Final Setup:
Hope this is useful for someone. I feel it is a safe and easy way of getting the car onto jack stands.


