How To Replace Your Starter Motor
I started off using a 3-ton hydraulic jack and two 3-ton axle stands. First, I raised the rear of the car by placing the standard fitment Clio car jack in the correct lifting points, just forward of the rear wheels. I lifted one side at a time, which allowed me to get the car just high enough to access the rear section of the undertray and remove all the bolts. There are 10 x M10 bolts in total – the one you'll likely miss is the one dead center in the middle, in the recess securing point.
Once the undertray was removed, I placed the hydraulic jack under the center of the rear section of the subframe. To avoid stressing the center area, I used a 2ft 6in block of 4x4 wood between the jack lifting point and the rear crossmember of the subframe. This ensured that the weight of the car was supported evenly across the full width of the subframe. I then lifted the rear of the car so the rear wheels were about 9 inches off the ground and placed the axle stands in place on both sides of the car, on a strong area of the subframe.
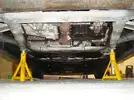
Once the rear was safely in the air, I removed the battery connections.
Next, it was time to drain the oil. If you're reusing the oil (as I am, since it's only done about 1,000 miles), let it drain into a clean container, and then pour it into an oil can or a plastic 5-liter oil drum to ensure it doesn't get contaminated while you work.
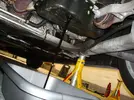
After draining the oil, I removed the oil filter and discarded it. You'll likely damage the filter to some extent when removing it, and considering the cost of a new one, it's not worth saving.
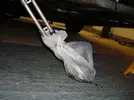
I then removed the Modine Oil Cooler, which is the part the oil filter screws onto. You'll need a 27mm ring spanner/socket to unscrew the protruding fixing that the oil filter attaches to. Once removed, I unscrewed the two metal coolant pipe securing bolts (2 x 10mm) from the rear of the subframe. This allowed me to move the Modine cooler and pipework out of the way to access the starter motor area. I kept the Modine cooler in a plastic bag to prevent it from attracting dust or grit from the garage floor. There was no need to remove any coolant pipes, just leave them connected.
Keep plenty of rags handy, as you'll get oil dripping from the block once the filter and cooler are removed. I also recommend having a tin of Gunk cleaner to deal with any oil spills.
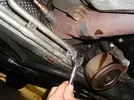
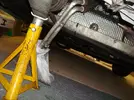
Now, you should be able to see the starter motor.
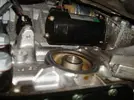
Next, I removed the heat shields around the pre-cat. You'll see that two CO sensors are bolted into the shield. Remove all of the 10mm securing bolts, and the two sections of the shield will loosen. However, you only need to remove the one shown in the final picture because the second one is blocked by a CO sensor that goes through it, preventing removal. Once the two shields are loose, you can move them enough to remove the starter motor shield (secured by 2 x 10mm bolts).
After removing the shields, you'll have just enough access to remove the three starter motor securing bolts. Initially, you might think that the last of the three bolts is blocked by the pre-cat and remaining heat shield, but this isn't a problem. The heat shield can be jiggled around, and with the two top bolts of the starter motor removed, you can maneuver the starter motor to get the last bolt out.
Once the final bolt is out, the starter motor will drop down far enough to access the power cables. To make this easier, remove the securing clamp that holds the power cable to the block. With the clamp out of the way, you can easily remove the cable from the starter motor without skinning your knuckles.
These are the parts and bolts you should have once the starter motor is removed. There’s no need to remove any other parts beyond these and the rear undertray.
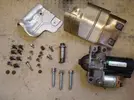
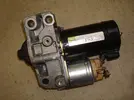
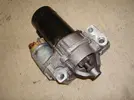
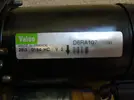
And here’s the culprit after 2 hours of work.
I started off using a 3-ton hydraulic jack and two 3-ton axle stands. First, I raised the rear of the car by placing the standard fitment Clio car jack in the correct lifting points, just forward of the rear wheels. I lifted one side at a time, which allowed me to get the car just high enough to access the rear section of the undertray and remove all the bolts. There are 10 x M10 bolts in total – the one you'll likely miss is the one dead center in the middle, in the recess securing point.
Once the undertray was removed, I placed the hydraulic jack under the center of the rear section of the subframe. To avoid stressing the center area, I used a 2ft 6in block of 4x4 wood between the jack lifting point and the rear crossmember of the subframe. This ensured that the weight of the car was supported evenly across the full width of the subframe. I then lifted the rear of the car so the rear wheels were about 9 inches off the ground and placed the axle stands in place on both sides of the car, on a strong area of the subframe.

Once the rear was safely in the air, I removed the battery connections.
Next, it was time to drain the oil. If you're reusing the oil (as I am, since it's only done about 1,000 miles), let it drain into a clean container, and then pour it into an oil can or a plastic 5-liter oil drum to ensure it doesn't get contaminated while you work.

After draining the oil, I removed the oil filter and discarded it. You'll likely damage the filter to some extent when removing it, and considering the cost of a new one, it's not worth saving.
I then removed the Modine Oil Cooler, which is the part the oil filter screws onto. You'll need a 27mm ring spanner/socket to unscrew the protruding fixing that the oil filter attaches to. Once removed, I unscrewed the two metal coolant pipe securing bolts (2 x 10mm) from the rear of the subframe. This allowed me to move the Modine cooler and pipework out of the way to access the starter motor area. I kept the Modine cooler in a plastic bag to prevent it from attracting dust or grit from the garage floor. There was no need to remove any coolant pipes, just leave them connected.
Keep plenty of rags handy, as you'll get oil dripping from the block once the filter and cooler are removed. I also recommend having a tin of Gunk cleaner to deal with any oil spills.


Now, you should be able to see the starter motor.

Next, I removed the heat shields around the pre-cat. You'll see that two CO sensors are bolted into the shield. Remove all of the 10mm securing bolts, and the two sections of the shield will loosen. However, you only need to remove the one shown in the final picture because the second one is blocked by a CO sensor that goes through it, preventing removal. Once the two shields are loose, you can move them enough to remove the starter motor shield (secured by 2 x 10mm bolts).
After removing the shields, you'll have just enough access to remove the three starter motor securing bolts. Initially, you might think that the last of the three bolts is blocked by the pre-cat and remaining heat shield, but this isn't a problem. The heat shield can be jiggled around, and with the two top bolts of the starter motor removed, you can maneuver the starter motor to get the last bolt out.
Once the final bolt is out, the starter motor will drop down far enough to access the power cables. To make this easier, remove the securing clamp that holds the power cable to the block. With the clamp out of the way, you can easily remove the cable from the starter motor without skinning your knuckles.
These are the parts and bolts you should have once the starter motor is removed. There’s no need to remove any other parts beyond these and the rear undertray.

And here’s the culprit after 2 hours of work.


Last edited:

