Cracked or Rusted Fog Light Replacement
Author: eastlmark
Date: 19/01/2009
Introduction:
Cracked or rusted fog light? It’s an easy change, but being a Vee, it might not be as simple as you think. Here's how I did it on a Mk1.
Step 1:
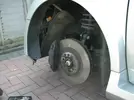
The inner wheel arch liner needs to be removed. While this can be done with the wheel in place, removing the wheel will give you better access. The Vee's wheel removal problems are legendary, but mine came off fine after a good kick to the tyre at the top and bottom. Of course, this is done only after removing the lug bolts, jacking up the car, and placing the front on axle stands.

Step 2:
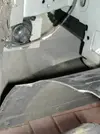
The inner section of the arch liner is secured by 2 torx screws at the top. There is no need to release the bottom of the liner, as it is flexible and will pull down enough for access. However, the torx screw securing the outer part of the liner may need to be loosened, as its thread protrudes enough to stop the inner liner from being removed.

Step 3:
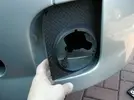
The fog light itself is attached by 2 plastic claws at the top and an 8mm headed screw at the bottom. A 1/4 socket ratchet with an 8mm socket will undo this with no problem. Since the light needs to come out from the front, you also need to release the Phillips screws that secure the black fog light surround. Three of these screws are easy to remove, and the fourth can be left as the light can still be removed with this screw in place.

Step 4:
Swap the lead. The new socket is at a different angle, but it will fit with no problem.
Step 5:
Put everything back together, and you're done!
Author: eastlmark
Date: 19/01/2009
Introduction:
Cracked or rusted fog light? It’s an easy change, but being a Vee, it might not be as simple as you think. Here's how I did it on a Mk1.
Step 1:
The inner wheel arch liner needs to be removed. While this can be done with the wheel in place, removing the wheel will give you better access. The Vee's wheel removal problems are legendary, but mine came off fine after a good kick to the tyre at the top and bottom. Of course, this is done only after removing the lug bolts, jacking up the car, and placing the front on axle stands.

Step 2:
The inner section of the arch liner is secured by 2 torx screws at the top. There is no need to release the bottom of the liner, as it is flexible and will pull down enough for access. However, the torx screw securing the outer part of the liner may need to be loosened, as its thread protrudes enough to stop the inner liner from being removed.

Step 3:
The fog light itself is attached by 2 plastic claws at the top and an 8mm headed screw at the bottom. A 1/4 socket ratchet with an 8mm socket will undo this with no problem. Since the light needs to come out from the front, you also need to release the Phillips screws that secure the black fog light surround. Three of these screws are easy to remove, and the fourth can be left as the light can still be removed with this screw in place.

Step 4:
Swap the lead. The new socket is at a different angle, but it will fit with no problem.
Step 5:
Put everything back together, and you're done!
Last edited:

