There is more to life with TurboRenault.co.uk

Register a free account today to become a member! Once signed in, you'll be able to participate on this site by adding your own topics and posts, as well as connect with other members through your own private inbox!

5 GT Turbo 11 years later silver bullet comes home

Which battery tray option

  • Leave as is with battery tray sections

    Votes: 0 0.0%
  • Fully remove all spot welds and battery tray sections

    Votes: 1 100.0%
  • Leave battery tray in and trim/cut out sections not required to tidy

    Votes: 0 0.0%

  • Total voters
    1
  • Poll closed .
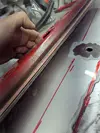
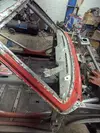
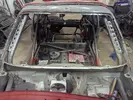
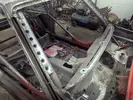
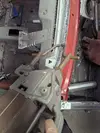
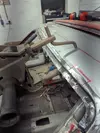
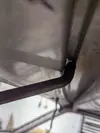
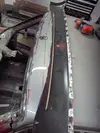
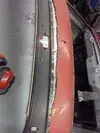
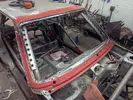
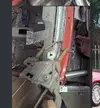
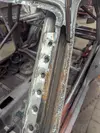
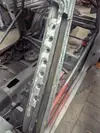
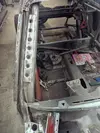
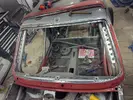
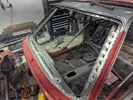
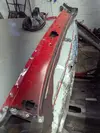
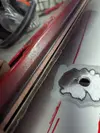
The rear line is above the bonded section as per picks below which potentially gives me some options but am fully exposed

Think spot welder 'might' reach but triple layer, plug weld or use a proper bonding glue?

Or the other lines leaving the good bit in / or not but no access to behind to help spread welds if pulled in too much bla bla bla
PXL_20250316_170027042.webp

PXL_20250316_170037144.webp

PXL_20250316_170040539.webp
 
If the forwards most red line is where you want to cut to rid the rot, and the passenger side is good, as much as I want to say chop, chop, and the likelihood of a roof skin falling on your lap if it goes tits up......I think, in your shoes I'd section it in, split into three, do worse first, IE the bit that's rotted away from the inner......I change my mind like I change my pants and socks on this conundrum.....every week
 
I think it comes down to how confident/competent your are butt welding panel thickness metal without distortion.
I've welded up aerial holes, rebuilt sections of gutter , but never gone that deep into a skin.
End of day proof will be when it goes to topcoat.
 
My brain says keep the cut forward of the bonded section. Maybe use the bottom of the aerial hole as a datum point if you decide to go straight across.

Think it wise to just do the sections as turbell suggested, it’ll give you a feel for the overall repair. If it goes wrong you’ve still got the option to move your cuts back and go again if needed
 
Thanks both, if go all in one or sections the line cut will be a commited cut of the donor part, if nearer the front line no option after.

My main concern it the lack of access to stretch the weld if it does contract too much....mig welds are quite hard at the best of times and would be more grinding flat as I go and no not going to get any dolly behind

Im ok as a non professional at butt welding French tin but this makes my full sill cut weld of silliness seem easy 😅

I typically go with a good 1mm gap and mildly confident one weld at a time cut out if it pulls but my urge is strong to cut the lot off and work it out as I go......

Never got to grips at min power on the welder with 0.8 wire but then never tried 0.6 which might help 🥱 prefer a touch hotter and shorter burts touch more wire speed. But the speed of fail goes up a few levels lol

Hoping work eases this week and we can all have a good laugh at the mess I lake of it 😂
 
Get a hold of a bit of 28mm copper pipe and flatten it out. if you're going to go in sections, clamp or jam it up under the weld area to act as a heat sink and to prevent burn through, First time I tried this, when welding up redundant holes was a revelation, nice flat welds that required minimum dressing. 28mm flat gives a nice thick heat sink.
Have a little practice on some offcuts to dial in settings. may take an evening to set it all up, but will save several evenings, when it gets to final finishing.
 
I'm intrigued to see how this goes, looking at mig welding my roof skin on in a few months. I had the same amount of rust on the pillars, this with having a sunroof, I also made the choice to replace and treat the rest of the gutters etc.
 
So in tonights 90mins of fun 😊

Removed the rest of the cradle....looks the right call 👍
PXL_20250318_201134188.webp
PXL_20250318_201123826.webp

Then finished separating the top section, got some hammer 🔨 and dolly action around the edges before quick flap wheel on any of the spot welds still a bit proud and quick part prep

PXL_20250318_201218212.webpPXL_20250318_201147834.webpPXL_20250318_201158137.webp

With replacement sitting loose got the spot welder out and looks like it will give me the option to use
PXL_20250318_201418158.webpPXL_20250318_201503000.webpPXL_20250318_201414555.webpPXL_20250318_201530498.webpPXL_20250318_201558881.NIGHT.webp

And one step closer to cutting the top out 😚
PXL_20250318_201708224.NIGHT.webpPXL_20250318_201746068.NIGHT.webp

Might just work lol
PXL_20250318_201725295.NIGHT.webp
 
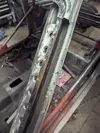
Now another decision as while the spot welder has most of the access needed I still have the holes from the removal to deal with

Make your view be known 🧐

1. Fill holes off the car with some copper backed section, and spot weld onto car
2. Just plug weld directly onto car
3. Spot weld and plug weld also onto car
3. Welding holes and spotting on welds may be problematic. Spot where you can plug where you can't
 
Cheers @Steve Swan yep never seems to join as well through weld, plan if filling holes off the car was to spot weld between on fresh metal lets see 🙈

Also never tried to spot weld with 3 layers.....might be a non starter or level 10 setting 😜
 
Back
Top