There is more to life with TurboRenault.co.uk
You are using an out of date browser. It may not display this or other websites correctly.
You should upgrade or use an alternative browser.
You should upgrade or use an alternative browser.
Will D93
Well-Known Member
19 vents are very 1998. I'd leave it.
Lol. Heard loud and clear, although I think I’m a good bit younger than a lot of you, I do prefer the old skool!
Bonnet vent wont do anything for performance mate, id leave it off
Surely more cold air is no bad thing, I’ve heard people talking about heat soak a lot with these. Can’t be a negative addition, aside from the asthetics maybe.?
Great work on the Welding @Will D93that’s very nearly @Turbell levels is welding dedication on these old rusty 5’s.
Regarding the vent, what’s the final plan for the car? It the rest of it is going to look original, that 1916v vent may look like a boil on its nose, but if there’s other mods planned, then it’s very period for the time so may blend in well?
It really has been much less work than his car haha there is no question about that, but it’s at a standard I’m well happy with.
As far as the look goes, it’s all in my head, but I’m aiming for a dark, kinda mean but understated, bucket seats, no rears, wise track, no side trims, black alloy wheels and plastics.
I dunno I feel the vent might be the boil it needs to tell people it might be a bit of a wolf in sheep’s clothing.
It might not be a sheep at all when it’s done haha
I thought about bad boy the bonnet as well, another flying thought. Problem is really this bonnet is in vgc. Haha
Thanks all for your opinions, much appreciated.
Brigsy
Media Mogul. Instagram legend.
Surely more cold air is no bad thing, I’ve heard people talking about heat soak a lot with these. Can’t be a negative addition, aside from the asthetics maybe.?
Ive ran both vented and non vented bonnets, no difference either way apart from the vented bonnets piss water into the engine bay, straight onto the wiring harness connector in that location. Always look crap too in my opinion.
Will D93
Well-Known Member
Ive ran both vented and non vented bonnets, no difference either way apart from the vented bonnets piss water into the engine bay, straight onto the wiring harness connector in that location. Always look crap too in my opinion.
Other people’s opinions are what I’m after.
Yea I had decided I would move the connector and make sure it could drain anything away if I was to do it.
I think I’ll revisit the thing once it’s more together, get a better idea of the look
Will D93
Well-Known Member
Full day pretty much in the garage today.
Finishing painting wheels, painting steering rack, and the plan was to quickly rub back and paint wishbones, powerflex bushes in and then build up the front end with the struts I got last week.
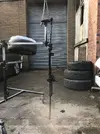
However, I’m not sure what’s going on with the different wishbones I’ve got.
The white ones had the powerflex bushes taken out as they were fitted wrong.
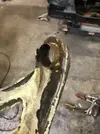
I decided to fit them into the black wishbones because they are in better nick and have new ball joints fitted.
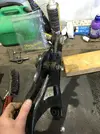
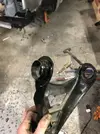
However the black wishbones, once I removed the standard bush they were a different set up to the white ones? They’ve not got the sleeve part. It’s just a cut hole with a 5mm lip. I wonder if the sleeve has been fitted to the white ones but wrong also.
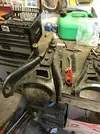
I dunno what was going on tbh. But I decided to troop on and get it done to get the car back on it’s wheels, so decided what I had to do to get those fitted and got some universal steering rack boots to finish that off. Just need new track rods now.
Decided I needed sleeves like were in the white wishbones but I needed it in the right place to fit the bushes in the subframe properly and hold the wishbone.
I removed those from the old bushes, cut them down to 20mm and positioned them in the wishbones where they needed to be. Welded the sleeves in place and a lick of paint.

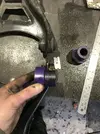
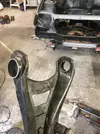
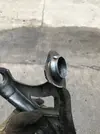
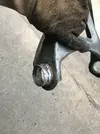

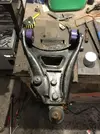
Fitted everything to the car, and with the top mounts and camber bolts the wheel position/camber is looking MUCH better, I need to adjust the steering rack to match the wider track.
Thats what I started with when I first put the 16v bits on,
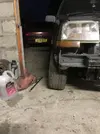
I’m gonna be back down at the unit tomorrow, I’m going to try and look at the rack and it’s length/ set up to get the wheels sitting right. I’ve also got the full set of wheels that are actually going on the car now aswell although on the wrong tyres. But I test fitted one on the rear earlier tonight and it tucks in behind the flared arch pretty nice. So the clio 16v axle is going to work fine but I think I’m going to need a different tyre.
So if I can get it all set and looking good tomorrow happy that I’m not going to have to change anything major the process of rubbing the car down will start for paint.
Feeling good
Cheers
Finishing painting wheels, painting steering rack, and the plan was to quickly rub back and paint wishbones, powerflex bushes in and then build up the front end with the struts I got last week.

However, I’m not sure what’s going on with the different wishbones I’ve got.
The white ones had the powerflex bushes taken out as they were fitted wrong.

I decided to fit them into the black wishbones because they are in better nick and have new ball joints fitted.

However the black wishbones, once I removed the standard bush they were a different set up to the white ones? They’ve not got the sleeve part. It’s just a cut hole with a 5mm lip. I wonder if the sleeve has been fitted to the white ones but wrong also.

I dunno what was going on tbh. But I decided to troop on and get it done to get the car back on it’s wheels, so decided what I had to do to get those fitted and got some universal steering rack boots to finish that off. Just need new track rods now.
Decided I needed sleeves like were in the white wishbones but I needed it in the right place to fit the bushes in the subframe properly and hold the wishbone.
I removed those from the old bushes, cut them down to 20mm and positioned them in the wishbones where they needed to be. Welded the sleeves in place and a lick of paint.


Fitted everything to the car, and with the top mounts and camber bolts the wheel position/camber is looking MUCH better, I need to adjust the steering rack to match the wider track.
Thats what I started with when I first put the 16v bits on,

I’m gonna be back down at the unit tomorrow, I’m going to try and look at the rack and it’s length/ set up to get the wheels sitting right. I’ve also got the full set of wheels that are actually going on the car now aswell although on the wrong tyres. But I test fitted one on the rear earlier tonight and it tucks in behind the flared arch pretty nice. So the clio 16v axle is going to work fine but I think I’m going to need a different tyre.
So if I can get it all set and looking good tomorrow happy that I’m not going to have to change anything major the process of rubbing the car down will start for paint.
Feeling good
Cheers

Norwich Nick
Well-Known Member
Pretty sure the poly bushes come with a weld in sleeve, can’t confirm which way they go though, my memory isn’t what it was but I could recite baby shark with actions if it helps!
Will D93
Well-Known Member
Pretty sure the poly bushes come with a weld in sleeve, can’t confirm which way they go though, my memory isn’t what it was but I could recite baby shark with actions if it helps!
That was pretty much the conclusion I came to, I didn’t bother wasting a half hour on google trying to find out, I decided it should work fine anyway and went for it haha
All fits fine so no drama and no need for the (undoubtedly flawless) rendition of baby shark
Will D93
Well-Known Member
Quick post,
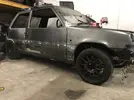
An image giving the closest example of what I’m aiming for, I know it doesn’t look like much, but that’s the track sorted and the wheels on and the rear arches look good etc etc etc etc, so I can move forward.
Quick opinions please,
With the tracking eyeballed to the right area, I’ve got 15mm threaded overlap on track rod and end, do we thing it’s enough?
I think it probs would be fine but I’d like 25mm really.
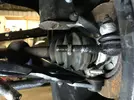
Does anybody know a general rule of thumb? Half the threaded section or similar.
I’m off to rub down paint... see you in a year
An image giving the closest example of what I’m aiming for, I know it doesn’t look like much, but that’s the track sorted and the wheels on and the rear arches look good etc etc etc etc, so I can move forward.

Quick opinions please,
With the tracking eyeballed to the right area, I’ve got 15mm threaded overlap on track rod and end, do we thing it’s enough?
I think it probs would be fine but I’d like 25mm really.

Does anybody know a general rule of thumb? Half the threaded section or similar.
I’m off to rub down paint... see you in a year
As long as you've got the more thread engaged than the diameter of the bolt, it's all good in the hood. (Y)
Will D93
Well-Known Member
Will D93
Well-Known Member
So, long timey no Talkey 
And unfortunately that is because to be honest I’ve done nothing with the 5 for at least a 6 weeks.
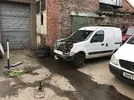
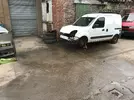
That kangoo van up there got a new (to me) gearbox, new clutch, clio 16v front shocks and springs, new(to me) rear axle, complete rear brake lines, clio 16v rear shocks. I wet sanded it like a savage too then polished it, it’s improved, but is still unquestionably a scabby works van. And it just passed its mot yesterday.
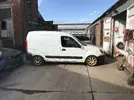
I’ve had the clio on the road for about a month now aswell before that runs out of mot. Needed an exhaust and some other bits I’ll do a wee update on that thread.

Having got the van to a point of readiness, after fixing bits on the clio to use it for the time being I have returned my attention to the 5 over the last 2 weeks just, been a couple days, but I did start sanding the body down like I said I was going to in March.
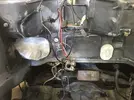
Started with the engine bay, then decided I was going to rub and paint the scuttle area with aerosol so I could stuff the loom in there and mask it off for painting the bay and car. Used some ford space grey I had lying about. Looks fine for something I’ll never see anyway.
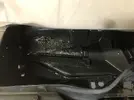
Rubbing down the engine bay as an easy way to get into the swing of it, just small areas one at a time.
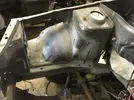
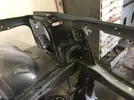
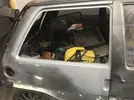
The window sill/area/repair on the rear got a skim and flatten back, it needs another wee skim but I’m hoping to get the car in primer relatively soon, go over it and final flatten back for colour.
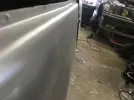
I am not going for professional body shop levels of finish here, I am not that fussed, I want to have a go because I haven’t since I was in college. It’s primary use is going to be getting driven on track I hope.
So after the bay was done I set about sanding the big areas, so the roof has been done, taken back far enough to eliminate the laquer blistering that was going on.
Windscreen surround and wiper area all done, side of car you can see, door stripped and sanded in and out and os door shut
So the ball is rolling.
At the moment I can’t even turn the car around as there is a big BMW estate in the middle of the unit (it’s been there for weeks ) let alone get right around it like I’d like to.
Might move this to the house, push the clio in the corner here when it goes off the road.
My garage is big enough to paint in aswell I’d say.
We’ll see how it pans out, I’m not in work tomorrow, so might get a day on the car.
Cheers
And unfortunately that is because to be honest I’ve done nothing with the 5 for at least a 6 weeks.
That kangoo van up there got a new (to me) gearbox, new clutch, clio 16v front shocks and springs, new(to me) rear axle, complete rear brake lines, clio 16v rear shocks. I wet sanded it like a savage too then polished it, it’s improved, but is still unquestionably a scabby works van. And it just passed its mot yesterday.

I’ve had the clio on the road for about a month now aswell before that runs out of mot. Needed an exhaust and some other bits I’ll do a wee update on that thread.

Having got the van to a point of readiness, after fixing bits on the clio to use it for the time being I have returned my attention to the 5 over the last 2 weeks just, been a couple days, but I did start sanding the body down like I said I was going to in March.
Started with the engine bay, then decided I was going to rub and paint the scuttle area with aerosol so I could stuff the loom in there and mask it off for painting the bay and car. Used some ford space grey I had lying about. Looks fine for something I’ll never see anyway.

Rubbing down the engine bay as an easy way to get into the swing of it, just small areas one at a time.


The window sill/area/repair on the rear got a skim and flatten back, it needs another wee skim but I’m hoping to get the car in primer relatively soon, go over it and final flatten back for colour.


I am not going for professional body shop levels of finish here, I am not that fussed, I want to have a go because I haven’t since I was in college. It’s primary use is going to be getting driven on track I hope.
So after the bay was done I set about sanding the big areas, so the roof has been done, taken back far enough to eliminate the laquer blistering that was going on.
Windscreen surround and wiper area all done, side of car you can see, door stripped and sanded in and out and os door shut
So the ball is rolling.
At the moment I can’t even turn the car around as there is a big BMW estate in the middle of the unit (it’s been there for weeks
Might move this to the house, push the clio in the corner here when it goes off the road.
My garage is big enough to paint in aswell I’d say.
We’ll see how it pans out, I’m not in work tomorrow, so might get a day on the car.
Cheers
Will D93
Well-Known Member
Standard 3 month update ahead,
Sanded down everything I could, but decided I couldn’t be arced painting it myself, so there was time spent sorting out some final things before putting it to paint.
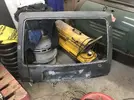
Boot was sorted out as far as required, didn’t do the bottom corner as the boot itself can be replaced, and I just want to build it now,
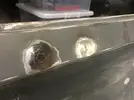

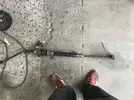
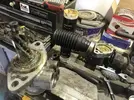
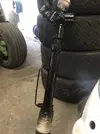
To get decent steering lock and a set up that would work fairly easily, a clio PAS rack was stripped and packed with grease, the R5 manual column shortened slightly to match up with it. Needs a new rubber packer for the mount and some track rod ends, and that should sort that out fine for the time being.
So it got to the point where I needed it painted to be able to go any further really,
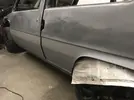
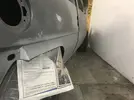
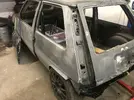
My mate who’s painting the car was given the breif scuff it, skim it, flatten it, and paint it. It is not a show car, it will take a beating.
So armed with that info, and a Renault 608 paint code, we pushed the car 30 ft from my shed to the painters.
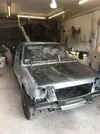
It’ll get painted this week, I’ll try and nab some photos of the process when I’m about.
Once it’s done Its going back up to the house where I’ve got a clean garage ready for it to go into.
Couple of months ago I took a punt at a promotion at work, I’ve been there less than a year so I wasn’t confident I would get it.
But I did, and what it meant was I down sized my tool set up at work
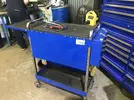
And my garage at the house got a good sized upgrade!
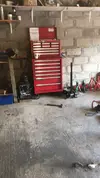
So we are set for the rebuild of the car, next weekend should see it in colour.

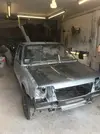
Sanded down everything I could, but decided I couldn’t be arced painting it myself, so there was time spent sorting out some final things before putting it to paint.
Boot was sorted out as far as required, didn’t do the bottom corner as the boot itself can be replaced, and I just want to build it now,


To get decent steering lock and a set up that would work fairly easily, a clio PAS rack was stripped and packed with grease, the R5 manual column shortened slightly to match up with it. Needs a new rubber packer for the mount and some track rod ends, and that should sort that out fine for the time being.


So it got to the point where I needed it painted to be able to go any further really,


My mate who’s painting the car was given the breif scuff it, skim it, flatten it, and paint it. It is not a show car, it will take a beating.
So armed with that info, and a Renault 608 paint code, we pushed the car 30 ft from my shed to the painters.

It’ll get painted this week, I’ll try and nab some photos of the process when I’m about.
Once it’s done Its going back up to the house where I’ve got a clean garage ready for it to go into.
Couple of months ago I took a punt at a promotion at work, I’ve been there less than a year so I wasn’t confident I would get it.
But I did, and what it meant was I down sized my tool set up at work

And my garage at the house got a good sized upgrade!

So we are set for the rebuild of the car, next weekend should see it in colour.


Similar threads
- Featured
- Replies
- 86
- Views
- 2K
- Question
Other ( non boosted Renault )
1994 Renault 5 1.4 campus - shock absorber top plates??
- Replies
- 5
- Views
- 105
- Replies
- 4
- Views
- 367

