There is more to life with TurboRenault.co.uk

Register a free account today to become a member! Once signed in, you'll be able to participate on this site by adding your own topics and posts, as well as connect with other members through your own private inbox!

The Campus Turbo 'in stock' build

so I charged outside today threw the top end of the engine back together and re connected everything. Took about an hour and a half, I was happy with that, super quick and easy to work on.

so after mulling it over last night I decided ignition timing was where I was headed. Went through it front to back, checked base dizzy timing, moved the cam drive a tooth either way just to see. Set it 180’ out to see if that was the problem, it was not.
checked all the leads, crimped, pushed, double triple checked.

i was at the point where I was thinking 4 hours or so and I could strip it down and swap the cam out for the standard item. Rebuild and try again.
not a great thought but I’ve nothing better to be doing at the moment and I want this thing to run!

I got annoyed at that point and went and made a coffee, came back out and sat looking at the car, annoyed. Despite worrying the engine was going to melt the first time I turned the key I was feeling low level confident when I built it, it felt nice and tight, the internals all looked pretty good I thought at the time.
Sitting having a coffee anyway. And it occurred to me that I hadn’t checked lead positions at the dizzy.
It was set up 1342, but it was 1 position out.
I realised this, or decided I thought that was the mistake I had made. Finished my coffee, set the timing 180’ back where I had it before, moved all the leads round one position.

set the camera up for the 26th time against the pot of grease, and this time I was pretty confident it was actually going to work.


You can hear I’m happy with the result haha

side note, three starter motors I have I think must all be Clio 16v ones as they are all identical but still making a hoooor of a noise on initial engagement of the ring gear.

so it goes till it runs out of fuel, at the moment the system primes and pump runs while cranking but I think my easiest solution is just to sack off that whole system and replace with a relay running constant on ignition live, I think that’s what the GTT’s are anyway.

so that’s the plan the morn, I’ll go out and rig up the fuel pump relay to ignition. Get rid of all the spi stuff. Do my 20 min run up and then it’s just buttoning everything up for road miles.

I’m glad I’ve got to this point today without taking the thing to bits again.

cheers,
 
nice work well done. That moment of realisation you've done something silly then followed by it working is a bit of a roller-coaster isnt it lol. I think on my last campus turbo i ran a fresh relay for the fuel pump using a normal 40amp relay i think. I cant remember if i triggered it from permanent ignition feed or from the tacho signal off the aei though
 
nice work well done. That moment of realisation you've done something silly then followed by it working is a bit of a roller-coaster isnt it lol. I think on my last campus turbo i ran a fresh relay for the fuel pump using a normal 40amp relay i think. I cant remember if i triggered it from permanent ignition feed or from the tacho signal off the aei though

absolute whirl wind of excitement mate lol

can you explain to me how that works, I presumed Tacho feed was intermittent/pulsed.?

is that the case but it still works to trigger a relay due to how quick it’s “opening and closing” ? The relay essentially seeing a constant 12v feed?
 
Pretty much as you have written I think. I did read back through my thread but cant find the info on how I did it in the end but it was mentioned doing it from the tacho feed. So using the aei output to the dash to switch the feed to the pump. Worst case it fails you use a switched ignition feed to latch the relay and feed the pump. I'm pretty sure, though it's been a very long time, the gt used a the oil pressure switch and the tacho out put to keep the pump running after the initial prime.
 
So Highs and lows again today as you might expect lol

first off I set about the pump wiring. Yesterday I got it to run so today I wanted to run it up and through a heat cycle.

spent half an hour faffing about trying to think about how to make the existing stuff do
the job but in the end I just sacked the lot off

99375E0D-AA5E-4DAA-8BE5-01B55665ED4B.webp

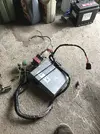
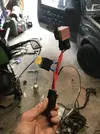
the multi plug where that set up plugs in had all the wires I needed so I cut that waste stuff up and used the plug and a relay, put a fuse in there and tried it out, works fine, but looks really pikey as I only have red insulating tape around. 🤷🏼‍♂️

8E6D653C-BE95-445A-B705-9D3802DDA9F6.webp

so pump now runs on ignition 👍🏼
Quite a nice solution in the end, tidy enough for me.

so the engine fired up and ran, kept running now fuels sorted. Bit of an air lock in the head since having it off, meant I had to stop the engine somewhere around the 10mins mark.

tried to get some more water where it was needed
And went to fire it up again, starter motor wasn’t playing ball again so I took that out and fixed that properly this time (dowell in the wrong place)

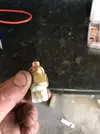
fired it up and the coolant system seems to have bled up okay this time, fan was kicking in and out but I think I cooked the temp sensor on the first go, it was working but now isn’t. I was watching temp via the multimeter.

899A086F-4C56-4185-8323-40026CDDD78A.webp

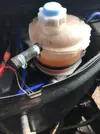
the colour confirms circulation.. 😂
(there’s 5l of type d coming)

so end of the day I’m feeling pretty good about it, starts up pretty easily over all much better now the motors in the right place.

glad I saw that in time, needs re routed.
2B94CDAD-D990-4A40-B4D9-E8811ED6823D.webp

Next bit is now to do the remaining jobs before MOT.. there’s a list, but nothing huge. The last thing on that list, is re seal the sump again because after a run it’s begun leaking again. I’m going to replace the half moon seals this time with new ones.

F57248F1-7622-44D3-AAAB-BE3B9B7913B0.webp

well there’s always tomorrow eh

cheers,
 
Wee update from the past few days. This existence is very surreal isn’t it.?

had yesterday off as nothing I was waiting for turned up and i just couldn’t be bothered, I’ve been out in the garage every day pretty much since this lockdown started.

so after last update there was a list of things needing done I started going through them on Wednesday. Kicked off decided to finish piping the brakes there was brake fluid on route somewhere in the postal service.

started at the front and positioned the two bias valves for the rear brakes, normally from what I gather these go straight into the master but that wouldn’t work 1. Because it’s a 2 port master and 2. Because there’s not enough space.

F361B6EC-8834-4DEF-A1BC-87ECAE3D29FF.webp
A5C97E6E-DC2E-4561-9359-DE944E517E96.webp
Tried to mushroom the end of one steel pipe, on my back, under the car, unenthusiastic about the job as it was, and thought fuck this! Ended up replacing the front to back lines as well as piping the rear axle as I had planned.
The steel ones weren’t in that good shape anyway the only reason I’d fitted them was to avoid having to replace them round the tank and exhaust etc.
but I had the line there to do it so went for it.

95A840C6-4C4E-44A2-866E-815EE91187CA.webpEC006330-9589-4543-9908-8392E0419835.webpBB3D8ED3-9932-44B7-AC4D-D81C72AAA136.webp
bext up painted the lips on the top of the wings as they had been missed when painted, painted the front end of them on the inside also where it’s seen in the bay.
64C397B5-59D9-4D8F-AA49-60EF0287411B.webpC9E7763E-34EE-4286-81BC-79E86FA97393.webp
Soldiering the dash connections was the next thing, but it was a farce. So I’ve crimped the lot.
judge me if you must..

E822C890-9AAA-49E6-946C-EE5FDF82B3E9.webp

once the wings had dried up I decided to assemble the front end for some inspiration and motivation

73C57D4C-F178-4FFD-9E28-56A597A5BAF0.webp0E33419C-284A-45E5-8E8F-06043539C43A.webp135CA77A-389E-4BEC-990D-DB787EE28CE8.webp

fitted the arb bushes,
Painted the battery clamp,
Fitted the headlight resistor
Fitted the vin plate
No plates.
horn (but it’s dead, so just the bracket now hah)
No plate lights,
Wings/indicator looms.
Fitted the front arch liners

72CC39E2-1405-4830-8023-7A0FBB5E5C01.webp

today I set about 2 main things, bleeding the brakes and removing and resealing the sump for a second time. Which was a ball ache, but did feel pretty positive with new seals, so that should be sound with any luck.

bleeding the brakes was fine, they are all doing something but the cap on my pressure bleeder is broken so I think a whip round with one of those would improve them slightly. But no leaks apart from one,

EA1351CF-7AE7-4034-A703-CC205B5B66B3.webp

coming from where the plastic pipe goes into the 90’ fitting, it’s in a shite place that. So I’ve got a bit bodgey on it with some superglue and I’ll see if that does it. I hope so lol

Fitted handbrake cables, had to shorten the adjuster mechanism to work with these cables but seems to be working with ease.

1BFEFAD7-54E7-4FC6-88B4-9D571619F52E.webp

finally today I spun the OS driveshaft round 180’ so in could get the roll pin fitted.
Spanner checked both hubs, steering, suspension, put the bolts in for the NS driveshaft boot and filled it up

03157CBB-3802-4753-A1B1-D2900F1D7E46.webp

I’m waiting on some box section coming to raise up the seat position, need to rebuild the dashboard, fill the engine with oil!!

oh and I ordered a skinnier set of tyres that should turn up early next week and give me a bit of needed clearence!

thanks for reading, cheers
 
Refilling gearboxes is a lot easier with a pump, you can get a hand pump off ebay for under a tenner. But the single port one you can unscrew the back from, fill the cylinder, pop the top back on and depress the plunger (sucking the oil into it doest work its too think). Then just squizz it out with a tube on the end into the box.
 
Refilling gearboxes is a lot easier with a pump, you can get a hand pump off ebay for under a tenner. But the single port one you can unscrew the back from, fill the cylinder, pop the top back on and depress the plunger (sucking the oil into it doest work its too think). Then just squizz it out with a tube on the end into the box.

I could do with a hand pump, as well as some syringes. and some decent funnels! With gauze!

Looking good mate, good work on the first start. 👍

thanks a lot, very close to MOT ready now
 
Fitted a set of finest wuhan 400’s to gain arch clearance. I will change these for real tyres once it’s been run a bit and working

B8CB6E9C-B0E0-4ADF-AA13-6ED22BB115B2.webp

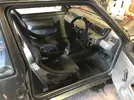
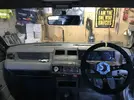
mounted the seats properly raising them up on a bit of box section, they are fixed, no sliders or anything but position is good for me. i might swap the steering wheel for something slightly shallower.

I also fitted mounted the boost guage in the dash, mounted the choke lever as the speed clips I was waiting for turned up.
fitted a new temp sensor which sorted out the dash reading. And allowed me to fit the clocks, and all the other dashboard plastics.

4AA1B887-41EB-4BBB-AAA0-9F922AB1D7B4.webp

So, the car does start and run, but it struggled with idling, it was dropping off and coming back like a post throttle air leak. Mixture screw wasnt doing what I thought it should be.?
I hadn’t fitted the nylon carb spacer for bonnet clearance so I thought that might be having an effect.
So I fitted a new idle mix screw, fitted that spacer, checked all the pipes etc in the carb area and changed how I had the vac lines to turbo/aei set up slightly and added cable ties to all the vac. pipes. Those things seem to have had an effect on it and is idling steadier than it was before, bearing in mind it’s got the cam fitted I think it’s not bad.

I managed to pick the boot lock after spending an hour trying to turn it the wrong (logical) way..
that meant I could refit the boot struts and latch mechanism. It also meant the car was sealed watertight properly.

38C684C1-05B2-437E-AAC9-1A1F8604FDBA.webp

ever since it’s been painted it’s just been sat getting dusty, id refrained from washing it mainly because of the boot not being sealed.
But today with me having run out of things to do pretty much today it was time for a wash.

straight in with the jet wash rinse down, two rounds of foam and rinsed, and round it with a hot sponge and bucket.
95022C2E-D2F5-4A8D-8FF4-2565ADB4AD8F.webp

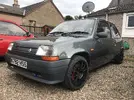
into the garage and over every panel with g3 compound, it looks great already, I’ll go round it tomorrow with poor boys black hole and it’ll be like brand new I’d say.

19FBA91E-EDB9-453F-A4B8-D19961B877F0.webp

Hoovered out the inside and the seats, polished up all the glass, gave the dash a proper wipe down.

24434B46-52C7-494C-8395-BA1AE903B32F.webp
EB150D79-3F8A-4DBC-9B09-29A8F98EECAA.webp

lastly i fitted new wiper blades and put the arms back on.

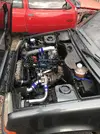
I have ordered some AN fittings to make up an oil feed line, that’s the only thing that I’m slightly worried about on a road test. The engine bay is hot, and it’s rubber. So I’ve got properline coming.

to do list is small now:
Replace duff bulbs
Make new oil line
polish panels
Rainex windscreen

Find and fit a horn!! I can’t forget that, failed last mot I put in on a horn because i forgot to check it, nothing but a corroded terminal!

ill get it polished up tomorrow and try and take some photos in the sun 🌞

cheers,
 
Polished up, lights checked and fixed as required,

I need to faf about with the idle mixture again, you can see in the following video the revs came up without me doing anything. but it’s small potatoes really at this point! Need a horn and hopefully the -4 fittings will turn up tomorrow, once that’s sorted I’ll insure it and take it for a hurl to bed the rings in.

after speaking to brigsy a bit it might be that I have to enlarge the idle jet slightly just to get it to idle consistently with this cam.

starts extremely easy both hot and cold which is good. Minor issues are all that’s left, but I’m not that bothered about those it needs a good shake down.


Paint looks good,
C5CC11BA-8832-40FD-A7D5-F6F973582820.webp

coolant looks wank,
B6B017F3-4046-4A13-A9B2-2B8D92D79BFA.webp

Cheers,
 
Back
Top