Thanks for thinking of me Mr LFB, but I've already got a copy 
There is more to life with TurboRenault.co.uk
You are using an out of date browser. It may not display this or other websites correctly.
You should upgrade or use an alternative browser.
You should upgrade or use an alternative browser.
Renault 11 Turbo Phase 2 Restoration
- Thread starter Big Steve - Raider
- Start date
This car will outlast us all. In 5000 years when mankind has destroyed itself, an alien race will land on this planet and the only evidence of civilisation will be a solitary Renault 11 Turbo sat atop a hill, refusing to give in to the elements.....with Steve's skeleton at the wheel.
Correction: ....... With Steve's skeleton slumped over the engine as he was obviously puzzled why the bloody thing broke down after he'd spent all that time and effort restoring it!

Haz
Well-Known Member
Looking good Steve, first time I've seen the thread and looks like you've really gone to town on it. A few things I was going to comment on but will wait until your at those stages so will just go with where you are at, stonechip.
Do it yourself, if you have a compressor now. Get upol gravitex and a gun, comes in black, white or grey but get white. 4-5 bottles will be plenty for the underside and arches. Mask up everywhere you don't want it, it spits far. You can get various finishes depending on air pressure, distance and drying time between coats, but cover the entire floor plan. Feel free to give me a shout if you go down that route
Do it yourself, if you have a compressor now. Get upol gravitex and a gun, comes in black, white or grey but get white. 4-5 bottles will be plenty for the underside and arches. Mask up everywhere you don't want it, it spits far. You can get various finishes depending on air pressure, distance and drying time between coats, but cover the entire floor plan. Feel free to give me a shout if you go down that route
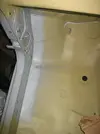
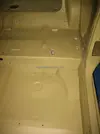
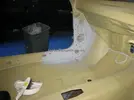
Again it's the weekend, and I had a few hours in the garage this morning continuing with the Seam Sealing..
I'm also not taking too many pictures at this point as there's only so many times you can look at little lines of Polyurethane, but it's fair to say I'm doing a lot more than I'm show you here.
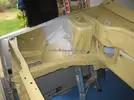
My technique is certainly improving now as well. I don't bother with the masking process like I did when I started. I'm now just lashing on a bead, and if it's neat then great - Like this one:
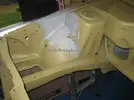
Or if it starts to get a little raggy, I go over it with a finger dipped in some thinners, and it soon smooths it off - Like this one:
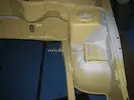
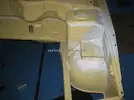
When It's under all the primers & paint I figure you won't see much difference.
It's not going to be long now before I'm done so am starting to think about the under-seal. Thanks for your top tips everyone @Haz & @NRG
Thanks for reading
:determined:
I'm deliberately taking my time with this process as it's untrue just HOW MUCH there is to do, and I don't want to get sick to death of it all!! So a few hours at a time then when I start to get cold and fed up I give it a rest. (The winter weather doesn't help this process)I'm also not taking too many pictures at this point as there's only so many times you can look at little lines of Polyurethane, but it's fair to say I'm doing a lot more than I'm show you here.
My technique is certainly improving now as well. I don't bother with the masking process like I did when I started. I'm now just lashing on a bead, and if it's neat then great - Like this one:


Or if it starts to get a little raggy, I go over it with a finger dipped in some thinners, and it soon smooths it off - Like this one:


When It's under all the primers & paint I figure you won't see much difference.
It's not going to be long now before I'm done so am starting to think about the under-seal. Thanks for your top tips everyone @Haz & @NRG
Thanks for reading
.... saves me writing it AGAIN!Again it's the weekend, and I had a few hours in the garage this morning continuing with the Seam Sealing..
It's funny how every time I finish a session (of seam sealing), I think there can't be much more to do!! But then the next time I go out there to continue working I find a HEAP more of areas that I missed the last time...
:choker:
So the battle continued today and I took a few more pictures for your perusal: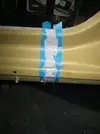
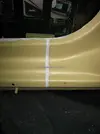

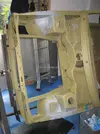
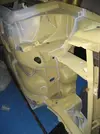
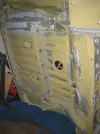
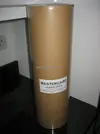
Given the slow progress of the work on the car, I thought I would buy a few of the things I will need for the next steps. First was a big roll of Masking Paper:
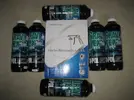
Then thanks to the suggestions from @malcolm @NRG and @Haz, I've purchased a few bottles of the Gravitex Plus (in white) and the spraying nozzle thingy:
Haz
Well-Known Member
It's relaxing Andy lol. It's good to show how much effort/time actually goes into a resto.
One thing though Steve, some joins like your last pic aren't be sealed in from factory. What you've done is prob better but just a small detail if your wanting it original looking. Your progress will be overtaking my 11 soon
One thing though Steve, some joins like your last pic aren't be sealed in from factory. What you've done is prob better but just a small detail if your wanting it original looking. Your progress will be overtaking my 11 soon
It's relaxing Andy lol. It's good to show how much effort/time actually goes into a resto.
One thing though Steve, some joins like your last pic aren't be sealed in from factory. What you've done is prob better but just a small detail if your wanting it original looking. Your progress will be overtaking my 11 soon
What Haz is trying to say @Big Steve - Raider is it will be virtually worthless when done.
Ill take it off your hands.
Ok Andy, let me know when you want to collect. 

DaveL485
Staff member
Absolutely. In fact, every time Steve updates with more sealing activity I can feel mine melting away a 'lil bit moreThat sealing job would destroy my soul.
Not really much of an update so to speak (been too busy visiting Family & Friends during recent weekends) but I went crazy with the latest Aldi offer on an air compressor and accessories, so I will be able to spray the bits & pieces I want to:

I've got plans to have a go at the small pieces of welding required soon, so will update you all on how that goes....

I've got plans to have a go at the small pieces of welding required soon, so will update you all on how that goes....

Chris Smith
Well-Known Member
Steve, do you require a heat lamp/paint curer ..
Got any pictures @Chris Smith?Steve, do you require a heat lamp/paint curer ..
Similar threads
- Featured
- Replies
- 76
- Views
- 2K
- Replies
- 4
- Views
- 345
- Replies
- 6
- Views
- 264
- Replies
- 2
- Views
- 259

