There is more to life with TurboRenault.co.uk
You are using an out of date browser. It may not display this or other websites correctly.
You should upgrade or use an alternative browser.
You should upgrade or use an alternative browser.
Renault 11 Turbo Phase 2 Restoration
- Thread starter Big Steve - Raider
- Start date
maplewingnut
New Member
Looking good Steve!
I've been doing some research on the old interweb (little Gas Monkey Garage reference  ) about what products to use on the car and found out that a Monthly Classic Car Magazine have done a 3 year test on anti-rust paint (and cavity wax) and the results are now in!
I managed to download a copy of the report to share with you as it makes for interesting reading, as one of the products that I've always been a fan of and actually used on my Raider (POR-15) came LAST in the test!! :
:
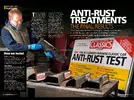
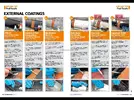
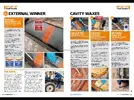
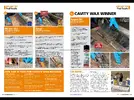
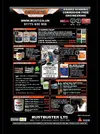
You can see that the winner of the test for the external coating was RustBuster Epoxy Mastic 121 and is one of the products sold in the UK on the RUSTBUSTER website.
I read the information on the website and realised that they're not a million miles away from Peterborough (in Spalding) so again I thought I would have a ride over there and have a chat with the guy face to face:
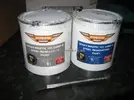
I ended up walking away with a Chassis Pack of the Epoxy 121 in Aluminium Colour to hopefully match in with the final Silver colour the car will be painted in:
So now I've got the stuff to make a start on the underside of the car, I had half a day in the garage today and got stuck in! As I'd mentioned before I found a few bits that were a bit scabby following the sheep dip:
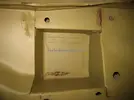
Ian (the guy at RustBuster) recommended that I used a wire brush to remove the loose paint and rust from the scabby areas, then over paint them directly with the Epoxy 121. He also recommended to paint all the seams and metal edges in the Epoxy 121 BEFORE I seam sealed them to ensure that there was no rust allowed to grow under the seam sealer.
I decided to split the car down into smaller sections to work on, rather than tackling it all in one fell swoop, so this was today's section to work on:
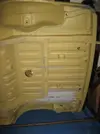
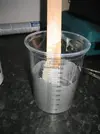
I used a selection of wire wheels in a drill to clean up all the area's and also had to scrape a few points with a screwdriver. The Epoxy 121 comes in 2 parts, and you have to mix them 1:1. I bought myself a load of mixing cups and small disposable brushes to make this job easier. I mixed just 120ml (60ml of both parts) of the 121 to take my first steps with this product:
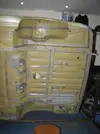
The 121 went on quite well. It came with some thinners, but I didn't feel the need to thin it down. Here you can see I painted all of the seams & scabby bits I'd rubbed down. The plan is to then clean and paint the other sections of the underside of the car with the 121, and then I'm looking to spray the whole lot for the final finish.
Thanks for reading
 ) about what products to use on the car and found out that a Monthly Classic Car Magazine have done a 3 year test on anti-rust paint (and cavity wax) and the results are now in!
I managed to download a copy of the report to share with you as it makes for interesting reading, as one of the products that I've always been a fan of and actually used on my Raider (POR-15) came LAST in the test!!


You can see that the winner of the test for the external coating was RustBuster Epoxy Mastic 121 and is one of the products sold in the UK on the RUSTBUSTER website.
I read the information on the website and realised that they're not a million miles away from Peterborough (in Spalding) so again I thought I would have a ride over there and have a chat with the guy face to face:

I ended up walking away with a Chassis Pack of the Epoxy 121 in Aluminium Colour to hopefully match in with the final Silver colour the car will be painted in:

So now I've got the stuff to make a start on the underside of the car, I had half a day in the garage today and got stuck in! As I'd mentioned before I found a few bits that were a bit scabby following the sheep dip:

Ian (the guy at RustBuster) recommended that I used a wire brush to remove the loose paint and rust from the scabby areas, then over paint them directly with the Epoxy 121. He also recommended to paint all the seams and metal edges in the Epoxy 121 BEFORE I seam sealed them to ensure that there was no rust allowed to grow under the seam sealer.
I decided to split the car down into smaller sections to work on, rather than tackling it all in one fell swoop, so this was today's section to work on:

I used a selection of wire wheels in a drill to clean up all the area's and also had to scrape a few points with a screwdriver. The Epoxy 121 comes in 2 parts, and you have to mix them 1:1. I bought myself a load of mixing cups and small disposable brushes to make this job easier. I mixed just 120ml (60ml of both parts) of the 121 to take my first steps with this product:

The 121 went on quite well. It came with some thinners, but I didn't feel the need to thin it down. Here you can see I painted all of the seams & scabby bits I'd rubbed down. The plan is to then clean and paint the other sections of the underside of the car with the 121, and then I'm looking to spray the whole lot for the final finish.

Thanks for reading
maplewingnut
New Member
Well done Watson. I wonder what it was that gave me away?Thanks @maplewingnut or should I say Neil, just deciphered your user-name
mattk
Well-Known Member
This looks fantastic @Big Steve - Raider. It'll be good to think, that you've done a proper job from the very beginning, and helping to preserve the integrity of the shell for many years to come  nice one.
 nice one.
Martin Christensen
New Member
That Car Rotisserie you have ther, is that a home made one or "store bought"?
Last edited:
Hi @Martin Christensen, I got the Rotisserie from the guy who welded up the car. He made it himself.That Car Rotisserie you have ther, is that a home made one or "store bought"?
I was originally thinking of buying one from THESE GUYS as they look quite good.
DaveL485
Staff member
Wow, for that money I wouldn't even bother building one myself! Good find Mr Steve!Hi @Martin Christensen, I got the Rotisserie from the guy who welded up the car. He made it himself.
I was originally thinking of buying one from THESE GUYS as they look quite good.
rockets1971
New Member
Awesome rebuild.... Can't wait to see the final results

Had a morning in the garage today and carried on with the preparation of the underside of the car working on the Centre section this time:
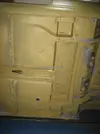
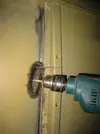
I also took a few photo's to show you the process. As mentioned in my previous post, the team at RUSTBUSTER recommend to concentrate on all the joints and edges of the panels. First step is to give any grotty looking areas a good going over with the wire wheel to remove the surface rust and clean the area up:
Then I'm over painting with the 2 pack Epoxy Mastic 121 (in Aluminium Colour) I'm trying to get the paint into the box sections as much as possible, to help with the rust prevention in the future:
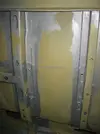
I completed the centre section, and then because I had a bit of paint left, I also made a start on the front section:
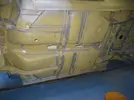
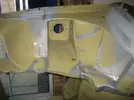
I then made a start on the seam sealer. I've read various internet forums advising on what is the best procedure to use and decided for neatness I'd go with the masking tape option. As the name suggest, first you have to mask either side of the joints you wish to seal, so you can get that neat edge:
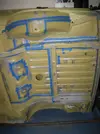
I've took a few photo's of the process in the rear nearside arch so you can see how it goes on:
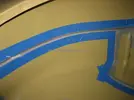
With the aid of a caulking gun (as I'm using Polyurethane seam sealer, although you could do the same process with the paint on underseal) the first step is to fill the void you want to seal:
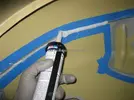
To ensure that the sealer is fully pushed into the seam, it is recommended to run over the seal with a paint stick:
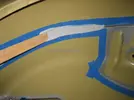
The next step is to try & remove the masking tape, without getting it all over either you or the rest of the car.... not easy!
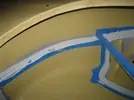
You're then left with a rather proud edge from the masking tape, so you then gently smooth the edge with your finger, after you dip it in some thinners (to stop the sealer from sticking to your fingers) giving you the final finish:
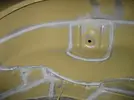
So after doing that for most of the seams I'd masked I realised I had half of the Seam sealer was left in the tube, and as It's Polyurethane it's curing as the air is getting to it, so rather than waste it, I decided to fill any of the other seams I could see.
Because I hadn't masked all of the other seams, I had to do it free-hand, and actually found that you could get results that look just as neat as with the masking tape, as long as you are careful, and give the edge of the sealant a good smooth down with your finger and a dab of thinners :
:
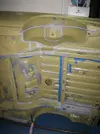
It looks a little bit of a mess at the moment, but I'm sure when it's all nicely over painted it will look a lot better
Thanks for reading

I also took a few photo's to show you the process. As mentioned in my previous post, the team at RUSTBUSTER recommend to concentrate on all the joints and edges of the panels. First step is to give any grotty looking areas a good going over with the wire wheel to remove the surface rust and clean the area up:

Then I'm over painting with the 2 pack Epoxy Mastic 121 (in Aluminium Colour) I'm trying to get the paint into the box sections as much as possible, to help with the rust prevention in the future:

I completed the centre section, and then because I had a bit of paint left, I also made a start on the front section:


I then made a start on the seam sealer. I've read various internet forums advising on what is the best procedure to use and decided for neatness I'd go with the masking tape option. As the name suggest, first you have to mask either side of the joints you wish to seal, so you can get that neat edge:

I've took a few photo's of the process in the rear nearside arch so you can see how it goes on:

With the aid of a caulking gun (as I'm using Polyurethane seam sealer, although you could do the same process with the paint on underseal) the first step is to fill the void you want to seal:

To ensure that the sealer is fully pushed into the seam, it is recommended to run over the seal with a paint stick:

The next step is to try & remove the masking tape, without getting it all over either you or the rest of the car.... not easy!

You're then left with a rather proud edge from the masking tape, so you then gently smooth the edge with your finger, after you dip it in some thinners (to stop the sealer from sticking to your fingers) giving you the final finish:

So after doing that for most of the seams I'd masked I realised I had half of the Seam sealer was left in the tube, and as It's Polyurethane it's curing as the air is getting to it, so rather than waste it, I decided to fill any of the other seams I could see.
Because I hadn't masked all of the other seams, I had to do it free-hand, and actually found that you could get results that look just as neat as with the masking tape, as long as you are careful, and give the edge of the sealant a good smooth down with your finger and a dab of thinners

It looks a little bit of a mess at the moment, but I'm sure when it's all nicely over painted it will look a lot better
Thanks for reading
Thanks @Jimmy 5, yeah it should be a winner alright mate, but my heart's always going to belong to the RaiderStandard of this 11 is amazing - its going to put your Raider to shame.

So when this is done I have a Renault 9 that you could take on OK?

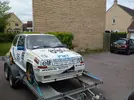
Anyway, from what I read, you're busy beavering away on your 9. You'd better get a project thread up!
Last edited:
j_carter
Well-Known Member
Absolutely fantastic! Best and most in depth resto i personally have ever seen. Im actually quite amazed and genuinely think with the love you are building this car with it will be better than when it came off the production line. Well done and keep the standard up for the rest of the build.
Similar threads
- Featured
- Replies
- 86
- Views
- 2K
- Replies
- 4
- Views
- 367
- Replies
- 6
- Views
- 271
- Replies
- 2
- Views
- 269


