There is more to life with TurboRenault.co.uk

Register a free account today to become a member! Once signed in, you'll be able to participate on this site by adding your own topics and posts, as well as connect with other members through your own private inbox!

Renault 11 Turbo Phase 2 Restoration

WELDING - 1 : STEVE - 2 (Steve Wins!)

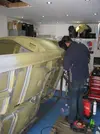
Had a day in the garage yesterday with my Best Man Jez to have a lash at the welding required on the 11, as it's holding me up doing any more work at the moment! :) It's the first time we've done any welding since we were both apprentices in the early 90's, so I wanted someone there for morale support! :grin.gif:

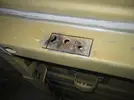
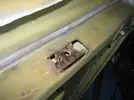
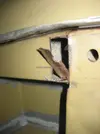
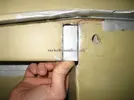
There were 3 parts that required attention, first was a hole in the rear chassis rail:
IMG_4188.webp
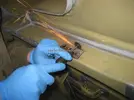
We used a fine "Dremel" style grinder for the fine sections:
IMG_4190.webp
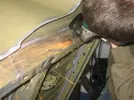
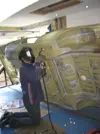
Then a larger grinder for the main cuttin:
IMG_4192.webp
IMG_4195.webp
Out she comes!! The inside of the Box Section looked pretty clean. I will be covering all this with a Dinitrol/Waxoil type product (not confirmed which one yet):
IMG_4196.webp
Gave the surfaces a little tickle up with a grinding wheel to remove the paint from where we needed to weld. (Yes they're safety glasses, not just some ones I got from a Madness gig :grin.gif: They're actually special ones for boatyards so you don't get dazzled from the light on the water... well that's what my mate said who I got them off, who works with boats!)
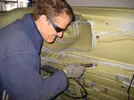
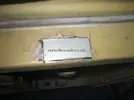
IMG_4200.webp
Made a little winning plate for the gap:
IMG_4201.webp
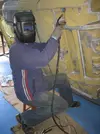
Then started the WELDING!! :aggressive.gif:
IMG_4203.webp
Not going to win any prizes, but not bad for a first effort:
IMG_4204.webp
IMG_4208.webp
Feeling pretty confident, after that success, we moved onto the next piece, just ahead of the rear axle mounting:
IMG_4211.webp
IMG_4216.webp
IMG_4218.webp
IMG_4219.webp
You now see how useful the little stool is @Mart :grin.gif:
IMG_4221.webp
IMG_4220.webp
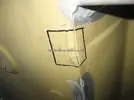
So this was where everything was going right, and Steve was in the lead with 2 point, and the welding trailing behind with 0. Next part was a piece of very thin steel in the floorpan that had become pitted, so I wanted to repair it. Again the offending piece was marked for removal:
IMG_4224.webp
Then removed:
IMG_4226.webp
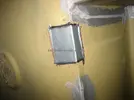
And then a new piece nicely shaped to fit:
IMG_4228.webp
This was exactly the point where it all went to sh1te!!! :ireful2.gif::ireful2.gif::ireful2.gif::ireful2.gif::ireful2.gif: The welder was blowing holes in the metal like crazy... even with me trying to spot weld it..I got thoroughly p1ssed off, and decided to call it a day :negative.gif:

Will go back to it another day... and cut a LARGER patch to start with!!

Thanks for reading :)
 
What thickness wire are you using Steve? If it's .8 drop to .6 and drop your current, use max gas as well and let the gas flow for a second before you start the wire feed. Your trigger should be staged to bring the gas in first.
I found .8 is absolutely impossible to get a decent weld and just blows holes through panel thickness like that. It's still not very easy with .6 tbh but do-able.
Yeah it's the 0.6mm wire Dave, and I'm using Argon shield.

Think as @Brigsy has recommended, I'm going to splash out on a proper hobby bottle, not used those Janky Machine Mart ones which don't have more than a fart inside :grin.gif:
 
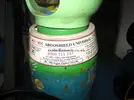
So, after losing a point... and my rag... the previous weekend, I decided to try again with the welding on the underside of the 11 Turbo last weekend. I figured that one of the things not helping me was the crappy small gas bottles running out so soon, so after a chat with my local BOC dealer, I came home with this bad boy:
IMG_4245.webp
IMG_4244.webp
So now it was definitely a case of all the gear... and no idea.. :punish.gif:I also bought myself a couple of better cutting and grinding discs. So first it was a case of again cutting out the HORROR that was left from before, and making the appropriate patch:
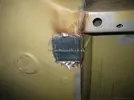
IMG_4240.webp
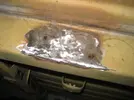
Again it was a case of carefully welding, and then grinding it back... This time we had more success :grin.gif:IMG_4246.webp
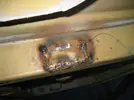
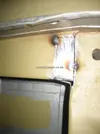
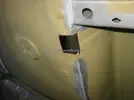
But again the welder was blowing holes in the steel like hell, even with the new fancy gas, and the only way we could figure our to stop it was to hold a small piece of the steel on the inside of the car, to give the welder something to go at. Problem is.... I'm now left with this on the inside of the car:
IMG_4253.webp
AND I'M NOT HAPPY ABOUT THIS!!!! :ireful2.gif::negative.gif::stop.gif: So I'm still scratching my head about what do to next..... to clear it up on the inside. Suggestions welcome :)

Thanks for reading :)
 
Also backing the steel you're welding with copper can help when welding steel. It stops the weld pool dropping out (hole) but the weld wont bond with the copper. Hold a copper block behind it or clamp a flattened bit of copper pipe behind it IYSWIM.

Just buzz it off. If you're having to offer some support use copper as it doesn't weld. Get a bit of 22mm copper pipe and hammer it flat. Same process as what you've done ;)

Maybe if someone else tells him he'll pay attention Haz lol
 
Back
Top