There is more to life with TurboRenault.co.uk

Register a free account today to become a member! Once signed in, you'll be able to participate on this site by adding your own topics and posts, as well as connect with other members through your own private inbox!

Renault 11 Turbo Phase 2 Restoration

Are you sending the sheep-dippers a rolling shell or a shell shell?

I see they collect, are you delivering or are they collecting?
 
Are you sending the sheep-dippers a rolling shell or a shell shell?
I see they collect, are you delivering or are they collecting?

I'm doing a lot of thinking about it at the moment LFB.

The dippers want a completely stripped shell, so I have a trailer hire booked for next weekend, and propose to winch the shell onto the trailer with both axles (for ease of moving it around by myself) and then when I get there, whip the front & Rear axles off and leave them with the basic shell and bring the axles home with me. I'm wondering now exactly how easy that is going to be though....? o_O If I had a handy rugby team or @Brigsy :grin.gif: living next door, it would be very easy for me to just lift the bodyshell on and off the trailer both ends easy as pie :( but I think my little sausage isn't going to be able to muscle up half of the shell....? The last R11 Bodyshell I stripped wasn't too heavy when you got everything off it, and it's easy enough to lift half off the floor but I think you'd need at least 4 to lift it comfortably onto a trailer.

Yes they do a delivery/collection service, but again when they collect, they only want a stripped shell to take away, so would load the shell onto one of their dolly's and then pull it into the back of their truck so again I would have the situation where two people would be trying to move the shell...

:confused:
 
I think i'd invest in some car-skateboards. You can jack one end up and drop it on then do the other end and roll it about like a shopping trolley. You can do either option then, just make sure you strap it to the trolley bases so they dont slip when going over ridges and bumps.
 
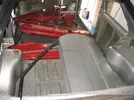
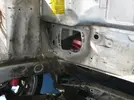
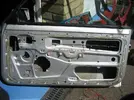
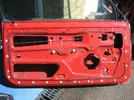
Stripped the final few bits off the car over the weekend ready for "The Dip" and also decided the best two doors and rear hatch to send with it. Stripped all them down to the bare bones also. Was in two minds about sending the doors to the strippers, but thought if I was sending the shell, I should also find out if there is anything that needs doing to the doors whilst at it?!
IMG_3803.webp IMG_3800.webp IMG_3794.webp IMG_3793.webp IMG_3791.webp IMG_3777.webp IMG_3766.webp IMG_3762.webp
Thanks to a tip off from @Kris M I've also sourced a replica set of Dealer Number plates, Tax Disk Holder (not that there will be a lot of use for this soon..) and rear window sticker, from the original supplying dealer of the car. I didn't really look at the handbook too much when I bought the car, but in the creation of these I found that I have all of the original documentation and the car was supplied and lived on the Isle of Man for many years! :cool:
8-)
6.webp
Thanks for reading! :)
 
Good idea sending the doors and boot. Get any hidden surface rust killed and protected fully by the e coat in the hard to reach areas.

Could make a wooden frame with wheels "borrowed" from an industrial wheelie bin to transport it , put the wood under and jack it up to the height desired, axel stands, do the other end, brace and add wheels?
 
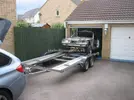
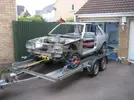
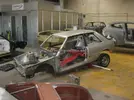
Today was the day to take the car to the sheep dippers, and thanks to a loan of a most excellent trailer from @Pigsnake (Thanks very much Luke! :friends.gif:) the job was a lot easier that I thought it was going to be! Thankfully the trailer had a winch so I could just gradually pull the car up the ramps whilst I made small adjustments to the wheel direction (no steering gear fitted):
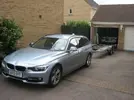
IMG_3814.webp
IMG_3815.webp

IMG_3821.webp
Got up at 6:00am this morning so I could drive to Tamworth whilst the roads were nice & quiet. No problems with the journey. :)
IMG_3826.webp
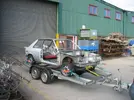
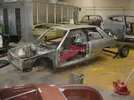
When I got there they helped me unload the car from the trailer, again the winch was a real boon here. They then left me to dismantle the Front Sub-frame Assembly and Rear Axles so they were left with just the shell. Again thanks to a bit of planning and taking the right kit (2 big feck off lumps of wood, and a trolley jack) the sub-frame and axle removal was a breeze:
IMG_3828.webp
IMG_3831.webp
IMG_3832.webp
IMG_3839.webp
IMG_3844.webp

I then loaded the Sub-frame and Axle back onto the trailer for the journey home. They did ask if I wanted to get them stripped as well whilst I was getting the car done, but I thought that the Rubber Bushes in the rear axle would get dissolved away in the Acid Dip, so that's probably not wise as getting new ones isn't so easy, so decided to just bring them home for separate refurbishment:
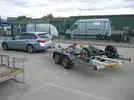
IMG_3840.webp
Whilst I was there I took a few pictures of the other cars that were in for treatment in different stages. Fiesta Rally Cars (About 4/5) to get all the sound deadening removed to save weight. Here you can see just the paint has been removed:
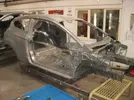
IMG_3830.webp
2 x Mercedes Benz Pagoda Cabriolet's after the treatment with their etch primer:
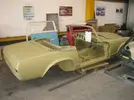
IMG_3829.webp
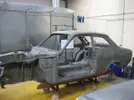
Mk1 Escort shell after stripping:

IMG_3849.webp
VW Transporter, again after Stripping:
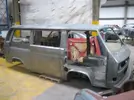
IMG_3850.webp
E-Type Jag, awaiting the process to begin:
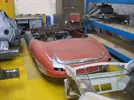
IMG_3848.webp
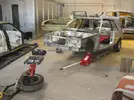
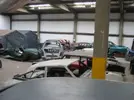
And then I just took a picture of the other cars in the warehouse to give you a taste of the cars they have. I think the old 11 is in safe hands! :grin.gif:
IMG_3851.webp
They originally quoted me 3 weeks to perform the strip, but as you can see they're pretty busy at the moment, so suspect It might take a little longer?? I'm not too bothered if it takes a bit longer though, I'm in no rush to get the body back.
Now I have room in my garage, I plan to pull together all of the bits from both the Silver and Red 11 Turbo's I've had and choose the best parts to refurbish/restore as required.
Thanks for reading! :)
 
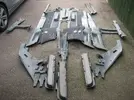
Had a few hours in the garage yesterday and started sort through the piles of parts from the Red and Silver 11 and then new one's I've bought. First I went through all of the Interior plastics to see what I had:
IMG_3860.webp
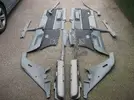
I then picked out the best parts I had:
IMG_3864.webp
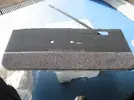
I also then found a brand new OE Passenger door panel I bought a few years ago which should look nice when the car's complete:
IMG_3872.webp
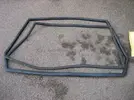
I have also managed to source a brand new OE rear window seal and new pattern front window seal, but don't think the front window seal looks correct:
IMG_3858.webp
I then started tackling the main parts and have decided to pile them up into different groups like Cooling, Electrical, Interior, Air.. etc to help the matching up the parts I have so I can select the best ones:
IMG_3875.webp
Thanks for reading :)
 
Back
Top