There is more to life with TurboRenault.co.uk
You are using an out of date browser. It may not display this or other websites correctly.
You should upgrade or use an alternative browser.
You should upgrade or use an alternative browser.
Renault 11 Turbo Phase 2 Restoration
- Thread starter Big Steve - Raider
- Start date
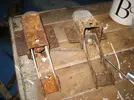
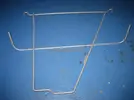
Had a couple of hours in the Garage on Saturday continuing to go through the piles of parts I have and picking out the best ones. Sometimes is hard to decide which one is the best one when they both look totally knackered, get a load of the two spare wheel brackets I have..  :
:
So I was planning on replacing the complete front suspension set up with a R19 16v Set Up (like I have done with the rear axle), but I spent a few minutes comparing the two subframes I have at the weekend I noticed there were indeed more differences than the first glance. (Apologies I didn't have my camera with me at the time, so cannot show you the differences; I will do in the future).Therefore I decided to stick with the original R11 Subframe, but where the heck am I going to get another one of those in a hurry...? Well thankfully the one I took off the Red 11 Turbo I broke some time ago, although looking rusty, was still sound, and I thought It could be brought back to life:
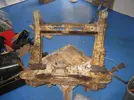
There bottom is all very straight, and doesn't look as though it's been through the whole pikey Kwik Fit Jacking process, so just the job for my car. Just the matter of it's current condition....
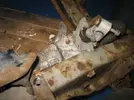
So after a little bit of homework today I've decided to give it a bit of a birthday and have dropped it off at a Blasters to get all of the old paint/rust/detritus off. My plan is then to get it Galvanized to protect against the future corrosion; and then powder-coated on-top to give it the nice finish/shine I'm looking for with this car.. I should be getting it back from the blasters this Friday, so will post an update for you all to show you the progress. Note the colour of the subframe isn't the usual Black of the R5, but a rather interesting Grey/Silver? I believe this to be the correct colour for the item as the original subframe from the Silver 11 is Grey as well. This is something I plan to keep during the restoration, and add to as I think It will go well with the Silver paintwork of the rest of the car .
.
I've had a few more eBay purchases of late, and last week took a gamble on a brand new Renault Servo for £30, that the seller didn't know what car it was for. I read on a R19 Forum, that one of the common upgrades for the R19 16V is to replace the servo with a Kangoo one for a better brake feel..
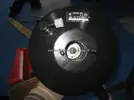
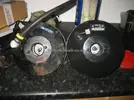
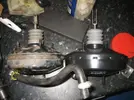
The brakes on this car have always been pretty even though I repaired/replaced a lot of the stuff prior to the rebuild to improve them but it never achieved the required result, so I promised myself that I would do everything I could to improve them during the re-build! When I compared this new servo to one of my Original R11 units you can see there are some small differences:


So I was planning on replacing the complete front suspension set up with a R19 16v Set Up (like I have done with the rear axle), but I spent a few minutes comparing the two subframes I have at the weekend I noticed there were indeed more differences than the first glance. (Apologies I didn't have my camera with me at the time, so cannot show you the differences; I will do in the future).Therefore I decided to stick with the original R11 Subframe, but where the heck am I going to get another one of those in a hurry...? Well thankfully the one I took off the Red 11 Turbo I broke some time ago, although looking rusty, was still sound, and I thought It could be brought back to life:

There bottom is all very straight, and doesn't look as though it's been through the whole pikey Kwik Fit Jacking process, so just the job for my car. Just the matter of it's current condition....

So after a little bit of homework today I've decided to give it a bit of a birthday and have dropped it off at a Blasters to get all of the old paint/rust/detritus off. My plan is then to get it Galvanized to protect against the future corrosion; and then powder-coated on-top to give it the nice finish/shine I'm looking for with this car.. I should be getting it back from the blasters this Friday, so will post an update for you all to show you the progress. Note the colour of the subframe isn't the usual Black of the R5, but a rather interesting Grey/Silver? I believe this to be the correct colour for the item as the original subframe from the Silver 11 is Grey as well. This is something I plan to keep during the restoration, and add to as I think It will go well with the Silver paintwork of the rest of the car
I've had a few more eBay purchases of late, and last week took a gamble on a brand new Renault Servo for £30, that the seller didn't know what car it was for. I read on a R19 Forum, that one of the common upgrades for the R19 16V is to replace the servo with a Kangoo one for a better brake feel..

The brakes on this car have always been pretty


- The new servo is 20mm bigger in Diameter (I hope it fits the space on the bulkhead, can't check until I get the car back from the Dippers)
- The actuation fork is a lot longer, with no adjustment (I think an accurate drilling will sort this)
- They both appear to be the same depth (Good!)
- The 4 fixing bolts on the inner face are more closely spaced (Again I think an accurate re-drilling of the mounting bracket will fix this)
- What Impact will fitting a new larger Servo to the OE 19.1mm Master Cylinder have?
- What Impact will fitting this new larger servo AND a 20.1mm Master Cylinder (OE Supply to the R19 16v, don't forget I've fitted larger R19 16v Brake Disks and calipers to the car)
- What would you try??

- Can anyone tell me how a Servo Works?? When I measure where the actuator rod is in relation to the actuator in the Master Cylinder, It appears they're something like 20mm apart...?
DaveL485
Staff member
Very little impact. The smaller master with bigger calipers will have slightly more pedal travel as you need to push it further to shift the equivalent fluid but i'd wager it would barely be noticeable on OE single piston calipers.der have?
- What Impact will fitting this new larger servo AND a 20.1mm Master Cylinder (OE Supply to the R19 16v, don't forget I've fitted larger R19 16v Brake Disks and calipers to the car)
- What would you try??
- Can anyone tell me how a Servo Works?? When I measure where the actuator rod is in relation to the actuator in the Master Cylinder, It appears they're something like 20mm apart...?
I'd fit the new servo with the 20.1mm master, and in fact I may well do so when I resto my 9! (Ta for the tip!)
A Servo assist is setup used to reduce the amount of pedal pressure required by leveraging an available resource (ie vacuum from the Manifold) against the master. Essentially it sucks your pedal down. Save me typing it out this kindly interweb fellow explains nicely:
DaveL485
Staff member
To expand on the above, this is why you have a one-way valve on your 5GTT in the line to the Servo. It only allows vacuum effect to pass to the servo. Pressure in there would be bad!
On a 21Turbo, though, we don't have a Servo at all. We have a hydraulic pump with an accumulator. The pump maintains the pressure in the accumulator between 1850 and 2100psi (enough to puncture your skin with brake fluid!) and uses this as it's assist resource and on top of that it uses it for it's ABS control....so when it sees a lock event at a wheel, a solenoid fires inside the Master cylinder and basically uses the stored energy from the accumulator to reverse the braking force for that wheel for an instant...which results in the wheel lock event stopping (this cycle repeats several times a second and is why when ABS fires you hear and feel it through the pedal).
On a 21Turbo, though, we don't have a Servo at all. We have a hydraulic pump with an accumulator. The pump maintains the pressure in the accumulator between 1850 and 2100psi (enough to puncture your skin with brake fluid!) and uses this as it's assist resource and on top of that it uses it for it's ABS control....so when it sees a lock event at a wheel, a solenoid fires inside the Master cylinder and basically uses the stored energy from the accumulator to reverse the braking force for that wheel for an instant...which results in the wheel lock event stopping (this cycle repeats several times a second and is why when ABS fires you hear and feel it through the pedal).
the stool I like it
Quick update for you..
1) Had a picture today showing that the Subframe and spare wheel cages have been through the Galvanizing dip and came out looking lovely...
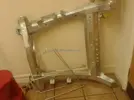
It certainly looks a lot better than it did...
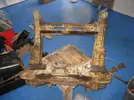
The plan is now to get this powder coated silver/grey to match the original colour/bodywork of the car..
2) Enviro-strip still haven't processed the bodyshell after having it 6 weeks now and I'm getting a little bit annoyed as they quoted 3 weeks. Problem is I've quite a few weekends planned from now & until Christmas so won't have many opportunities to pick it up. New plan is to pick it up on Saturday 11th October... on pain of death!!
1) Had a picture today showing that the Subframe and spare wheel cages have been through the Galvanizing dip and came out looking lovely...


It certainly looks a lot better than it did...

The plan is now to get this powder coated silver/grey to match the original colour/bodywork of the car..
2) Enviro-strip still haven't processed the bodyshell after having it 6 weeks now
 and I'm getting a little bit annoyed as they quoted 3 weeks. Problem is I've quite a few weekends planned from now & until Christmas so won't have many opportunities to pick it up. New plan is to pick it up on Saturday 11th October... on pain of death!!
jimmyturbo
Active Member
Great build story,always had a soft spot for the 11.
Yeah I was wondering the same, but I don't believe mine is a special case?? Going to have a little chat with them on Monday.Considering their FB feed shows a steady process of work Steve i'm surprised it's not done....or is it cos you got a "deal" that they haven't done it in turn?
DaveL485
Staff member
Special? No. More like....Basket!I don't believe mine is a special case??
As the car still hadn't been through the sheep dip  I decided to crack on with the Engine and strip it down ready for it's rebuild. I'm going to try not to split the engine this time as it just runs like a little dream so want to leave it well alone. I still want it to look minty clean and fresh though so have a few plans
First I took the gearbox and clutch & flywheel off so I could get it onto the engine stand:
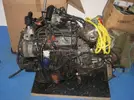
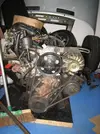
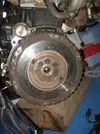
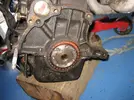
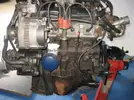
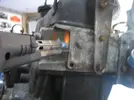
I then started to take off all of the periphery brackets and everything was going well but then the bolts holding the blanking head blanking plate felt a little too tight, so rather than break the bolt, I applied a little bit of Deep Heat to the offending bold and head and they soon gave up their fight!
As it was a nice sunny day today at Thomson Towers I thought it would be a good time to give the block a quick degrease and jet-wash. So after a liberal application of de-greaser, the old Jet Washer came out with a vengeance!
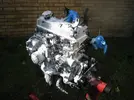
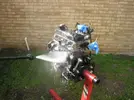
The block looked a lot better for having a quick clean up:
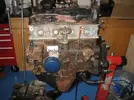
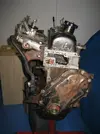
I'm pleased with how it came out but it shows I'll be in need of a new Sump, as the rust has got to this one in a BIG way
Thanks for reading
 I decided to crack on with the Engine and strip it down ready for it's rebuild. I'm going to try not to split the engine this time as it just runs like a little dream so want to leave it well alone. I still want it to look minty clean and fresh though so have a few plans
First I took the gearbox and clutch & flywheel off so I could get it onto the engine stand:


I then started to take off all of the periphery brackets and everything was going well but then the bolts holding the blanking head blanking plate felt a little too tight, so rather than break the bolt, I applied a little bit of Deep Heat to the offending bold and head and they soon gave up their fight!

As it was a nice sunny day today at Thomson Towers I thought it would be a good time to give the block a quick degrease and jet-wash. So after a liberal application of de-greaser, the old Jet Washer came out with a vengeance!


The block looked a lot better for having a quick clean up:


I'm pleased with how it came out but it shows I'll be in need of a new Sump, as the rust has got to this one in a BIG way
Thanks for reading
TNT Andy
Well-Known Member
Looking good Steve - I don't know how you get time for this, but so glad you do and document it.
Top job for not splitting it, there's nothing sweeter than a silky smooth C1J, Apart from a tappetty cammed C1J that is.
What's the plan for getting all the old paint and crud off buddy.
Top job for not splitting it, there's nothing sweeter than a silky smooth C1J, Apart from a tappetty cammed C1J that is.
What's the plan for getting all the old paint and crud off buddy.
What's the plan for getting all the old paint and crud off buddy.
Think I'm going to go at it with a selection of wire brushes and flap wheels to try & smooth/clean it all up then Primer, then paint
TNT Andy
Well-Known Member
Good ol elbow grease and big chinny gurning then! Now that needs photo-documenting.Think I'm going to go at it with a selection of wire brushes and flap wheels to try & smooth/clean it all up then Primer, then paint
Picked up the parts from my local blaster/powder-coater today and pleased with the results!  After the subframe and spare wheel hanger had been galvanised, the silver powdercoat looks great and hopefully the dreaded rust shouldn't make an appearance anytime soon..
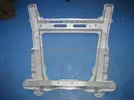
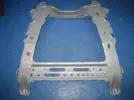
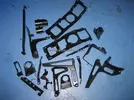
I also dropped off a load of parts I wanted blasting only, and they've come back power-coated black
I was thinking of making many parts on the car silver to contrast the body colour.... but it looks like that idea has been taken out of my hands now... which I think was probably for the best, too much Silver might look too much.
Thanks for looking
 After the subframe and spare wheel hanger had been galvanised, the silver powdercoat looks great and hopefully the dreaded rust shouldn't make an appearance anytime soon..


I also dropped off a load of parts I wanted blasting only, and they've come back power-coated black


I was thinking of making many parts on the car silver to contrast the body colour.... but it looks like that idea has been taken out of my hands now... which I think was probably for the best, too much Silver might look too much.
Thanks for looking
Similar threads
- Featured
- Replies
- 86
- Views
- 2K
- Replies
- 4
- Views
- 367
- Replies
- 6
- Views
- 271
- Replies
- 2
- Views
- 269
