There is more to life with TurboRenault.co.uk
You are using an out of date browser. It may not display this or other websites correctly.
You should upgrade or use an alternative browser.
You should upgrade or use an alternative browser.
Clio Clio 197 with forged Megane r26 engine
- Thread starter stephenvenning
- Start date
stephenvenning
Well-Known Member
UPDATE:
Not a huge amount of work this week, just the bits that Ive been putting off
First of was the passenger side drive shaft. When I was stripping the engine out I slipped with the crow bar while levering out the driveshafts and split the inner rubber boot. I then searched for a genuine gaitor and could only find the outer ones and a new one from renault was £65, screw that for a bit of rubber. Anyway I decided to buy these universal boots that stretch a lot more so you can slide them over the CV joint easily. Well it all went very well, and hopefully Ive just saved myself a bit of money. If it fails then Ill replace the shaft, wont be very hard as everything shouldn't be seized that time round as I use copper slip on everything!
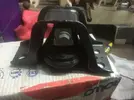
In order for the megane engine to fit you have to use the Clio's cam cover and associated engine mounts, but i couldnt leave these in the state they were in considering there at the top of the engine. I took them to work and shot blast them so they were to base metal. I then etch primed them making sure to mask of all the rubber bushes, after 2 hours I followed my usual procedure of hitting it with 3 coats of colour coat and then 2 coats of lacquer as I dont want it super glossy looking. Ive done the Cam cover and upper arm link in the same black as my clio and then the other engine mount and plate in the gun metal colour that the rest of the engine is painted in. It looks OEM but with a different look.
The scuttle panel area is always a settling point for dirt and grime and mine was disgusting, 8 years of rotting leaves and dirt however I didnt want to use the jet washer as it will drench out the garage and already cleaned engine bay that has exposed wiring. I opted for a £20 steam washer from argos and it worked a treat! I agitated it first with a detailing brush and Auto glym quick detailer and left it to dwell for 5 minutes. I then went in with the steam cleaner and it got most of the ingressed dirt out, I repeated this process until I was happy, now its all sparkly and ready for the fresh engine to go in
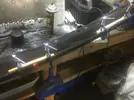
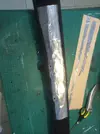
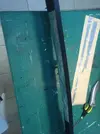
While I was cleaning out the scuttle panel i removed all the trim from around that area. One thing that has always bugged me with the engine bay is the heat resistant material sagging around the scuttle panel. While this trim piece was out I might as well rectify it. I used some EVO stick spray glue and drenched behind the heat resistant material with it. Then using some G clamps and some bits of wood I clamped it down and left it for an hour, now it doesn't sag. I didnt stop there though, as the turbo will be sitting right below this trim I decided to give it a bit more heat protection. By using the zircoflex heat shield material I cut out a strip and stuck it down onto the trim piece and cut off the excess with a sharp knife. Ill get some rubber edging from work to neaten it up a bit this week.
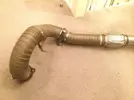
The link pipe was then wrapped with the same DEI titanium wrap the downpipe is wrapped with, a V band clamp was also tacked onto the end.
This week I hope to re-route the brake booster vacuum line as to the meganes brake servo is the other side to the clio's it has to be made longer. I also fit the heat shielding to the engine bay and make final prep for the engine to go in. I also still need to time up the engine
BEFORE:
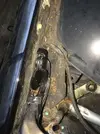
AFTER:
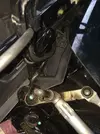

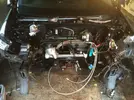
Other pictures:
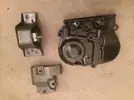
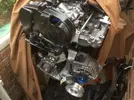
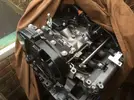
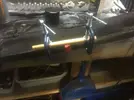
Thanks
Not a huge amount of work this week, just the bits that Ive been putting off
First of was the passenger side drive shaft. When I was stripping the engine out I slipped with the crow bar while levering out the driveshafts and split the inner rubber boot. I then searched for a genuine gaitor and could only find the outer ones and a new one from renault was £65, screw that for a bit of rubber. Anyway I decided to buy these universal boots that stretch a lot more so you can slide them over the CV joint easily. Well it all went very well, and hopefully Ive just saved myself a bit of money. If it fails then Ill replace the shaft, wont be very hard as everything shouldn't be seized that time round as I use copper slip on everything!
In order for the megane engine to fit you have to use the Clio's cam cover and associated engine mounts, but i couldnt leave these in the state they were in considering there at the top of the engine. I took them to work and shot blast them so they were to base metal. I then etch primed them making sure to mask of all the rubber bushes, after 2 hours I followed my usual procedure of hitting it with 3 coats of colour coat and then 2 coats of lacquer as I dont want it super glossy looking. Ive done the Cam cover and upper arm link in the same black as my clio and then the other engine mount and plate in the gun metal colour that the rest of the engine is painted in. It looks OEM but with a different look.
The scuttle panel area is always a settling point for dirt and grime and mine was disgusting, 8 years of rotting leaves and dirt
While I was cleaning out the scuttle panel i removed all the trim from around that area. One thing that has always bugged me with the engine bay is the heat resistant material sagging around the scuttle panel. While this trim piece was out I might as well rectify it. I used some EVO stick spray glue and drenched behind the heat resistant material with it. Then using some G clamps and some bits of wood I clamped it down and left it for an hour, now it doesn't sag. I didnt stop there though, as the turbo will be sitting right below this trim I decided to give it a bit more heat protection. By using the zircoflex heat shield material I cut out a strip and stuck it down onto the trim piece and cut off the excess with a sharp knife. Ill get some rubber edging from work to neaten it up a bit this week.
The link pipe was then wrapped with the same DEI titanium wrap the downpipe is wrapped with, a V band clamp was also tacked onto the end.
This week I hope to re-route the brake booster vacuum line as to the meganes brake servo is the other side to the clio's it has to be made longer. I also fit the heat shielding to the engine bay and make final prep for the engine to go in. I also still need to time up the engine
BEFORE:

AFTER:


Other pictures:


Thanks
DaveL485
Staff member
Handy aren't they! I have a funny cone thing for fitting them too, you oil it up and slide it on. It's kinda funny!universal boots that stretch
stephenvenning
Well-Known Member
UPDATE:
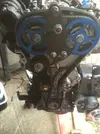
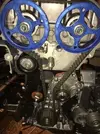
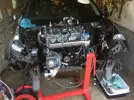
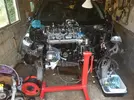
This week not a lot has been done mostly because of waiting for the last bits to arrive and being so busy with uni work and working 10 hour days all week. Anyway this weekend I managed to time up the engine finally! I rented some genuine Renault timing tools and began timing it yesterday, I first found TDC on piston 1, I installed the crank pin into the designated slot, I then checked this with a DTI gauge to increase precision and reduce the chances of power being lost through the timing being out. The cam locking tool was then installed to allign the slots in the end of the cam shafts. The belt was then installed and the Cam pulleys locked into position and the pulley nuts torqued to 30 N/m, the tensioner was rotated clockwise with an allen key until the marks lined up, the tensioner was then torqued to 8 N/m. All the locking tools were then removed and the engine turned over for 2 revolutions, the tools were then installed again to check everything still lined up. The blanking rubber seals were then installed.
This week Ill hopefully get the vacuum lines re-routed and I should finish a custom braided fuel vapour venting line to use up the line of the fuel line that I brought. The heat-shielding can then go on.
The plan is to get the engine in by next weekend, then I can concentrate on the suspension again and then get it finished.
Thanks
This week not a lot has been done mostly because of waiting for the last bits to arrive and being so busy with uni work and working 10 hour days all week. Anyway this weekend I managed to time up the engine finally! I rented some genuine Renault timing tools and began timing it yesterday, I first found TDC on piston 1, I installed the crank pin into the designated slot, I then checked this with a DTI gauge to increase precision and reduce the chances of power being lost through the timing being out. The cam locking tool was then installed to allign the slots in the end of the cam shafts. The belt was then installed and the Cam pulleys locked into position and the pulley nuts torqued to 30 N/m, the tensioner was rotated clockwise with an allen key until the marks lined up, the tensioner was then torqued to 8 N/m. All the locking tools were then removed and the engine turned over for 2 revolutions, the tools were then installed again to check everything still lined up. The blanking rubber seals were then installed.
This week Ill hopefully get the vacuum lines re-routed and I should finish a custom braided fuel vapour venting line to use up the line of the fuel line that I brought. The heat-shielding can then go on.
The plan is to get the engine in by next weekend, then I can concentrate on the suspension again and then get it finished.


Thanks
stephenvenning
Well-Known Member
UPDATE:
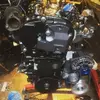
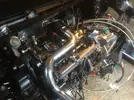
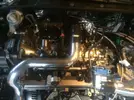
This week was a big week with the with the project/conversion, the engine is finally in!!
Anyway, on Friday I picked up all my bolts from zinc plating like Ive done with all the engine and gearbox bolts, makes a big difference in the appearance of the engine bay. I also set about that evening re-routing my brake booster line and vapour line. I'm routing the brake booster line around the engine bay using the old AC pipe brackets/clamps to keep it neat and tidy. The vapour line ive made out of some spare braided line and fittings to make it look more in keeping with the engine bay (Im a sucker for for braided lines )
)
Saturday I installed some heat shielding to protect the fuel lines and bulkhead from the increased heat of the turbo, it looks however Ill need some more to protect the re-routed brake booster hose. It looks okay, a bit messy in places but im useless with stuff like that, you should see my present wrapping skills
With that sorted attention went to getting the engine ready, all there was left to do was put on a new aux belt and fit the flywheel/clutch and gearbox. Aux belt was easy to do, 5min job with the right tools. However the clutch was a bit trickier, first thing was the fact there was no clutch aligning tool supplied with the clutch, I had to make an aluminium one out of a bit of scrap bar. With that sorted the flywheel was fitted and torqued to 30Nm + 60 degree's, the clutch was then bolted on using the aligning tool. The clutch plate was torqued down to 30Nm and blue loctite was used. Now the tricky bit, especially when there was only me. The starter motor was bolted to the gearbox and then the box was offered up to the engine, jesus gearboxes are heavy all bolted up and the engine was ready to go in. Anti seize was used on all the bolts. The loom was also now connected.
Now the even trickier bit, with the hoist I carefully positioned the engine and gearbox in the bay, the exhaust link section was then put through the exhaust tunnel and then bolted to the downpipe flange. After this the engine was wiggled into position and the engine mounts tightened up. The gearbox mount plate will need to be removed in the week to be painted as i forgot to last week and today it was too late to do so.
Anyway the pictures:
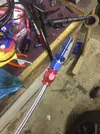
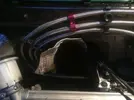
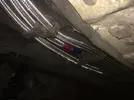
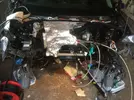
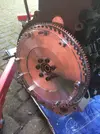
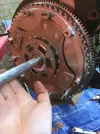
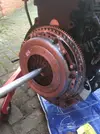
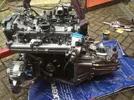
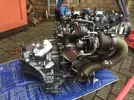
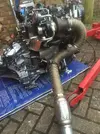
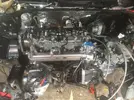
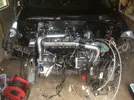
Thanks
This week was a big week with the with the project/conversion, the engine is finally in!!
Anyway, on Friday I picked up all my bolts from zinc plating like Ive done with all the engine and gearbox bolts, makes a big difference in the appearance of the engine bay. I also set about that evening re-routing my brake booster line and vapour line. I'm routing the brake booster line around the engine bay using the old AC pipe brackets/clamps to keep it neat and tidy. The vapour line ive made out of some spare braided line and fittings to make it look more in keeping with the engine bay (Im a sucker for for braided lines
Saturday I installed some heat shielding to protect the fuel lines and bulkhead from the increased heat of the turbo, it looks however Ill need some more to protect the re-routed brake booster hose. It looks okay, a bit messy in places but im useless with stuff like that, you should see my present wrapping skills
With that sorted attention went to getting the engine ready, all there was left to do was put on a new aux belt and fit the flywheel/clutch and gearbox. Aux belt was easy to do, 5min job with the right tools. However the clutch was a bit trickier, first thing was the fact there was no clutch aligning tool supplied with the clutch, I had to make an aluminium one out of a bit of scrap bar. With that sorted the flywheel was fitted and torqued to 30Nm + 60 degree's, the clutch was then bolted on using the aligning tool. The clutch plate was torqued down to 30Nm and blue loctite was used. Now the tricky bit, especially when there was only me. The starter motor was bolted to the gearbox and then the box was offered up to the engine, jesus gearboxes are heavy
Now the even trickier bit, with the hoist I carefully positioned the engine and gearbox in the bay, the exhaust link section was then put through the exhaust tunnel and then bolted to the downpipe flange. After this the engine was wiggled into position and the engine mounts tightened up. The gearbox mount plate will need to be removed in the week to be painted as i forgot to last week and today it was too late to do so.
Anyway the pictures:


Thanks
stephenvenning
Well-Known Member
UPDATE:
Sorry for not posting last Sunday, I have been really busy, I have however mad some time in a few evenings and this weekend to put time aside to concentrate on the car.
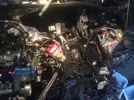
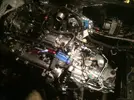
First thing that needed to be sorted was the wiring and to plug all the sensors, coilpacks, injectors etc in, thanks to Steve at SC autos who made me a custom loom, everything lines up and makes it very easy to plug everything in correctly. There were however a few alterations to be made, first off was the fact i was using the newer style lambda sensors used on the clio 197 but not on the early megane 225's which is what my engine is from, this means the plugs were different. To solve this issue I bought some Tyco 4 pin plugs and rewired the lambda sensor and loom to match, hopefully Ive got it right and they work another change was the fact that the clio 197 vacuum line sensor is located on the left of the engine bay and most conversions keep it in this position. I on the other hand have located it where the megane has its sensor to save making more custom vacuum lines, because of this I had to extend the loom to compensate, I have run the extension under the inlet manifold along with the brake booster vacuum line that Ive made to further compensate for the brake servo being on the opposite side to the meganes.
With the loom 90% installed I turned my attention to running the coolant pipes, the pipes were cleaned thoroughly and flushed out. One thing that needed doing here was modifying the heat matrix inlet as it is larger on a meganes. This was done by slipping a section of silicon hose over the barb fitting/inlet, then i could fit the meganes coolant pipe over the top and clamp it down, it shouldn't leak, if it does Ill have to think of another solution. Another problem that i ran into was because im using the clio gearbox when you secure down the secondary coolant pump it hits on the gear linkage and you cant get it into 2nd, 4th and 6th, I have therefore secured it in a higher position to clear the linkage, most people dont have this problem as they use the megane box. The battery tray could now be installed and luckily it hides most of the wiring and coolant pipes, it all looks rather neat
Today Ive cleaned out the radiator ready for some modification to aid cooling. The shocks were also stripped ready for servicing and to replace the springs with H and R ones. Top mounts look okay but I may replace them later in the year with some more suspension upgrades.
Its looking now more like a car again by next weekend i hope to have the engine side of things pretty much completed, i can then concentrate on the suspension again and get it completed.
Jobs to do:
- install air intake
- finish fuel system
- finish suspension and driveshafts
- get front end resprayed (summer job)
- finish coolant system
- route the intercooler piping and secure intercooler
Photos:
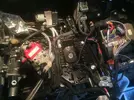
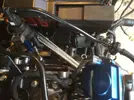
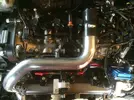
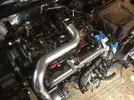
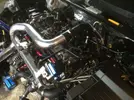
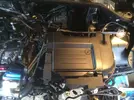
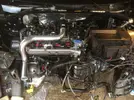
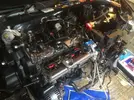

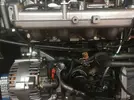
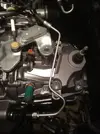
Thanks
Sorry for not posting last Sunday, I have been really busy, I have however mad some time in a few evenings and this weekend to put time aside to concentrate on the car.
First thing that needed to be sorted was the wiring and to plug all the sensors, coilpacks, injectors etc in, thanks to Steve at SC autos who made me a custom loom, everything lines up and makes it very easy to plug everything in correctly. There were however a few alterations to be made, first off was the fact i was using the newer style lambda sensors used on the clio 197 but not on the early megane 225's which is what my engine is from, this means the plugs were different. To solve this issue I bought some Tyco 4 pin plugs and rewired the lambda sensor and loom to match, hopefully Ive got it right and they work
With the loom 90% installed I turned my attention to running the coolant pipes, the pipes were cleaned thoroughly and flushed out. One thing that needed doing here was modifying the heat matrix inlet as it is larger on a meganes. This was done by slipping a section of silicon hose over the barb fitting/inlet, then i could fit the meganes coolant pipe over the top and clamp it down, it shouldn't leak, if it does Ill have to think of another solution. Another problem that i ran into was because im using the clio gearbox when you secure down the secondary coolant pump it hits on the gear linkage and you cant get it into 2nd, 4th and 6th, I have therefore secured it in a higher position to clear the linkage, most people dont have this problem as they use the megane box. The battery tray could now be installed and luckily it hides most of the wiring and coolant pipes, it all looks rather neat
Today Ive cleaned out the radiator ready for some modification to aid cooling. The shocks were also stripped ready for servicing and to replace the springs with H and R ones. Top mounts look okay but I may replace them later in the year with some more suspension upgrades.
Its looking now more like a car again
Jobs to do:
- install air intake
- finish fuel system
- finish suspension and driveshafts
- get front end resprayed (summer job)
- finish coolant system
- route the intercooler piping and secure intercooler
Photos:


Thanks
stephenvenning
Well-Known Member
Nice prograss mate! You'dve been better of using the Megane clutch tube though!
Why would I when im using a clio gearbox with a clio clutch and slave cylinder?
stephenvenning
Well-Known Member
Crap, forgot
no worries lol clio one is dead easy to bleed as well.
stephenvenning
Well-Known Member
UPDATE:
An early update this weekend mainly because there have been issues. Today i tried to test the starter motor and that the immobilizer had been decoded okay. Bad news the engine was solid and wouldnt turn over by hand whatsoever. Looked at a few things like the starter motor, cambelt etc, couldnt find anything wrong. A quick phone call to SteC and he told me that the fly wheel bolts may be too long and fouling on the crank case. This meant the engine had to come back out to get the gearbox off, in 30 mins it was out, fly wheel off and the bolts inspected. My mistake is the fact I ordered megane fly wheel bolts which are 2mm longer than the clio's bolts. This evening I turned down the bolts by 2.3mm so hopefully should get the engine in tomorrow and cranking over to check oil pressure etc.
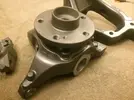
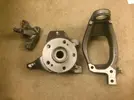
I have also this week completely assembled one of my hubs with new swivel bearings and zinc plated bolts. I simply pressed them in at work. next week Ill strip and refurbish the other sides hubs.
I will update again tomorrow, with hopefully better news.
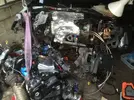
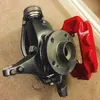
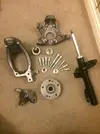
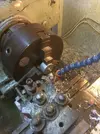
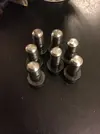
Thanks
An early update this weekend mainly because there have been issues. Today i tried to test the starter motor and that the immobilizer had been decoded okay. Bad news the engine was solid and wouldnt turn over by hand whatsoever. Looked at a few things like the starter motor, cambelt etc, couldnt find anything wrong. A quick phone call to SteC and he told me that the fly wheel bolts may be too long and fouling on the crank case. This meant the engine had to come back out to get the gearbox off, in 30 mins it was out, fly wheel off and the bolts inspected. My mistake is the fact I ordered megane fly wheel bolts which are 2mm longer than the clio's bolts. This evening I turned down the bolts by 2.3mm so hopefully should get the engine in tomorrow and cranking over to check oil pressure etc.
I have also this week completely assembled one of my hubs with new swivel bearings and zinc plated bolts. I simply pressed them in at work. next week Ill strip and refurbish the other sides hubs.
I will update again tomorrow, with hopefully better news.


Thanks
stephenvenning
Well-Known Member
UPDATE:
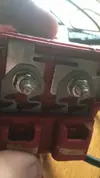
As promised I have an update about the current situation. I bolted up the flywheel again with the modified bolts and turned the engine over by hand and success it turns over once again i was listening out for any grinding and could hear or feel any. Bolted up the clutch like before and installed the gearbox, a lot easier this time as my dad was on hand to help. Within an hour the engine was bolted back in the car and started connecting up the loom, clutch line, coolant hoses, gear linkages and exhaust and also bled the clutch with new ATE fluid, I was now at the point I was yesterday and ready to give the engine a crank, but wait another problem, the dash wasn't lighting up but the interior lights were and the ignition wasnt coming on, 20 mins with the multimeter and still no ideas on what it could be. I then checked the postive terminal plug and it appears there is a fuse inside this, it separates the interior/aux electrics and the engine electrics. My guess is the motor drew too much current when it wasn't able to turn the engine over yesterday and this was enough to blow the fuse, doh! Anyway a new one is on order, I linked out this fuse just to test the starter motor and immobilizer, and it all turns over lovely.
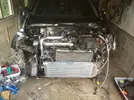
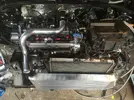
Ive now given the front sub-frame a quick coat of hammerite to cure a bit of rust and then bolted that in. The radiator was then bolted up and hosed up, this will probably be changed out with a megane rad later in the year when I have more time. Intercooler was now quickly mocked up and secured with zip ties so I can figure out some brackets to hold it securely. She starting to look a bit menacing now
Pictures as usual:
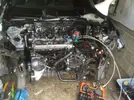
Thanks
As promised I have an update about the current situation. I bolted up the flywheel again with the modified bolts and turned the engine over by hand and success it turns over once again
Ive now given the front sub-frame a quick coat of hammerite to cure a bit of rust and then bolted that in. The radiator was then bolted up and hosed up, this will probably be changed out with a megane rad later in the year when I have more time. Intercooler was now quickly mocked up and secured with zip ties so I can figure out some brackets to hold it securely. She starting to look a bit menacing now
Pictures as usual:


Thanks
Similar threads
- Replies
- 1
- Views
- 489
- Replies
- 23
- Views
- 6K
- Replies
- 83
- Views
- 8K
