There is more to life with TurboRenault.co.uk
You are using an out of date browser. It may not display this or other websites correctly.
You should upgrade or use an alternative browser.
You should upgrade or use an alternative browser.
5 GT Turbo Alpine Turbo Project
- Thread starter Gary
- Start date
Hi Matt thanks, yes was a hell of a drive but good all the same my only regret is we didn't drive the Alpswow , looks great , cant wait to see it finished .
that's a hell of a drive to south of France @Gary
But save that for when the 5 is finished
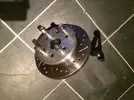
Fair comment, some people like centre bore and others don't, we did consider them but the engineering companyHub adapters look great, only criticism is the lack of a center bore shoulder to help the wheel locate centrally. You might get some vibration and all the load will be on the bolts alone.
fair comment, seems to be a bit of grey area the centre bore, some like them some don't. Still a huge improvement on 3 stud!Hub adapters look great, only criticism is the lack of a center bore shoulder to help the wheel locate centrally. You might get some vibration and all the load will be on the bolts alone.
Advice on turbo's please.
I am in the process of looking for a suitable turbo, have seen some threads on here but not able to edit some of them, I have been advised by Owens Turbos that the
471171-5003S 836023-5001S Turbocharger GT2554R £571.83+vat
is the turbo that I require to limit lag and maximise performance but requires the alteration of the 4 stud manifold.
I believe the 5GTT lads are starting to move oveer to these turbos with good results.Advice on turbo's please.
I am in the process of looking for a suitable turbo, have seen some threads on here but not able to edit some of them, I have been advised by Owens Turbos that the
471171-5003S 836023-5001S Turbocharger GT2554R £571.83+vat
is the turbo that I require to limit lag and maximise performance but requires the alteration of the 4 stud manifold.
T3 but you can get the Gt2554r with a T3 fittingWhat turbo fitting does your car have now then? Thats a T25 fitting on the turbo right?
DaveL485
Staff member
T3 but you can get the Gt2554r with a T3 fitting
I just bought a T3 flanged turbine housing for a GT28-series. be careful cos they are OH-MY-GOD expensive!
Also the step-down converter to switch the T3 manifold to the smaller 25/28 flange is quite a size reduction.
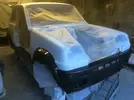
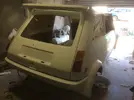
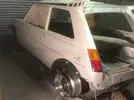
Looks great from here @GaryView attachment 18492 After a nightmare with problematic laquer not hardening and me not knowing enough about painting in a shed in winter! I've accepted that it's as good as it's going to get with me in charge of the gun in a dirty garage, so sticker kit finally going on and crack on with the build finally!

I'd be really interested in learning what kit/paint/ppi you had to paint the car?? I'm wanting to paint the underneath of my R11 Turbo sh1tbox and I don't really know where to start..? :bt:
Chris Hebden
New Member
Stunning work mate
Looks great from here @Gary
I'd be really interested in learning what kit/paint/ppi you had to paint the car?? I'm wanting to paint the underneath of my R11 Turbo sh1tbox and I don't really know where to start..? :bt:
Hi Steve, I bought some decent guns both devillbis gti pro, one set up for primer and the other for base coat and laquer, I can get the tip sizes if you want, I bought them from spraygunsdirect and found them great for advice, I used my existing compressor which is 250ltr and 10cfm but found this to be a little small, you could feel the pressure loss on big panels. I applied etch primer to all exposed panels after prep work and blasting and then high build primer flated this down and applied a dust coat which was flated again and any high/ low spots repaired and another coat of high build which was flatted again dry with orbital sander first then blocked it with 1200 grade, the pearl white was a base and laquer paint I opted for a single coat not a 3 part pearl just for ease of application, but it's a little white for my liking compared to a 3 part. The problem was the arches and stripes which were masked and painted I had to paint the base colour then seal with a dust coat of laquer to allow masking for the arches and stripes then mask the whole car and paint stripes and laquer the whole car, but I had a nightmare with the laquer not setting, I thought it was me but got a mate who paints for a living to look at it and knew straight that the laquer was problematic, the laquers can be fast/ slow or ultra fast curing with some being air activated which suits the likes of me painting it in a shed. Some painters inject a quick activator as an addition, it all depends on the conditions and temperature you are painting in, I sealed the underside with stone chip slightly thinned for a smoother finish( before painting the base) but I didn't fancy laquwring the underside, just a gut feeling it would chip so actually mixed the grize bronze base court with laquer and applied as a single coat, slightly unconventional but it's worked. It's not as easy as people think and having the experience to stop or know what to do when thinks are going wrong in invaluable. Gun set up and paint pattern is key, knowing when it's tacky enough to lay it on as opposed to dust coats to avoid orange peal. I painted with the hvlp gun at about 40psi, you can paint with these guns lower. It I got used to coverage and gun travel speed for this pressure so stuck with it. I'm no painter but have enjoyed doing it, It would have worked out the same price with buying quality kit as it would to have someone paint it, but not as satisfying, as I said it won't win prizes but looks decent, if I can help closer to the top give me a shout
Last edited:
Hi Steve...............
FAN BLOODY TASTIC @Gary!! Thanks for the details!! I'll have a good digest of that and compare to my kit.. got a feeling my compressor is already a fair bit smaller??
Which paint type did you use? I'm guessing non 2 pack paint because of all the scary airborne nasties?
Steve, I mixed base coat 50:50 with base course thinners, hence why it doesn't set set like a lacquer and was reluctant to place masking tape on it as it would pull the paint off, , I didn't use water based, the laquer was 2k. Base coat had 3 coats and laquer the same, the painters on here will tell you more but as long as it evenly applied, I weighed the paint before using a paint weighing scale thinking this would be more accurate but it's not as different paints are different weight so you don't get the mix correct, better to use measuring cups or rulers, is also used high volume hose on the compressor and wet the floors to stop dust, the thinners in the laquer was about 12% and is needed to help the laquer flow but watch for runs, feel the paint to see if it tacky then you can lay it on a bit thicker, the other issue was the way you apply the base course because of the pearl, the seems to lay on and if you paint an edge from bottom to top as opposed to side to side, the pearl is laid on differently and it shows. When it hardened I used a 1500 dry disc on a sander with an interface pad then a 2500 with a touch of water then cutting polish, try and get one without silicon, depends which one you get 3m is very good and you may not need to polish after, otherwise you can buff with polish, try not to use silicon based as if you need to paint any other panels the silicon is airborne and is a night mare, one last thing is panel wipe buy good quality, and clean clean clean!FAN BLOODY TASTIC @Gary!! Thanks for the details!! I'll have a good digest of that and compare to my kit.. got a feeling my compressor is already a fair bit smaller??
Which paint type did you use? I'm guessing non 2 pack paint because of all the scary airborne nasties?
Last edited:
DaveL485
Staff member
Similar threads
- Replies
- 4
- Views
- 342
- Question
5 GT Turbo
Renault 5 gt turbo radiator options
- Replies
- 13
- Views
- 183
- Replies
- 3
- Views
- 102
- Featured
- Replies
- 74
- Views
- 2K
- Replies
- 2
- Views
- 256

