Class…
There is more to life with TurboRenault.co.uk
You are using an out of date browser. It may not display this or other websites correctly.
You should upgrade or use an alternative browser.
You should upgrade or use an alternative browser.
Alpine 1968 Renault R8
- Thread starter Adey
- Start date
- Featured
Steve Swan
Well-Known Member
Looks better man. Ducel points are clever self cleaning design. The vac capsule moves the contact patch on normal driving keeping the face of the points clean. Super reliable, always best to set on dwell percentage rather than actual gap, if you can find a dwell meter. Finding genuine points is difficult and copy bits absolutely awful. Electronic ignition may be easiest in the long run.
Wheelers Workshop
Active Member
Hi All,
Points well in my experience they are reliable, especially the Ducellier points in the R8/R5 distributor, I have been using them for over 50 years in my various Renaults without any issues, saying that I did have a set close up after driving the R8G to France for a weekends hillclimbing, but they are easy to check in the field and adjust as necessary. The Dizzy I am currently using is the R5G Ducellier externally adjustable type so the dwell angle can be adjusted with the engine running by turning the external adjuster nut with a 7mm small spanner and utilising a dwell meter [ which I now carry in the car].
Its tempting to upgrade to the numerous options of Electronic variations , but the Ducellier spring is good for avoiding points bounce at high RPM, British Cars would usually need upgraded points [Cooper S type] with an uprated spring to get them to rev clearly at high RPM.
The coil I use is just a normal 12v unballasted Gold Lucas item not complicated.
Most of my competing colleagues have encountered some kind of failure with electronic add on kits, which is no good when you need an operating correctly working engine say in Foreign parts to be also driven back to Blighty.
However I do carry a set of points , a condenser, Rotor arm and Cap , and a spare coil in my usual spares package just in case.
Finally, if you decide to soldier on with std French Points Ignition, don't buy anything other than genuine Ducellier quality components, when it comes to servicing.
Cheers
W
Learnt a lot there! Thanks @Wheelers WorkshopHi All,
Points well in my experience they are reliable, especially the Ducellier points in the R8/R5 distributor, I have been using them for over 50 years in my various Renaults without any issues, saying that I did have a set close up after driving the R8G to France for a weekends hillclimbing, but they are easy to check in the field and adjust as necessary. The Dizzy I am currently using is the R5G Ducellier externally adjustable type so the dwell angle can be adjusted with the engine running by turning the external adjuster nut with a 7mm small spanner and utilising a dwell meter [ which I now carry in the car].
Its tempting to upgrade to the numerous options of Electronic variations , but the Ducellier spring is good for avoiding points bounce at high RPM, British Cars would usually need upgraded points [Cooper S type] with an uprated spring to get them to rev clearly at high RPM.
The coil I use is just a normal 12v unballasted Gold Lucas item not complicated.
Most of my competing colleagues have encountered some kind of failure with electronic add on kits, which is no good when you need an operating correctly working engine say in Foreign parts to be also driven back to Blighty.
However I do carry a set of points , a condenser, Rotor arm and Cap , and a spare coil in my usual spares package just in case.
Finally, if you decide to soldier on with std French Points Ignition, don't buy anything other than genuine Ducellier quality components, when it comes to servicing.
Cheers
W
Great read @Wheelers Workshop , thanks to everyone passing over info for these older cars, helps me massively.
I've been tinkering some more though I've not documented it with pictures as much as I should have. So lets have a quick run down of where I am. Wishbones were dropped and the subframe redrilled to take out the factory positive camber and to add a little negative. I also added some spacers to the bottom shock mount so that the shock had a little more usable length. Looks good now, and still clears getting on and off my drive ( I need to get some decent pictures of it)
I have got a horn fitted, now initially I was stumped by this, more so than I should have been tbh. I was reading a switching 12v on the wiring though when adding any load the voltage would drop off to 0v and nothing would work. I tried a few different bulbs and horns to test it and always got the same result. After a few days of thinking I decided to start chopping the wiring back to find black instead of copper.... high resistance. Chopped nearly a foot of the wiring out and bingo it works. Fresh cable laid back in and we are onto a winner.
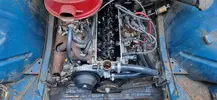
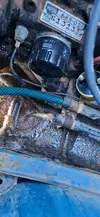
New pump has turned up also (the correct one with the heater take off on it) so first up was to test the pipework to the heater matrix. Popped the hose onto it to flush it all out, some rusty water flushed through but no where near as much as I was expecting tbh. Ran it through at varying pressures for a good 5 min. The valve under the dash works fine, the control cable has come out of its clip though so didn't actually actuate it from the dash, that part is still on my list of things to fix (hopefully tomorrow) The old pump has been whipped out after about 50 miles so came off nicely and its been replaced with the correct one. New pipes have been connected to the old heater hoses too. Tomorrow I will hopefully refit the rad and test the system for leaks. Fingers crossed all is well and we have another creature comfort that will make using it more comfortable.
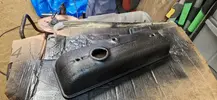
Whilst its apart I have also whipped the rocker cover off. I have given it a few coats of wrinkle finish black, just to hide the crustiness and to make it a little more presentable when it goes back together.
Thanks for taking the time to read, here's some pics





Steve Swan
Well-Known Member
The hole in the heater valve is tiny, flow looks ok. You did flush both ways? Careful with the bleed screw on the heater, you don't want to have to start over....
Have you adjusted the tracking? Moving the bottom pivots out will have it toeing in about half to three-quarters of an inch. Won't feel good on the road.
Have you adjusted the tracking? Moving the bottom pivots out will have it toeing in about half to three-quarters of an inch. Won't feel good on the road.
Steve Swan
Well-Known Member
Top of the heater under the bonnet catch panel passenger side, go easy it may be brittle.
Tracking is disconect track rods and turn bush in Rack end 1 or 1.5mm per rev (can't remember) make a track rod conversion kit top of your shopping list......
Tracking is disconect track rods and turn bush in Rack end 1 or 1.5mm per rev (can't remember) make a track rod conversion kit top of your shopping list......
Cheers @Steve Swan a wealth of knowledge as always
Really coming on this mate! Can see me getting the Raider or 11T taxed for the month of the Retro show to come & have a look!!
Really coming on this mate! Can see me getting the Raider or 11T taxed for the month of the Retro show to come & have a look!!
defo do it if you can buddy. In the flesh this will make your skin crawl
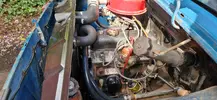
As an update, we have warm air available in the front of the car. Took a while to bleed up, but me being a dunce had the nose high as my drive slopes towards the garage. Turned the car around and it pretty much bled itself


Wheelers Workshop
Active Member
Hi Guys,Top of the heater under the bonnet catch panel passenger side, go easy it may be brittle.
Tracking is disconect track rods and turn bush in Rack end 1 or 1.5mm per rev (can't remember) make a track rod conversion kit top of your shopping list......
Steve as always speaks pearls of wisdom and regarding the tracking adjustment its a pain in the @rse to do on the std set up, I have also use the fully adjustable modern track rods and ends {and as my last 4CV Racer] , these allow live on the car adjustment like modern cars have, so when you go to the tyre garage they can adjust the tracking easily and quickly live on the loaded cars suspension, these are a must to have. As an initial set up I use a cheap Aldi laser measuring tool pointed at the opposite tyres inner side walls before and after the crossmember, its good enough to use the car before final adjustments by professionals.
Regarding the rubber heater pipes under the car [and this is probably after the horses have bolted], these have steel joiners and they wrot alarmingly, these are probably the source of the iron oxide in the water flushing. Its another shit job to do to replace these "time bomb" joints. I use Halfords blue nylon pipe joiners which are serrated at both ends. I also found that my hoses were crispy internally with rust deposits, the solution is to take the pipes off the car and walk over them to release the deposits or replace with new hoses .
{ avoid letting the Neighbours see you doing this as they may call for a white van to come to collect you to take you to the nice home for permanently bewildered R8 owners}.
The heater tap operation is by Bowden cable as you know but your left foot when trained can manually operate the slider to the on/off position! The Heater Tap itself is brass and contains a small rubber O Ring seal, its probably worth changing it while the system is drained i.e if you are doing the above cleaning out. You should end up with a rejuvenated functioning heater, use an 86 deg thermostat was well.
Cheers
W
@Steve Swan @Wheelers Workshop im browsing around for a few bits and found this

 www.arnaudventouxpieces.com
Looking at the price it seems good to me. Am I able to make/find one cheaper or is it good? just looking a little further forward to allow some better adjustability

Kit of 2 adjustable steering rods (rods + ball joints) with bellows
R8 / Caravelle / Floride S A110 / Alpine GT4 / Matradjet
Looking at the price it seems good to me. Am I able to make/find one cheaper or is it good? just looking a little further forward to allow some better adjustability
Steve Swan
Well-Known Member
It's not bad @Adey. I think you can make them up from the correct MK1 Clio bits, but I don't know exactly which ones. I re tapered my original uprights on the 8 for a different TRE and the Dauph uses rod ends. By the time you faff around and re tap the connectors, it would be easier to just buy them. It makes life much easier all round.
Turbell
Well-Known Member
Just as a word of caution I bought similar for my 750/4cv and they didn't have as much movement on the inner joint as the original , didn't look like they'd cover the full sweep of the suspension, from droop to bottoming, they were also too long, correct paint number on the packet.
I just chucked them in the pile of broken shit and forgot about them, similar money if I remember, but from Auto Bretagne, didn't bother complaining, posting back etc
I just chucked them in the pile of broken shit and forgot about them, similar money if I remember, but from Auto Bretagne, didn't bother complaining, posting back etc
The wife and I popped out for some food yesterday but stopped in to take a look at a place called Retro Sect. A retro shop tied in with a car salesroom also selling retro cars. Young Retro motor club were there at the same time. I didn't get many pics as it was a flying visit (I was hank marvin) so grabbed a few of the 8 taken buy others










Similar threads
- Question
Other ( non boosted Renault )
R8 5 speed gearbox (again)
- Replies
- 7
- Views
- 107
- Featured
- Replies
- 74
- Views
- 2K
- Replies
- 21
- Views
- 1K

