There is more to life with TurboRenault.co.uk

Register a free account today to become a member! Once signed in, you'll be able to participate on this site by adding your own topics and posts, as well as connect with other members through your own private inbox!

5 GT Turbo 11 years later silver bullet comes home

Which battery tray option

  • Leave as is with battery tray sections

    Votes: 0 0.0%
  • Fully remove all spot welds and battery tray sections

    Votes: 1 100.0%
  • Leave battery tray in and trim/cut out sections not required to tidy

    Votes: 0 0.0%

  • Total voters
    1
  • Poll closed .
Yep same Lotus Elise/exige S2 & Vx220 rack positioning. I need to extend ends by 25mm each side due to my increased track (front & rear) done to accept 5 pot engine and dsg (shame really as if I used the s3 tfsi and 6 speed manual have the mounts and shaft drawings from the conversions I did in the vx220) but that would have been far too simple and miss out on 5 pot noise noise and super fast dsg 😜

In stock form raiser plates are used to give adjustment, and I will probably leave a bit more for playing with ride height setup

While some thought for mounting needed still - it will fit (he says with confidence lol) more the servo after be fun, and make sure angles to steering column well within range etc

Welcome any thoughts or feedback @Steve Swan 👍
 
Basically the inboard rack pivots are just above the lower wishbone mountings and I guess the outboard ends are in the same basic relationship. If you can move the Rack up and down on shims, you'll be able to find the sweet spot. Having longer track rods will help as the longer (swing axle) will alter it's effective length less than shorter rods. The humble Hillman Imp and later Vauxhall's used a centre mounted track rods to minimize the changing length thing ...
Watching with interest...
 
Ok, so after going over all options I could see working photo bombed our resident metal working master @Mark_L to get some validation, given a thumbs up on option A got on with measuring, cutting and making joy.

Going to weld uprights bases to subframe (welded some 2mm squares onto ends to keep nice and honest) and then needs gussets etc to give the extra strength and look at bolting to bulkhead as I want to retain option to drop subframe and lower section in one.

Not too much more needed taking of chassis rail which is a bonus and can see a few easy option to put strength back in 👍

Measurments all good which is the most important bit....

Quick look at servo and think will need spacing out 60mm but will see.

Started to use my temp suspension bit of box to determine pickup and looks like it will slot in just fine.

20231006_115748.webp

20231006_120302.webp

20231006_125251.webp

20231006_130310.webp

20231006_130706.webp

20231006_130717.webp

20231006_130726.webp

20231006_132125.webp

20231006_132133.webp

20231006_132320.webp
 
Thankfully made no changes to any key structure areas, suspension setup or put a big engine in the back seat area 😅

Yeah expect full on pain of IVA looming but need to get built 1st and see if can register against donor vehicle year or full new registration.....won't know until speaking but in world of EV voodoo sure they will make it easy for me lol 😆

Track attack in it once working first 😉
 
3hrs in the blink of an eye....time goes far too quick when having fun 😞

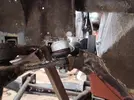
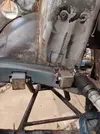
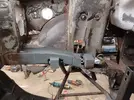
So got on with spot welding brace plate and seam welded sides, top done after that top section in. Part welded in the pickups and few extra tacks on outside.

Measured up and drilled out holes for rack mounting, need to do shim plate still but made longer for adjustment but also elongated bit bigger than bolt size to give fine tweak.

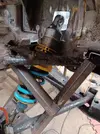
Cut out hole for suspension/spring top mount, as per pics box bit correct angle but need to take a bit more out to fit Mr Nitron but want to add a bit of strength 1st as everything not braced yet.

20231007_154249.jpg

20231007_161059.jpg

20231007_174315.jpg

20231007_174322.jpg

20231007_174329.jpg

20231007_174334.jpg

20231007_174341.jpg

20231007_174350.jpg

20231007_174427.jpg

20231007_174436.jpg

20231007_175052.jpg

20231007_175059.jpg

20231007_175108.jpg
 
Any ideas roughly how many hours you have in this so far?
I need to think on that one and an intersting question maybe best left alone lol.

I had an estimate of 3000hrs for the build of which sounds crazy but let me validate as while a lot of time spent since the start, of course the multiple short bursts is not the most efficient approach and it is not what I do for a living - definetly more a new 'opportunity' and makes an engine conversion seem quick and easy😜
 
Mate your definitely mad ,bloody clever but mad , I can’t seam to get passed a project being worth less than you spend , I take my hat off to you , and appreciate all your skill and determination and to be fair your updates are better than watching the telly and would never want you and many others to change , keep up the good work it’s bloody fantastic .
 
Thanks @gordini stu often think stop spamming the forum with your few hours progress and photo bombs 😀 ......but glad it's keeping a few of you entertained by my madness and helps others try something new. My kids often say to do a YouTube channel of the build and bore the world with my detailed joy but too far in now and cant see it helping speed the build up in anyway

Tune in at 6pm to see what today's 3hrs of fun was 🤣
 
Sunday fun day update....

Got thinking about chassis leg gussets, braces and cutting bigger holes 😇

Settled on some 40mm box plan or another layer of 2mm sheet on side as per random pics will revisit
IMG-20231008-WA0013.jpegIMG-20231008-WA0011.jpegIMG-20231008-WA0015.jpegIMG-20231008-WA0017.jpeg
Then changed next job of working the steering rack and cutting out the back to allow access, gave it a blast of primer and welded a cap in
20231008_154800.jpg20231008_145925.jpg20231008_161241.jpg20231008_161259.jpg
Then rack back in to check access and get hole enlarged, bit of cad and some 2mm sheet almost ready to weld in
20231008_162434.jpg20231008_162423.jpg20231008_162346.jpg20231008_162409.jpg20231008_171332.jpg20231008_171342.jpg20231008_171354.jpg20231008_171458.jpg20231008_171508.jpg
 
90mins = steering rack mounts welded in, and removed other bits of excess metal in the rack arms space which worked out all👍 will weld backs when subframe dropped next.

Rack moves in and out smooth and looking forward to getting final mounts made and in.

Having a measure up of ARB decided a custom one makes most sense and can build in the extra width and make mounting easy and save any further subframe cutting.

20231012_194839.webp

20231012_194922.webp

20231012_194932.webp

20231012_194950.webp

20231012_195011.webp

20231012_195106.webp

20231012_195116.webp
 
Back
Top