danb
Well-Known Member
Well, the tungy 21 has left the drive way and I have to admit after driving a 1.0l corsa with 3cylinders for best part of 6months it has numbed my sense of acceleration.
Anyhow before the guy came to pick up the 21 I took it out for a quick spin up and down my road to bed the brakes in a bit, clean off the surface rust and generally check it still works LOL. He came picked it up and drove away happy, he said he couldnt stop smile all the way home. This was the bump I needed to get the restorations going again.
So weather has been nice.. I decided as there is some more space on the drive way, lets have a look at the silver quadra.
Ut oh! JACKING POINTS!!! Started on the near side.
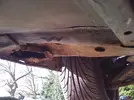
Not good but then they never are. Anyway got some jacking points from Jo a while back. I asked a friend who works in metal whether or not he could fold some up, but he pointed out that they are stamped not folded.
So I started to clear off the under seal and then get in between the jacking point and floor, break the welds and peal the crap metal off.
Jacking point off, after a mad struggle - man those things are on there good!

Floor is a bit damaged, also in the arch where the jacking point wraps up and around there is also a seam for the arch to floor metal, I managed to split that instead of the jacking point! DOH, so a bit more fab to be done.
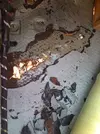
All of the carpet and under lay up and out of the way, loom moved slightly up and over, all of Dave's favorite floor sealant removed; which was actually a breeze once you get under it with a chisel.
Anyway the old man thinks it better just to pop a plate on the underside to cover over the holes and the splits, metal is pretty thin there where the ol' tin worm has gotten its teeth in.
With some 0.8mm sheet, a piece of A4 paper, an old cereal box, a pencil and some scissors a template was made and cut.
Heres one I made earlier Blue Peter stylee
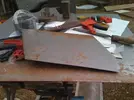
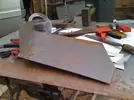
Many attempts to offer it up to the car it is a good fit. I had to pop off and grab the girlfriend from work at this point so Baldy carries on working the metal up around the curve into the arch.
Curve well underway, I needed to clean out yet more of the under seal and then pop out the dipping/painting plug like so.
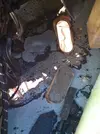
While dad held the plate up I drew around the inside of the plug ready for removal..
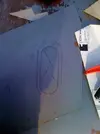
Plug hole now accessible, notice the curve for the arch as well. Lovely.
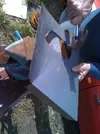
Rapidly approaching a point where we need to design a jacking point, with the floor plate pretty much finished we grabbed the jacking points I got from Jo and set about with a piece of cardboard to make another template.
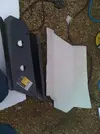
Drew it out onto some 2mm sheet and then cut
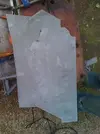
Then we marked up where the bends need to be and the fun began!
He bent the rear edge first, as this one is pretty much straight; the front edge has a gradient that wraps itself up into the arch slightly, but this is all change now with the added floor plate. You can see the gradient in the second pic.
Looks pretty good.
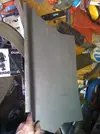
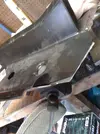
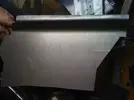
Then I didnt get any more pictures for a while but here is how the jacking point stands currently.
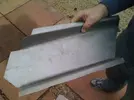
The floor plate got drilled and tacked to the underside of the car then we packed up as we lost light. Continue next weekend, everyone do a sun dance as I dont want rain.
For those who are interested, the jacking point will have a further plate of 2mm on its underside, for jacking purposes. Not only will this allow the jacking point to be used for...jacking but will also form a part of the bottom of the sill. I think 4mm will be good enough!
Right bit of an update, been things going on and too much wind really to bother looking at the jacking points. Not to fortunate to have a nice large lock up to work on my car.
The jacking point as it was left
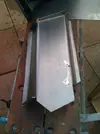
Floor is plated and looking good. Jacking point offered up many a time to double check and tweek any obscure angles. Strengthing leg had the grinder to it to clear off the remaining spots of weld and metal from the old jacking point.
Grabbed a scrap piece of 2mm to cut the jacking plate from.
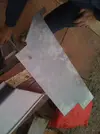
Dad cutting it up, his favorite job because he gets to use Mr Angry.
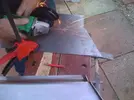
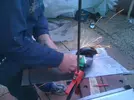
Plate cut out and filled edges so they arent to damn dangerous.
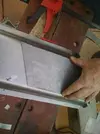
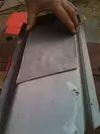
This jacking point is going to be f..king strong! 4mm thickness on the jacking surface. Will get it all welded up tomorrow as it looks like another stunning day ahead.
Well another cracking couple of days! so more pictures of my sexy jacking point lol.
Jacking point tacked into place
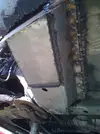
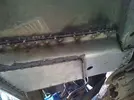
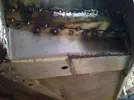
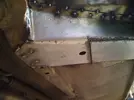
Notice the grey putty looking stuff is guttering rubber, stays flexible and waterproof so figured its perfect for forcing into the seams and joins.
After it was all tidied up a bit, ground the spots/tacks down a bit to make it less obvious. Then set about painting a THICK layer of underbody sealer on. A friend of mine who was an MOT tester for many years told me in the pub last night that any repairs to the body need to be seam welded... stupid as it comes from factory spot welded! Needless to say plenty of underbody sealer will be applied to make it difficult to see.
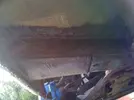
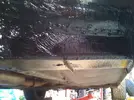

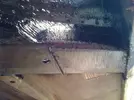
Very pleased with the outcome, and should be very very strong. Second coat of sealer tomorrow.
Right another good day, although a touch windy. Anyway no welding happened today as I had my matey over to check out the replacement jacking point to see if he would pass it; and he would! Nice to hear after spending that much time preping and cleaning the area, and not to mention the amount of time my old man spent making the bloody thing. LOL. Luckily the guy I use for MOTs it quite relaxed so should be no problems there. It got a second early morning layer of underbody sealer again.
So with that side done and dusted and my old man going up to the local apiary for a few hours I decided to let the car down and turn her round. Got her jacked up and on blocks again ready to inspect the o/s jacking point. Turns out its in not too bad a condition compared to the other, the floor doesnt have a massive hole in it for a start!
Scraped away some of the underbody coating to find where the rust stops. Then undid the fuel line protection bracket, which well was in a sorry state; although on the upside it came undone without any rounded/broken bolts.
Brilliant usage of a bungee cord.. ha
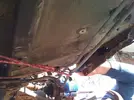
Now with rotten half of the jacking point cut off, floor doesnt look too bad.
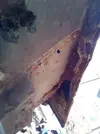
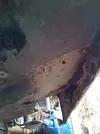
There will be a small strip to replace the inner sill and also the inner sill/arch as its a little bad there too so might as well do it. So I popped off the plastic arch cover and wing to get good access.
And I decided to Kurust the fuel line brackets to cure them before I paint them in good old Hammerite Black. Those of you on my facebook will probably have noticed I ended up with best part of the tin on the drive way.. greaaaaat!:evil:
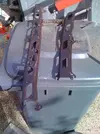
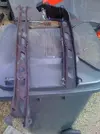
Pictures of them painted tomorrow probably.
Righty haven't updated for a couple of days, but a bit more progress!
Clean up the metal work and remove any loose rust ready for an assessment on the amount of replacement skin needed.
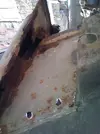
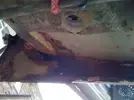
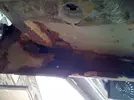
Then make a skin out of two pieces and weld them together, and check fitment like so
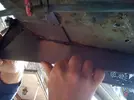
Then weld it into place and slap on some underbody sealant for good measure.
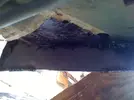
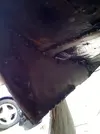
Then we patched up a piece of the outter sill
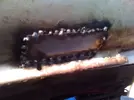
And then my old man started working on a template and replacement piece of jacking point, which turned out like this.
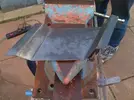
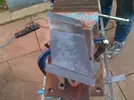
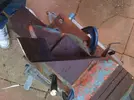
Unfortunately I had to put my phone on charge so didnt get anymore pics, but we also cut out another piece of 2mm to add to this like the other side for the actually jacking surface.
Then we tacked it up onto the new floor skin and we are ready to finish it off in the morning. More pics to come tomorrow.
Anyhow before the guy came to pick up the 21 I took it out for a quick spin up and down my road to bed the brakes in a bit, clean off the surface rust and generally check it still works LOL. He came picked it up and drove away happy, he said he couldnt stop smile all the way home. This was the bump I needed to get the restorations going again.
So weather has been nice.. I decided as there is some more space on the drive way, lets have a look at the silver quadra.
Ut oh! JACKING POINTS!!! Started on the near side.

Not good but then they never are. Anyway got some jacking points from Jo a while back. I asked a friend who works in metal whether or not he could fold some up, but he pointed out that they are stamped not folded.
So I started to clear off the under seal and then get in between the jacking point and floor, break the welds and peal the crap metal off.
Jacking point off, after a mad struggle - man those things are on there good!

Floor is a bit damaged, also in the arch where the jacking point wraps up and around there is also a seam for the arch to floor metal, I managed to split that instead of the jacking point! DOH, so a bit more fab to be done.

All of the carpet and under lay up and out of the way, loom moved slightly up and over, all of Dave's favorite floor sealant removed; which was actually a breeze once you get under it with a chisel.
Anyway the old man thinks it better just to pop a plate on the underside to cover over the holes and the splits, metal is pretty thin there where the ol' tin worm has gotten its teeth in.
With some 0.8mm sheet, a piece of A4 paper, an old cereal box, a pencil and some scissors a template was made and cut.
Heres one I made earlier Blue Peter stylee


Many attempts to offer it up to the car it is a good fit. I had to pop off and grab the girlfriend from work at this point so Baldy carries on working the metal up around the curve into the arch.
Curve well underway, I needed to clean out yet more of the under seal and then pop out the dipping/painting plug like so.

While dad held the plate up I drew around the inside of the plug ready for removal..

Plug hole now accessible, notice the curve for the arch as well. Lovely.

Rapidly approaching a point where we need to design a jacking point, with the floor plate pretty much finished we grabbed the jacking points I got from Jo and set about with a piece of cardboard to make another template.

Drew it out onto some 2mm sheet and then cut

Then we marked up where the bends need to be and the fun began!
He bent the rear edge first, as this one is pretty much straight; the front edge has a gradient that wraps itself up into the arch slightly, but this is all change now with the added floor plate. You can see the gradient in the second pic.
Looks pretty good.


Then I didnt get any more pictures for a while but here is how the jacking point stands currently.

The floor plate got drilled and tacked to the underside of the car then we packed up as we lost light. Continue next weekend, everyone do a sun dance as I dont want rain.
For those who are interested, the jacking point will have a further plate of 2mm on its underside, for jacking purposes. Not only will this allow the jacking point to be used for...jacking but will also form a part of the bottom of the sill. I think 4mm will be good enough!
Right bit of an update, been things going on and too much wind really to bother looking at the jacking points. Not to fortunate to have a nice large lock up to work on my car.
The jacking point as it was left

Floor is plated and looking good. Jacking point offered up many a time to double check and tweek any obscure angles. Strengthing leg had the grinder to it to clear off the remaining spots of weld and metal from the old jacking point.
Grabbed a scrap piece of 2mm to cut the jacking plate from.

Dad cutting it up, his favorite job because he gets to use Mr Angry.


Plate cut out and filled edges so they arent to damn dangerous.


This jacking point is going to be f..king strong! 4mm thickness on the jacking surface. Will get it all welded up tomorrow as it looks like another stunning day ahead.
Well another cracking couple of days! so more pictures of my sexy jacking point lol.
Jacking point tacked into place


Notice the grey putty looking stuff is guttering rubber, stays flexible and waterproof so figured its perfect for forcing into the seams and joins.
After it was all tidied up a bit, ground the spots/tacks down a bit to make it less obvious. Then set about painting a THICK layer of underbody sealer on. A friend of mine who was an MOT tester for many years told me in the pub last night that any repairs to the body need to be seam welded... stupid as it comes from factory spot welded! Needless to say plenty of underbody sealer will be applied to make it difficult to see.


Very pleased with the outcome, and should be very very strong. Second coat of sealer tomorrow.
Right another good day, although a touch windy. Anyway no welding happened today as I had my matey over to check out the replacement jacking point to see if he would pass it; and he would! Nice to hear after spending that much time preping and cleaning the area, and not to mention the amount of time my old man spent making the bloody thing. LOL. Luckily the guy I use for MOTs it quite relaxed so should be no problems there. It got a second early morning layer of underbody sealer again.
So with that side done and dusted and my old man going up to the local apiary for a few hours I decided to let the car down and turn her round. Got her jacked up and on blocks again ready to inspect the o/s jacking point. Turns out its in not too bad a condition compared to the other, the floor doesnt have a massive hole in it for a start!
Scraped away some of the underbody coating to find where the rust stops. Then undid the fuel line protection bracket, which well was in a sorry state; although on the upside it came undone without any rounded/broken bolts.
Brilliant usage of a bungee cord.. ha

Now with rotten half of the jacking point cut off, floor doesnt look too bad.


There will be a small strip to replace the inner sill and also the inner sill/arch as its a little bad there too so might as well do it. So I popped off the plastic arch cover and wing to get good access.
And I decided to Kurust the fuel line brackets to cure them before I paint them in good old Hammerite Black. Those of you on my facebook will probably have noticed I ended up with best part of the tin on the drive way.. greaaaaat!:evil:


Pictures of them painted tomorrow probably.
Righty haven't updated for a couple of days, but a bit more progress!
Clean up the metal work and remove any loose rust ready for an assessment on the amount of replacement skin needed.


Then make a skin out of two pieces and weld them together, and check fitment like so

Then weld it into place and slap on some underbody sealant for good measure.


Then we patched up a piece of the outter sill

And then my old man started working on a template and replacement piece of jacking point, which turned out like this.


Unfortunately I had to put my phone on charge so didnt get anymore pics, but we also cut out another piece of 2mm to add to this like the other side for the actually jacking surface.
Then we tacked it up onto the new floor skin and we are ready to finish it off in the morning. More pics to come tomorrow.
Last edited by a moderator:

