There is more to life with TurboRenault.co.uk

Register a free account today to become a member! Once signed in, you'll be able to participate on this site by adding your own topics and posts, as well as connect with other members through your own private inbox!

Clio Restoring a 172 Cup track slag..

I used gorilla epoxy to repair mine.

Great progress, I kept scrolling and scrolling and scrolling hahaha, thanks for the big update. Great stuff :)

Better late than never ;)

Lovley work there @conor ! Keep it up sir! 👌🏻

Thank you :)

I need to refurb inferno 225 calipers, citric acid did a good job on your rears, I'll give that a go.

Are they powder coated or painted? If so I would skip the acid as it might not do anything my Brembo 4 pots were sand blasted. It's the rears I put in the acid - which came up great, in case that wasn't immediately clear.
 
So i've been playing around with various ideas for the switches over the past while. MSPaint has served me well as I can easily move stuff around.. here is the design along with some thoughts, reasoning behind positioning.

The design is an aluminium panel that will be cut and drilled then bolted (four corners) to some lightweight structure (TBD).

Small panel - To the right of the steering wheel, offering some secondary switches.

  • Cabin is a momentary switch that I can press to temporarily light the cabin if I want to glance at something. The cabin switch on the other panel is latching.
  • H. Light adjust will be the OEM headlight level adjustment (Never used it in any car, but it seems important lol)
  • EPAS is the adjustment for the amount of assistance from the electronic power steering. This required finer adjustment and I am right handed so it's probably better to the right hand side of wheel.
  • Door lock is a push button that will just lock the doors. It's there as OEM, so I may aswell keep it. Can be handy. Useful on the right so I can just slam it if needed - probably not totally track safe... but useful on city roads.

Large Panel - To the left of steering wheel (RHD), in front of the gear lever, with the appropriate clearance.
  • Those toggle switches should be easy to switch with gloves and should offer solid tactile feedback.
    • The led in the switch will be constant, whereas the indicator underneath will be on when in on position.
    • This design should enable me to find the switch easily and also see if it's on/off at a glance.
  • The buzzer will sound along with one of the following lights when one of the following conditions is met.
    • NO ISOLATE - Door open and battery is not isolated
    • KEY IGN - Door open and key still in ignition
  • Hazzard is a push / pull switch so I can just easily push with my palm.
  • MAIN will light up when battery is no longer isolated.
  • IGNITION will light up when key is in and turned to ignition position. I have toyed with push button start but this will be fine and secure. I need to keep the key in car, near immobiliser receiver anyway.
  • OBDII Diagnostic port is there until I find a better home for it. I was going to have it right hand side, but centre is better if I wanted to put a laptop on the passenger seat, or have a passenger operate something while there is a driver, without the cable needing to cross over the driver area.

Any feedback welcome as this is a first pass.

Brownie points if you can find a use for this "REMOVE BEFORE FLIGHT" widget. Maybe I can just put it on the ignition key, meaning I need to remove before I leave the car... It's cool and IS needed :D

1634139539508.png


1634138559101.png
 
You can get stacks of that sort of stuff online which might save you some hassle?

You can alright, but none if it exactly as I want.. I am actually looking forward to building and wiring it all up.

I can customise it fully and adapt if needed in the future...

... But sure, it's going to be pretty frustrating at time and take a while to wire everything up, but that's part of the fun.

I'm enjoying imagining me in the driving seat, reaching for the buttons and thinking about where is best to place the switches..
 
Any updates?

Not much mate..... well, maybe.

I got back into it last weekend, after much hiatus :'(

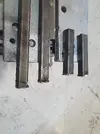
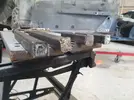
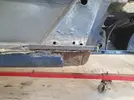
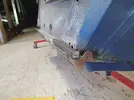
Having had a quick scan at my previous post here, this thread is mainly up to date. Since my last updates, I had set about adding some jacking supports to prevent the pinch welds from future damage..

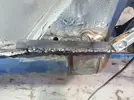
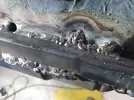
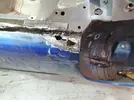
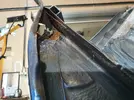
Here's a quick overview.. The welding is a bit messy. You can see I did lay down some nice welds, but after that I needed to run over and fill some bits in etc.

It's not clear in the photos.. but see where in the last photo, there is a blob of weld that is a bit away from the box iron. The panel, was a bit warped and I needed to drill a hole to try and pull the panel out a bit, to get an even surface to weld to.

20211010_162115.webp
20211010_162120.webp
20211010_162411.webp20211010_162426.webp20211010_172252.webp20211010_172255.webp
 
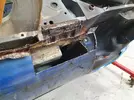
Then, I found a little more rust, which was actually pretty painful to find, if I am honest. It was doubly painful, because I couldn't cut out the full extent of the rust, without cutting out the box that I had just welded in.

I only noticed the rust, when I saw a little hole that I decided to zap with the welder.. It started blowing through immediately, which is when I discovered it all. I was disappointed in myself for not finding before.. oh well.

Was pretty disheartening to have to open it all up like I did - but it felt like the right thing to do.

20211016_152920.webp
20211016_152940.webp20211017_134014.webp20211017_135254.webp20211017_141637.webp
 
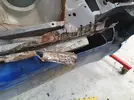
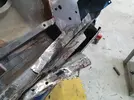
I don't have much from making up the sills but it was just a lot of guessing and trying to get stuff bent in the vice. I ended up with something reasonably good, for a first attempt and for something people won't see once the skirts are back on.

Here is a selection of the bits I ended up making that need to be welded on. I decided against using the galv piece on the right as it was too heavy, so I made up another piece.
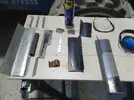
1642236775956.webp

Here is a support piece that was rotten away. I made this up based on the other side. I cut the tabs in so that I could fold the steel over. Will weld them back up.
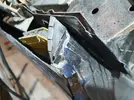
1642236814954.webp

Installed..
1642236873839.webp

Then I just welded in some other smaller bits, to make up the different skins/panels that were rusted. This is the only real pic I have. This was my second time around welding so I wanted to just get into it..
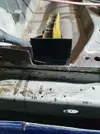
1642236937393.webp

Next photo then, was of a tacked up sill.. I tacked this and realised I made some mistake (can't remember) so needed to remove it again. It never fit the same after that.. but overall ended up ok, I think.
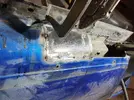
1642236995242.webp

And the finished product.. minus a few holes that needed another round of the MIG.
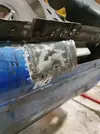
1642237035799.webp

.. Before the next panel, I decided to give a shot of Zinc182 zinc primer, followed by paint. Just in an effort to try and seal up the raw metal that was there. Can't hurt.
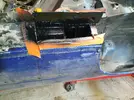
1642237086562.webp

Don't have complete pic of it welded in, but here it is installed. Note the penetration from the underside.
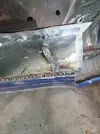
1642237135992.webp

Ok, pics not in order.. but here you can see the support for the sill. Not welded, but fits "ok" need a bit of finessing prior to weld.
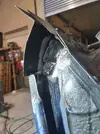
1642237218545.webp

So I slotted the ends of the sill and hammered them over to make it "factory" :lol
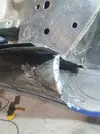
1642237250629.webp

I decided to insert a piece of the heavy steel from before, so that I had something sturdy to weld the box iron support to. It's not sexy but will be functional.
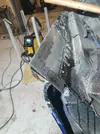
1642237329266.webp

Ok, so the photos very hit and miss after this.. but here is the finished product.

Please ignore the massive welds up top. These were plug welds and I wanted to really burn into the next panel, I guess I went a bit too overboard heh! I'll grind them down.

Overall, it's not a totally brutal job. For a first time around making sills, I don't think it's bad at all, as the do remotely line up. Obviously I do think a better job would be needed if the final job was going to be visible.

Still a nice bit of tidying up around the skins where they join up etc.

That's where I am up to now.
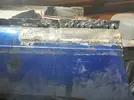
20220110_191203.webp
 
Back
Top