There is more to life with TurboRenault.co.uk

Register a free account today to become a member! Once signed in, you'll be able to participate on this site by adding your own topics and posts, as well as connect with other members through your own private inbox!

Clio Restoring a 172 Cup track slag..

This evening I realised that an old disused server cabinet ready for the bin would make some mighty supports for my car. Look at the profile and thickness of this stuff.

I reckon I can use it to possible replace the rotten box section in the car that I cut away and also use it to make some solid jacking points going forward. There is a little bit of flat stuff at the bottom which may be usable for the other repairs.

It seems quite thick for that though. I think it's about 2mm from looking and could be a b**** to bend... we shall see.

20210506_205821.jpg
20210506_205829.jpg


... Oh and the eagle eyed of you might have noticed this from before. The top of said cabinet makes for an awesome bench/standing stool/general seat. It's so strong.

One of my first times using an angle grinder too, I am so surprised all the "legs" are equal lengths and it doesn't wobble at all.

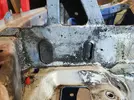
20210503_124204.jpg
 
Right lads.. another small update.

At the weekend I spent a bunch of hours cleaning up the top surfaces of the engine bay + one of the wheel wells. It's actually mental how long it takes to do a good job. Using a combination of that small toothbrush like tool, small wire pick and brake cleaner + white spirits. I think it will pay dividends come spray time though. I probably spent too long on the downward facing surfaces but I am aiming for a full covering of paint and I really dont want to see paint coming away from the various nooks and crannies due to oil residue, if I can help it. A certain amount will be guaranteed as I am not vapour blasting the entire shell, but it should be good enough..... "It's only a track car, right!?"

Here a few pics of the work in progress.. it's super rewarding to see how it scrubs up. I particularly like cleaning the seam sealer which has lots of grime caked in. My method seemed work really well which was.. spray some white spirits, agitate/scrub with brush then shoot it all off with pressure of brake cleaner in hand sprayer. You can see the results below.

Side note: You might have recalled a previous question about how I would clean the car. I am just about finished with the cleaning, including removing all the schultz from underside. I think I have used about 4 litres of brake cleaner + 4 litres of white spirits. No water! That doesn't seem bad. I thin there is probably a lot of silicon in the white spirits so i'll probably have to splurge on a gallon of silicon remover to use before paint. Does anybody know if that is really needed or if thinners is ok?

20210509_123856-jpg.webp20210509_134552-jpg.webp

You will note the corrosion there too. Which again, all things considered, does not seem bad at all. Will be treated in due course.

20210509_134557-jpg.webp20210509_134600-jpg.webp20210509_134605-jpg.webp

One thing I found peculiar though, was that on both sides the corners towards the bottom/front of the wheel arches were bashed in. Is it a coincidence it happened on both sides, or was this some kind of steering or wheel clearance kind of "mod"? I'm going with coincidence and multiple bumps where the bumper would have bounced but the metal not so much. Who knows. I pulled one out and will do the other again.

Looks like the outer edges are all bashed in too.

What do you think?
20210509_134612-jpg.webp20210509_134621-jpg.webp

I also cleaned up around the fuel tank filler, and this will need some TLC also. It's a well known rust point on this car. Mine isn't actually too bad, all things considered.


20210509_163837-jpg.webp

Still doesn't seem like much to look at which seems a bit mental, considering I have completed my 27th day of working on the car. I do feel as though I am progressing though.

It is easy to be hard on ones self when it comes to assessing progress but I don't mind if an experienced person would have gotten here in half the time. Before April 2019, I had never even used a socket on a spanner before so I don't think i'm doing too bad in the grand scheme of things lol.

Oh.. in looking at the photo here is a fun tidbit... see the black brackets all along the sill where the outer sill would sit. I took them off by drilling the rivets out.. now the inner rivet part is inside the sill and i'm not sure how I will get them out.. If they remain they will just rattle around in the car - FML.
?hash=a05458ddb042db99c6d4925ae41e022e.webp285915-0f22e608e8174ba87ea9460f4481f436.webp285929-b3afdd6c32860a75807af7af13a74211.webp
 
...and here comes the interesting part.

Just as a reminder, this is where I left off last time... It's all a bit flimsy and crap looking, so I reckon it just had to go..

20210508_130208.jpg
20210508_130210.jpg
20210508_130223.jpg


All hail the sharpie, eh!?

20210508_132538.jpg


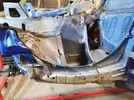
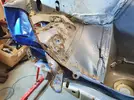
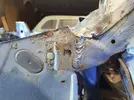
I ended up with this after much strategic grinding, cutting and wire wheeling..

20210508_165232.jpg
20210508_165237.jpg


If you look right into the centre of this photo, where the floor pan meets the front and side skins, you will see it's still a little crusty here. The collet in my dremel started acting up so I couldn't tighten a stone into it, that will get cleaned up next time..

This photo also shows that the inner most vertical skin is gone pretty thin in one or two places due to the rust. There is still the smallest amount of corrosion seeping in behind where the floor pan joins on.

I simply cannot clean this out without having to cut into the floor pan and creep upwards with a power tool to cut out more of the vertical surface? Is that worth doing?

Something really really irks me about the thought of leaving even the smallest amount of untreated (preferably cut out) rust in the car, especially an area that will be covered up by welded metal. What would you do?
20210508_165238.jpg


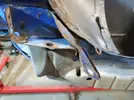
The jury is still out on these remaining outermost bits. They will remain for now, but sometimes I look at them and feel like they should go. I would probably feel a lot more comfortable with new bits welded in.

20210508_165308.jpg


Freshly cleaned metal is a sight to behold, isn't it. Until you revisit it the next day.. when it's got surface rust on it. That leads me to my next topic - my paint system. I will create a separate post for that.

20210508_165318.jpg
 
Paint system!? - I'm clueless!!

So guys..... etch primer, high build primer, epoxy primer, 1k, 2k, water based, oil based, base coat, clear coat, porous, non porous, reaction, orange peel, keyed surface, flash off, under seal, seam sealer, schultz .. the list goes on.

If you ask me about any one of these terms in isolation I can probably give you the full lowdown, or a pretty solid attempt. But when it comes to coming up with a formula I don't have the confidence to pick the best combination.

Let's start off with the bare metal. I've reached a point now where I have started cleaning metal surfaces with my knotted wire wheel and when left, surface rust re-appears.

My initial plan to prep any metal surfaces is to use:

* Grinder with knotted wire cup/wheel for most of the rust
* Bilt Hamer Deox Gel (Rust remover) and Hydrate 80 (Rust converter) to chemically remove/stunt microscopic rust.

I guess the next stage is primer, right? Any old primer? I believe epoxy primer is best as it's non porous but not really sandable or great for visible body work.

So let's brake it down into two parts - underside/wheel wells (highly exposed) and upper body work.

when I have cleaned up some bare metal what do you recommend I put on these areas? So that they can be left for up to a month before getting paint?

Thanks a lot.

EDIT: Does anybody have experience with Bilt Hamer Epoxy Master? I have heard great things about it, and BH in general. I might buy some of that to apply to the underside areas that I clean to bare metal, or general areas not visual exposed to the eye.

annotated-underside.jpg


Quick snap.. I had to pull in the SL while I went away for a few days. SL needs repair to the rear weather strip which leaks water into the boot. I hope that by dumping it here, it will force me to fix on my return.

Update: I did fix it.. further info here. A very satisfying job, if I am honest. R230 - Rear window seal repair with rust fix.
20210525_201418.jpg
 
For the rust repair I had to go shopping, ooph. An investment in some good stuff that should last a very long time if looked after. I hope.

20210612_173024.jpg


I got a welding jacket which is out of shot. I can imagine i'll likely never use it though.

...Oh and this compressor. It's 50 ltr. I made a mistake. It's already up for sale and i'm going to get a 200 ltr. Better just bite the bullet now I guess. I didn't realise the tools I would be using are some of the most demanding (die grinder, sander).

I'll take a hit of a few quid, but will put it down as a lesson to do more thorough research in future. (I was too caught up with CFM figures).

20210612_173019.jpg
 
Monday morning update on project.

I'm also too lazy to re-post this other work log, but you can read about my fixing of the rear window seal on my SL here.

Still nothing really, Clio wise. Over the past week I bought two shelving racks from Screwfix and installed them. They are amazing. I got some boxes too, to store all my bits. Sadly no photos but it's really impressive. I'm quote anxious now however as some new guys are going to be setting up beside me soon enough to do similar work.

At this point I have just about absolutely everything you need for a resto project. I hope they don't start helping themselves.

I wired up my welder to a domestic plug with 13A fuse.. seems a bit dodge but I read on here that people do that and it's fine. I'll be welding on the lower end of stuff anyway.

Is this a good wiring job? Would it pass certification? Or is there too much exposed copper around the earth pin? How would you improve? I want to wire plugs perfectly.

20210613_142955.jpg


So here is my proposed welding setup.. the trolley is the lower end of a server cabinet we discarded at home (In the previous photo, my new purchases were sat on the upper end, which also makes a great stool).

The plan is to make some mods to have the welder fit perfectly and also a floor to support the gas. I will weld tie on the gas towards the top with some rope or chain.

I was hoping to make the top a welding table type surface, but the cylinder sits too high. The only alternative is to position the gas at an angle and sticking out the front, so that I can weld the surface onto the 4 protruding supports, which is 2mm steel.

Any ideas? Or perhaps welding above my welder/regulator is just a bad idea.

20210613_150226.jpg
 
..Right lads and lassies, i'm still here and this project is still moving.

For a variety of reasons I think there was a good 6 week period there where I did very little on the car. It wasn't all wasted though. I have spent a number of days playing around with my welder and getting a feel for that..

Before proceeding, let me stress this fact. If you are removing a windscreen, as an amateur with amateur tools like I did, you will absolutely break the glass. The theory is simple, you just slice the bonding and lift it out, right!? In practice it's not simple.. it's a brute force kind of job with those tools. Perhaps if you had some piano wire you may not break the glass. I would only remove the windscreen if it is already broken. If you want to remove to get a better paint finish, you have some serious considerations (cost/time) to make.

Anyway.

I resumed this weekend (Sunday). I had planned on getting into welding the part of the shell I gutted due to rust but changed tack last minute.

In the morning I ended up picking up the windscreen removal tool (cutting blade) that a friend loaned me. I got into this big time and ended up taking out the windscreen, which took a good 4 or 5 hours to finish completely I would say. After that it was too late to rush into some welding as I wanted to give myself plenty of time. So I decided to just tidy up a bit of rust and decided doing it in a piecemeal fashion wash ok. As long as I am progressing on the car, it's all good.

I once heard a funny expression... "bar steward"... and that is exactly what the job of removing a windscreen is. I used the following tools.

First I used the blades on the left to cut the adhesive on the two vertical sides and horizontally along the top. Wasn't too.. bad but still took maybe 1 or 2 hours or pulling and gouging. I was quick to realise the bottom section was going to be extreme given the insane amount of bonding there. I don't have any photos as I was just too into it.

It was at this point I realised that a slightly broken windscreen was the same as a completely mangled unit, only would take less time to get to end result.

Basically once the three other sides were freed up, I just pulled them all forward and used the bottom section as a kind of hinge.. snapping the windscreen and pulling it off. Obviously using decent gloves.

Enter the gasket scraper and hammer. Once the main sheet was off.. I had the bead of bonding at the bottom with a bit of glass still attached. I just hammered the scraper under a bit and then was able to pull it all off in one strip.

20210704_140237.jpg


A removed windscreen.

20210704_142701.jpg


...Oh and here we go. The windscreen originally broke when I was trying to remove the rear view mirror. I pulled on it, and cracked the glass. I discovered yesterday that had I RTFM'd (if there was a manual) I would just slide the mirror up and out it would come. I would have saved about 4-5 hours and €200 in the process. Oh well.


20210704_142651.jpg


Glass out..
20210704_135248.jpg


Once the glass was out. I used a combination of the gasket scraper and sometimes hammer to clear off the bulk of the adhesive. When it was down to small amounts I used the wire wheel on the die grinder to finish it off. Then lashed on a nice helping of Zinc 182 to keep it clean while I continue on other bits.


20210704_143121.jpg


All cleaned up..

20210704_150940.jpg


Primed


20210704_151400.jpg
20210704_151411.jpg
 
It was it this point I was supposed to start welding but decided against it as I didn't want to rush.

Instead I picked the O/S front wheel wheel well and cleaned up a bit of rust with wire wheel. I then sprayed it with Zinc 182 primer to keep clean. I will paint some seam sealer on a little later. I have kind of decided not to go with epoxy primer/mastic for this build as I don't think it's warranted. Not attempting concours and it's "only a track car". I mean in reality it will be getting sent for most of it's remaining life and is won't be immaculate for long, I would say.

Some before shots..
20210704_152920.jpg
20210704_152923.jpg


..After.. (cleaned up..)
20210704_154412.jpg


20210704_154416.jpg
20210704_164834.jpg
20210704_164842.jpg
20210704_164844.jpg


.. And after (primed)
20210704_165135.jpg
20210704_165137.jpg
20210704_165502.jpg


It feels good to tackle areas of rust like this. It means that I can pick a new area to do a couple of evenings a week after work and make some solid progress in a short period of time.

Any tips on this are very welcome. I am aware my process if kind of simple. I have some etch primer, wondering should I be using that instead?

To be honest though, the Zinc 182 that is going on at this stage is just to prevent flash rust as I had some there. I'll likely rub all these surfaces again and coat with fresh primer before going to paint.
 
So guys.. interested to hear peoples thoughts on this.

I was sitting looking at spaghetti junction (wiring loom) this evening, in a clammy dormer room/office/den. It was not comfortable, and dawned on me.

A) I have no where nice to work on building a new loom that I can leave as is while in progress.
B) It's going to be a lot of work.
Oh 3 things..
C) IT'S GOING TO BE A LOT OF WORK...

Summer has dragged on, life got in the way and I did nothing on the car for about 6 weeks.

I have decided to avoid building a new loom, but to just keep what I have and tidy it up a bit. I'm thinking.

1. Keep the looms as is, but just strip them and re-dress/skin/cover them.
2. Repair any obviously broken wires/connectors etc. There are one or two in the engine loom.
3. Do some minor surgery so I still get to relocate the fuses/relays in the centre console.
4. More minor surgery to move the battery into the rear of the car, behind the passenger seat. This may not end up happening.

My thinking is that the car will be going back together fairly bare and it should be easy enough to perform wiring jobs in the future, if needed.

This will free up some time/anxiety to get the rest of it going.

What do you think?
 
Ok, so for the second weekend in a row I have been working hard at welding the rotten area back into shape.

You can review the raw damage in previous posts...

Overall, the process I decided on was to cut small fillets of steel to rebuild each skin individually and then plug and lap weld them together as I go along. some of the fillets early on had some cold welds with only minor penetration, but overall the welding is good and strong.

First two pics show my first weld on a car body panel.. ever. It was where I had over cut when cleaning up the rot.

20210710_151839.jpg


20210710_152646.jpg


Then just plug / lap weld these two skins back together. From memory, they were original split for inspection purposes.

Side note: Throughout this, you will see some coating wet (blue) and dry (black). This is Bilt Hamber Hydrate 80 rust killer/barrier.

20210710_155039.jpg
20210710_155044.jpg
20210710_155056.jpg
20210710_162706.jpg
20210710_163206.jpg
20210710_164229.jpg
20210710_180747.jpg
20210711_141558.jpg
 
Adding another fillet. Got some good penetration on this.

Arrrgh.. looking back on my photos, I have very few of me actually prepping the stuff and fitting etc, along with underside penetration. I remember it being too hard to photograph really, but you get a peek in one picture here.

Also, I made some videos of me working one of the weekend (meaning lack of photos).. thinking I would do YouTube. I really don't have the time for that. Running a video camera slows the work and my general workload is too high to be editing decent videos.

I think going forward I will continue to make videos here and there and edit them / upload in time (winter maybe).

ALSO - I had another thread querying some of my welds on one of my first fillets, here. Might be useful.

The main reason for the cold/bad welds was my 1 second spot timer use. I turned that off and kept all other settings the same and everything got much hotter.. the welds pooled/puddled a lot more and generally ended up not as high.

20210717_122229.jpg
20210717_122533.jpg
20210717_122541.jpg
20210717_140123.jpg
20210717_141610.jpg
20210717_141614.jpg


I am VERY chuffed at how this is turning out. Everything is coming together nicely. I think that by adding many smaller fillets and welding all together it is quite strong, according to others and that it certainly wouldn't be weaker than factory.
20210717_141621.jpg


See the jagged skin there. That was my biggest concern really, and wasn't sure how I would address it.

In this photo you can see where I separated it from the cabin panel, by drilling the spot welds from the inside. This allowed me to get in there with the BH Hydrate 80 to kill the rust.


20210717_151334.jpg

20210717_155952.jpg


Is it just me, or does this kind of stuff always look ugly/crap before it starts to get good again lol.


20210717_155958.jpg
 
To fix that jagged/flimsy skin, the plan was to weld in a panel from a donor car door. The plan is to weld it on the exterior so the patch won't be visible from the cabin. I would then plug weld it on the inside and tidy up along with a lap weld on the outside.....to that very thin steel, which was quite tedious and ended up a bit messy.

20210717_160558.jpg


The intention was to mark out the cutouts so that I could mimick factory. In the end it turned out ok. But, before I forget. One hole ended up covered so I just welded it up lol.

20210717_160508.jpg
20210717_161614.jpg
20210717_165132.jpg
20210717_180146.jpg
20210717_180153.jpg


Needed to really pound in some wood to keep the new sheet pressed up against old for welding.
20210717_180859.jpg
20210717_181449.jpg


I was happy with these. I'm disappointed I didn't get pics but there was really good penetration here.


20210717_181752.jpg
20210717_180913.jpg
 
The outside part of that new panel was very tedious.. I kept blowing away the light steel broken down by rust. Eventually I got there. A few gaps and holes but overall, I think it's strong.

I laid the heat on pretty thick around here.. That might have added to the panel warp, but that is largely down to the wedging technique to get flush fitment with internal panel for the plug welds. This will be hammered down and plug welded to the lower layers later on.

20210717_184136.jpg
20210717_190039.jpg


I even stacked a few pennies LMAO!!


20210717_190048.jpg


Once that was done, I used the holes from the original drilling to plug weld the seams from the inside. Again, very messy but laid on the heat pretty strong.
20210718_114917.jpg
20210718_114919.jpg


Time to tidy up....

Ground and flap disc used here..
20210718_114921.jpg


20210718_130349.jpg


Few little blemishes here and there... but "it's finnnnee" - I need to remember "it's only a track car"..


20210718_142657.jpg


I personally feel like it came up quite well.. What do you think? Still looks reasonably original.


20210718_144508.jpg
20210718_142708.jpg
 
Then I just cleared up the other side a bit.. No major needs around that as this will ultimately be covered over..

20210718_130901.jpg
20210718_130858.jpg
20210718_142610.jpg


Now.. I must say I am really pleased with how this final panel has come together.. I was really concerned about how I would go about making a decent repair of that flimsy stell.

You can see here how the panel is going to be easily formed into a nice profile. It will start off low and be plug welded.. then as it raises up it will be made available for a piece of folded steel to replicate the factory fold, which adds strength. That folded steel is thicker too, not sure what, but maybe 1.5mm :/
20210718_151202.jpg


20210718_151213.jpg
20210718_151219.jpg


That fold was given to me by one of the guys, that he got folded based on his visual memory, which was very kind! It's not ideal as is, but I am confident I can make it work. The side hanging off the bottom will need to come off..

20210718_151742.jpg


I wasn't sure how the box/folded profile was done, but by looking at the other side, I could see that it tapers in. With that in mind I only need approximately less than half of the folded length I have. I'll probably cut some slits into it to aid further folding, shaping, as it will need to be tapered on two surfaces.

20210718_145454_Annotated.jpg
20210718_151737.jpg


What do people think.

I've really enjoyed it so far. Was chatting to somebody the other day who say this and said given the complexity (not difficulty for a pro) it would take time to get it all back into shape and depending on who I got, could easily be into the €500-700 mark to get it done. That made me feel a lot better about the amount I spent on that welder lol.
 
Right.. so a quick lunchtime update from me, on the weekends work.

It basically took me all weekend to get that one piece of folded steel fitted and welded to the chassis. I was super careful about it all as I know it is somewhat structural and wanted it to fit nicely, in general.. just because.

So this is what we are dealing with here.. note the taper on the panels..

20210724_115202.jpg


I was running a bit ahead of myself but then I remembered the cardboard and all it's wonderful uses. This was a decent fit and figured if I could get the steel to fit like this i'd be doing well.

20210724_144745.jpg


Fast forward for a moment.. this is the final fit, just before welding. I don't think it turned out too bad after all..

You will notice a weld along the vertical surface. That surface was just too long really, so I cut along the middle. I had then tacked it both ends so I could mark it to cut. Then I figured, why not keep it lapped and weld both sides..it certainly can't be weaker that way..

20210724_183343.jpg
20210724_183345.jpg
20210724_183340.jpg


Next pic shows the tack welds to hold the correct fitting.

For the lap welding, one side turned out with a nice bead, then I ended up enjoying the welding on the other side too much, playing with the puddle etc. I ended up with a massive bead, but good penetration nonetheless, so it was all good.

20210724_171526.jpg
20210724_173004.jpg
20210724_173011.jpg
20210724_173020.jpg
 
Sunday... :


Decided to pepper the piece with plug welds. For that piece measuring about 150mm there are 9 plug welds coming via both sides on one surface. Surely that should be great. Admittedly, some of them didn't penetrate as good as other welds I have done. Overall, now that everything is welded up, the whole area is totally solid, based on my hammer test lol.

20210725_134003.jpg


Oh and the top surface has another 8 plug welds from the top surface only.

20210725_144942.jpg


And tacked along all the edges.

While the welding here looks incomplete, I didn't get a raw weld photo of it all complete, it did get all completely welded.

20210725_151556.jpg


Plug welds from the other side..

I felt like these were great at the time.. because I started the puddle on the underside sheet and filled in the whole. For some reason they didn't penetrate fully. Maybe the welder was a little low for that slightly thicker steel??


20210725_154431.jpg


After welding fully.. nice penetration on the cabin panel.

20210725_164522.jpg


Welds ground down.
20210725_161038.jpg


Oh, I didn't get a polished pic, but I think you can see it finished off here..


Overall, it was a bit fiddly and the welds look kind of messy. I feel the welding could have been better but I am chuffed with the fit of the steel, especially the taper on it. The taper won't be visible once the outer layer goes on but at least I will no it's smart and it was great fun to do it.

EDIT: Wow, I feel a tad sick after watching that clip.
 
Ok... so here goes another update. I've been a bit silent on here of late, as I had to travel away for about 10 days (jab #2 amongst other bits).

Anyway... I have completed the welding repair.

TLDR: My last update finished up everything bar the outer section which effectively closes the whole thing up. It was fiddily and time consuming. I made a few mistakes here and there, but it did turn out a good fit in the end (I think!). I think most of my problems arose from trying to make the entire piece as one big compound shape. There were loads of angles and I was doing great until I went to fit, when I realised it was all wrong lol. I hadn't accounted for the curved floor pan section. By the time I was have way through hammering/shaping the piece, the scored sections (for folding) gave way, and I ended up with three separate pieces. No sweat, I just welded them on individually.

This is what I started off with. I gave a shot of Zinc 182 and some rattle can black just to try and keep things somewhat sealed / tidy. There will be cavity wax later anyway.

20210731_111017.jpg


Much shaping... simple, right!? :grimace
20210731_120753.jpg


This steel I am working with here is 1.5mm and quite strong.


20210731_121637.jpg


Marked out the places I need to score with the cutting disc to help fold.

20210731_125422.jpg


It ended up not fitting all that well for a few reasons, and it was at this point I realised a single compound shape was a bit too ambitious of me. I guess my lack of folding abilities were always going to be a problem (I just didn't realise it).

20210731_150602.jpg


You can see here that I now have three pieces instead of one. The fold lines ended up breaking as I tried to form the single shape. No sweat. It was actually a relief when it happened as I knew it would make things easier. I guess I was just keep to try and do it in one.
20210731_160459.jpg


And this is what I ended up with. The logic is that I will weld up piece 1 first, then plug welds at 2, allowing me to pull the area at 3 forward and plug weld that. Then finally, I will weld up 4.

20210815_164924_Annotated.jpg
 
Plugged up nicely. I played around with the settings a bit as I felt like the weld was building up too high before the bottom piece had been penetrated. On the smart mig feature I couldn't lower the wire speed past a point, so I went to manual and played about. I'm not sure it helped or if it was a fluke or what.

20210816_191139.jpg


That's decent penetration though, right? That's not a rhetorical question. I would assume it is as you can see where the metal was partially molten.. on the other hand if it was to go much past that point, you are sailing very close to the wind with regards just burning a hole? Am I right in saying that, or could that have penetrated better? Answers on a postcard, please :)

20210816_191158.jpg


More plug welds after the break.
20210816_193459.jpg

20210816_193506.jpg


Lower plugs done, and you can see how I was successful in my logic to pull the piece forward to allow plug welding.

20210816_193931.jpg


Plugged up.. you can see how the final piece fits in too.

20210816_194346.jpg


Ready to tack in the final piece of the puzzle.
20210816_200420.jpg


Plug welds on the final piece. I don't have any pics, but if you look at previous photos there were holes (from OEM spot welds) on the floor pan. I used these wholes to do plug welds from the other side onto the final piece too.

So this is the three pieces welded in. A few brutal looking gaps there that make me wince a little, which isn't fair really. I think overall i've done a good job as this was really my first MIG project.

20210816_200922.jpg
20210816_211615.jpg
20210816_202333.jpg
 
Don't look if you are squeamish!!!

.
.
.
.
.
.
.
.
.
.
.
.
.
.
.
.

In the upcoming photo you will see where I just went total open season on the weld in an effort to just sink some weld, add some reinforcement and just generally seal things up a bit.. For the large gap in top left, I just stuck a piece of 1mm sheet in there, bent it into place and used it as something to catch the weld from the torch. Then cut the excess off with a grind. Total caveman **** there lol, but what the heck.

For the piece on the far right, the weld wouldn't penetrate/stick to the floor pan. I think that was due to some of the rust treatment I hadn't cleaned off. I thought it would burn through, but didn't. Oh well, there are plenty of plug welds in that to have it nice and strong. As I mentioned before about the plugs from the other side, the second photo below shows the three areas of penetration from the other side.. should be plenty strong?

UPDATE: A lot of the smaller welds are kinda cold looking. I The only aim for these was to try and tidy up/seal the gaps and reinforce the scored steel used for folding. They aren't structural, so it's not a concern. The structural welds are all basically plug welds which are plentiful with decent penetration as previously seen.

20210816_203307.jpg


Did some cursory grinding for the photo op. This will be primed, painted and seam sealed with some strategic seam sealer use LMAO!! Then UPOL Gravitex over that. Once it's all done, I don't think will be all too visible, so I'm easy enough on myself LMAO.

This repair is _very strong_. I can beat any area of the repair and the whole car resonates loudly whereas any of the other corners have a shallow thud in comparison. I'm not sure if that makes sense, but the repair seems very strong. This was the first time I have ever welded anything with my MIG (with the exception of some light sheet metal, to see how it actually works). Considering that, I think it's a pretty decent job really.

20210816_211554.jpg


Here is a quick video snipped of the job, which shows a brief comparison to the other side.

 
Before the weekend, I need to weld in the small square hole in the roof where the arial was and that is the main welding work done. I have also started stocktaking the various bits of running gear that I need to get cleaned up / blasted and sprayed.

Then it's tidying up the remaining rust on the bottom, painting, seam sealing and UPOL gravitex..ing the underside. Prep and pain the inside and then the outside. Simples, right!?

Also, colour update.

Originally, I wanted to go purple with black/silver wheels, similar to a Porsche 911 GT3 RS.. I was toying between that and some kind of Racing Green with gold/bronze wheels. I like the purple a bit more, but I think that purple could make the car really undesirable when it inevitably comes to sell, so green it is.

Here's a flavour of what it could look like. I will be going flat (non metallic) to keep the painting process a bit simpler.

What do people think of my thought process and the colour?

For reference, purple below..

6061925367169417240_23.jpg
FB_IMG_1614199568082.jpg
purple-porsche-gt3-rs-gold-forged-wheels-centerlock-rims-a.jpg
40147819670_02a469cf45_b.jpg
2015-553165-2015-porsche-911-gt3-rs1.jpg
download.jpg
 
Back
Top