There is more to life with TurboRenault.co.uk
You are using an out of date browser. It may not display this or other websites correctly.
You should upgrade or use an alternative browser.
You should upgrade or use an alternative browser.
Renault 11 Turbo Phase 2 Restoration
- Thread starter Big Steve - Raider
- Start date
Looking amazing.
I had a Devil exhaust on my 11T. I remember I had to drop the rear beam to get it on as there was no join in the rear section
Funny you mention exhausts… I was having a bit of a sort out in my Garage loft this evening, and found, why I believe to be 2 more exhausts!! Believe 1 to be a GTT, and one an 11 Turbo…!??
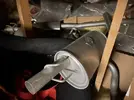
If that’s the case, I may be reviewing my choice of exhaust again for the full OE look.??
Science experiment!
So we’re all well aware of the dreaded faded black plastics & rubber seen on 1980’s cars. The common solution is lashings and lashings of back to black dressing every time you clean the car, but the weather soon washes it off and you’re left at the staring position again..
Well I’ve been giving this matter some thought recently and wondered if there was a different way to solve this problem… a little more permanently. You’re thinking paint..? Well close…
Here are two rear spoilers for my R11 Turbo, and you can see they are already two different shades of black. The top one is the one I’m going to put on my car, but I wanted to have a play with some products on the surplus one, to see if I could improve it:
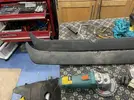
First step, was to give a small portion of the spoiler a deep clean with a grey scotchbrite pad, and some degreaser/panel wipe. That gave a dramatic improvement, after one pass!
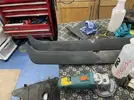
This was where I started the science experiment for real! I did a bit of research, and found that you can dye cured Polyurethane with a solvent dye.. so thanks to eBay, I got a bottle of this Solvent Wood Dye:
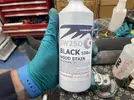
I know it’s not wood I’m dying here, but it was the Solvent Dye I needed. Next I painted on a layer with a foam brush, and spread it evenly over the section I was testing on:
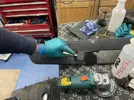
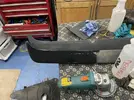
Next it was a few minutes under the garage fan heater:
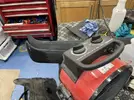
Before a final inspection to see what the results were like:
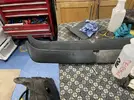
I repeated the dying process 3 times in total and the final comparison is this:
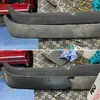
I think this could be a REAL Winner for my final choice spoiler..! Will give it a few tests over coming days to check that the dye doesn’t run off in the rain etc… but if that works, then I’m onto a winner for a brand new OE looking spoiler, without the greasy covered in back-to-black look!!
Thanks for having a gander!!
Chris Smith
Well-Known Member
Are the bumpers to far gone for something like G-Techniq C4 trim restore?
No, I’ve got a bottle of C4 trim restorer… but you know yourself it wears off.Are the bumpers to far gone for something like G-Techniq C4 trim restore?
Back in my 9 / 11 days I used to wave a heat gun over faded rubber, brought it right back to black.
This is a foam tho, different material.
Will try a strip with the heat gun, and some C4 Explosive
Found a video of the 11 at Santa Pod many years ago doing the business to get into the 14’s!!
Be chuffed if I can achieve this again after the Resto!??
Be chuffed if I can achieve this again after the Resto!??
24th February 2022, The day Russia  invaded Ukraine
Nothing stops getting Project Renault 11 Turbo back together!!
Been working on the offside of the car over the last few evenings, and tonight I finally got the bump strips on the side of the car.
Same process as the Nearside, apply the red decal onto the bump strip, then 3M Moulding tape on, then finally stick it to the car.
As I had all the fastenings on the front strip that goes onto the wing, I started there, and then worked backwards:
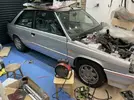
And finished at the rear quarter panel:
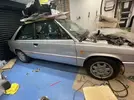
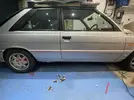
Side skirt next
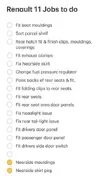
Have you got a todo list ?Main section of Nearside side skirt on this evening:
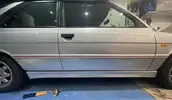
View attachment 199678
Got called in for my tea, before I could fit the torsion bar finisher bit, at the back! 🍽
Thinking this weekend should be the start of some more interior going back in!!
gordini stu
Well-Known Member
Top stuff
Duncan Grier
Well-Known Member
Great progress @Big Steve - Raider. Final big push and could be mot, taxed and on the mean streets in March 
gordini stu
Well-Known Member
Been at work this morning just poked my head in the door at my gordini, my todo list is considerably longer. Lol
Great progress @Big Steve - Raider. Final big push and could be mot, taxed and on the mean streets in March
It’s getting MOT’d on Sat 26th March mate come hell or high water
Interior Refit Begins 
Started on the drivers door this morning.
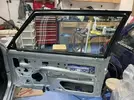
First I dug out the wing mirror, and fitted that:
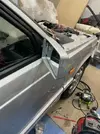
Next it was to fit the horrible sticky mastic glue:
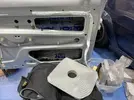
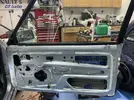
Then the rain guard I previously scraped all the old manky glue off
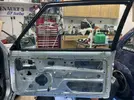
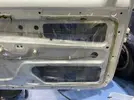
Then finally time for the door panel. Dug out all the new OE clips I ordered as the old ones were in various stages of horribleness:

Then the panel goes on:
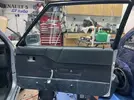
Before the door handles and door pocket! ALL DONE!
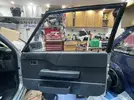
Then I moved onto the rear quarter panel, covering the Amplifier. First was the lower fabric trim:
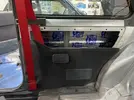
Then upper trim:

Chuffed to bits how it’s looking:
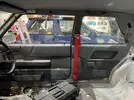
Makes me laugh how a few pictures on here make it look like 5 minutes work, but it took most of the day, groping round finding all the bits in various places, and then finagling everything To make sure everything fits absolutely spot bollock on!
Buoyed by the success on the drivers side, I moved to the passenger side rear quarter, which went on really quickly after doing the drivers side. Lower trims on first:
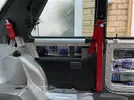
Then upper:
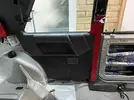
BOOOOOOOOM
Duncan Grier
Well-Known Member
Getting real now Steve, you must be buzzing!
Totally am matey, you know yourself tho Duncs, the snag list is never ending!! Bloody drivers door switch doesn’t open the passenger door window today, but the passenger door window switch works fine…Getting real now Steve, you must be buzzing!
It’s all those little things I’ll be chasing down for weeks to come I guess!!
Steve Swan
Well-Known Member
If you can swap the switches to check, that's easy, beware it may be black wire syndrome in the copper conductor that's the problem
Similar threads
- Featured
- Replies
- 74
- Views
- 2K
- Replies
- 4
- Views
- 344
- Replies
- 6
- Views
- 264
- Replies
- 2
- Views
- 256

