There is more to life with TurboRenault.co.uk
You are using an out of date browser. It may not display this or other websites correctly.
You should upgrade or use an alternative browser.
You should upgrade or use an alternative browser.
Renault 11 Turbo Phase 2 Restoration
- Thread starter Big Steve - Raider
- Start date
gordini stu
Well-Known Member
Coming along now . In my opinion you have to many other distractions taking your focus away from this , the most important project in your collection.
Very nice fleet of cars you have sir especially with the last two additions .
Very nice fleet of cars you have sir especially with the last two additions .
Following a little chivvy up from @gordini stu  I got out there this evening, and got the passenger door on:
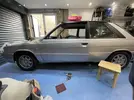
Then gave it a good going over with the FatMat sound deadening..
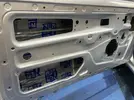
Think it would be nice to get a picture of it with my new Meggie when I get it back…

Then gave it a good going over with the FatMat sound deadening..

Think it would be nice to get a picture of it with my new Meggie when I get it back…
gordini stu
Well-Known Member
Nice to see that’s all it takes to make you crack on . With my lack of commitment to the projects I have . I need a rocket up my arse and a bloody big one .
top stuff as always .
top stuff as always .
Been out in the garage a few evenings this week and got the passenger door electric window system all back in, together with the seals:
Again super happy with how fast it moves for a dodgy old 80’s French Hatchback!!!
Again super happy with how fast it moves for a dodgy old 80’s French Hatchback!!!
Duncan Grier
Well-Known Member
Sounds and looks like an old renault window.......just much quicker 
gordini stu
Well-Known Member
You must have a 24v battery wired up ,
Working as good as new , I like it
Working as good as new , I like it
RIGHT… Let’s get back to this project and finish it off for ‘22!!
Decided I want to get the rear glass back in first, so I can then freely open the boot to finish off the interior re-fit.
Set up my carpeted table and got the rear glass laid out:
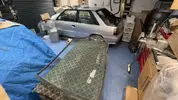
First thing was to remove the old window decals which had SERIOUSLY hardened and faded from the sunlight:
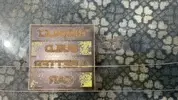
Little tickle with the heat gun, and they soon came off:
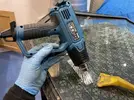
But of course there was a nice sticky mark remaining, that needed a wipe over with some solvent, to remove:
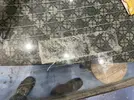
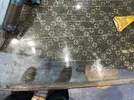
I then spent ages cleaning off a load of mastic, that someone had injected into the old window seal… evidently it must have been leaking sometime in the past, so this was the fix someone tried… I guess??
Whilst removing the mastic, I noticed there was a really thick scum-line that had accumulated along the edge of where the seal face touches the glass:
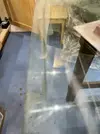
No-matter what solvent/cleaner I tried, I couldn’t shift it, so I got a bit more serious with it:

 youtube.com
Used an old metal polishing pad I had for my angle grinder, and that got it shifted!!! Actually gave the whole glass a little tickle over with this, and it came up a treat!!
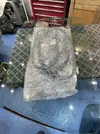
With the glass looking a lot better for itself, I pulled out the brand new old stock rear window seal I came by many years ago:
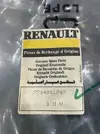
This is the part number if anyone is looking for one:
Had to give it a RIGHT wrestle, to get it onto the glass.. it certainly is a tight fit:
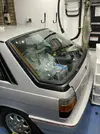
Just laid the glass back onto the car now, I think it’ll be a 2 man job to properly install it as someone will need to hold the glass, whilst someone else is pulling the Para-cord in the car.
Thanks for reading


Decided I want to get the rear glass back in first, so I can then freely open the boot to finish off the interior re-fit.
Set up my carpeted table and got the rear glass laid out:

First thing was to remove the old window decals which had SERIOUSLY hardened and faded from the sunlight:

Little tickle with the heat gun, and they soon came off:

But of course there was a nice sticky mark remaining, that needed a wipe over with some solvent, to remove:


I then spent ages cleaning off a load of mastic, that someone had injected into the old window seal… evidently it must have been leaking sometime in the past, so this was the fix someone tried… I guess??
Whilst removing the mastic, I noticed there was a really thick scum-line that had accumulated along the edge of where the seal face touches the glass:

No-matter what solvent/cleaner I tried, I couldn’t shift it, so I got a bit more serious with it:

Cleaning scum-line from glass
With the glass looking a lot better for itself, I pulled out the brand new old stock rear window seal I came by many years ago:

This is the part number if anyone is looking for one:

Had to give it a RIGHT wrestle, to get it onto the glass.. it certainly is a tight fit:

Just laid the glass back onto the car now, I think it’ll be a 2 man job to properly install it as someone will need to hold the glass, whilst someone else is pulling the Para-cord in the car.
Thanks for reading
clarky_gtt
Well-Known Member
Looking great. Took me the best part of 30 seconds to fit my 5 glass with another pair of hands 
gordini stu
Well-Known Member
Looking so tidy , rear screens are tricky from memory. Definitely a two man job .
Can’t stop this boy now!!! Went out to the garage again this morning with a view to trying to fit the rear glass, after about 10 mins of studying it, I realised it was never going to happen alone… so sacked it off and looked what else I could do..
Thought I would have a go at fitting the bump strips along the side of the car. It was a job I’d not really wanted to do, as the mouldings were a bit wavy, and I was concerned how good a job I could make of putting them on, because a couple of clips/fastenings had also got broken during the disassembly….
First to try was the N/S rear qtr moulding:
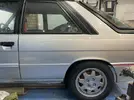
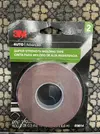
Bought some PROPER 3M Moulding tape all the way from the good old for this job:
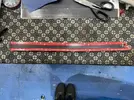
Gave the back of the moulding a good scrub/degrease and then applied the moulding tape as close to the edges as I dare, without going over the edge:
I then gave the side of the car, a clean/degrease and took a deep breath, before sticking it on:
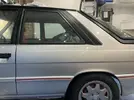
WOW!!! That went well, and was easier than I’d imagined!!!
Buoyed by that, I got stuck into the N/S Door moulding:
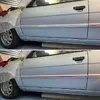
And then stuck the small moulding onto the N/S Wing as well:
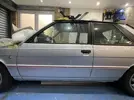
MEGA Chuffed with the results, and can say that this proper 3M Moulding Tape is the DON!! Helped straighten out the wavy moulding so it looks super straight on the car now!!
With all this positivity, I dug out the main side-skirt moulding, and offered it up to see how it looked…
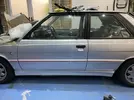
BLOODY AWESOME is how it looks!!!

 need to get thinking cap on as to how I’m going to fix it onto the new front wing, that doesn’t have the little metal tang welded on from the factory… but I think I’ve found a way with a Rivnut and a modified grub screw…
Thanks for joining me on this ride!!
Thought I would have a go at fitting the bump strips along the side of the car. It was a job I’d not really wanted to do, as the mouldings were a bit wavy, and I was concerned how good a job I could make of putting them on, because a couple of clips/fastenings had also got broken during the disassembly….
First to try was the N/S rear qtr moulding:

Bought some PROPER 3M Moulding tape all the way from the good old

Gave the back of the moulding a good scrub/degrease and then applied the moulding tape as close to the edges as I dare, without going over the edge:

I then gave the side of the car, a clean/degrease and took a deep breath, before sticking it on:

WOW!!! That went well, and was easier than I’d imagined!!!
Buoyed by that, I got stuck into the N/S Door moulding:

And then stuck the small moulding onto the N/S Wing as well:

MEGA Chuffed with the results, and can say that this proper 3M Moulding Tape is the DON!! Helped straighten out the wavy moulding so it looks super straight on the car now!!
With all this positivity, I dug out the main side-skirt moulding, and offered it up to see how it looked…

BLOODY AWESOME is how it looks!!!
Thanks for joining me on this ride!!
OE was basically what I’ve done, but they had a few more clips on some of the mouldings that have unfortunately broken off to fix their positions faster/easier during mass production. I’ve had to just use the adhesive on a couple of bitsWhat was the OE method for mounting? This stuff looks the business!
gordini stu
Well-Known Member
Now proper jealous . Looks the part now .
They do the stepped rivets . I think auxal do them .
On the rear screen , I almost sure you have to disconnect the tail gate struts till the glass is in , They distort the gate slightly , and the glass comes out the rubber when you string it in .
They do the stepped rivets . I think auxal do them .
On the rear screen , I almost sure you have to disconnect the tail gate struts till the glass is in , They distort the gate slightly , and the glass comes out the rubber when you string it in .
clarky_gtt
Well-Known Member
i echo this, every time i plan to do something aloneCan’t stop this boy now!!! Went out to the garage again this morning with a view to trying to fit the rear glass, after about 10 mins of studying it, I realised it was never going to happen alone… so sacked it off and looked what else I could do..
it's looking great
Necessity is the mother of invention!
Today’s job was to finish off the Nearside of the car by fitting the side skirt.
The skirt is held on by some little ‘tangs’ that are welded onto the sills and held by a metal clip on the side skirt, that bite onto those ‘tangs’. My problem was, there were no ‘tangs’ on the new wings I fitted to the car, so I was scratching my head as to what I could do to fix that..?
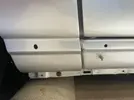
I was thinking that I could perhaps stick the front of the side-skirt onto the car with some of that 3M moulding tape, but after looking at the skirt, there wasn’t enough “meat” there to stick it on… so what can I do???
After a LOT of head scratching, I thought I would give a riv-nut a try, so bought a set complete with the setting tool.
After some thorough measurement, I whipped the wing off, and drilled a hole in the bottom of the wing:
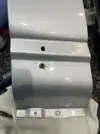
Then I installed the riv-nut in reverse into the wing, so the threaded portion was sticking out, towards the side skirt:
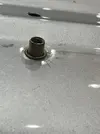
I was hoping that the riv-nut would be sticking out enough for the side skirt to bite onto it, but after it was compressed, it wasn’t long enough for the side skirt to reach…
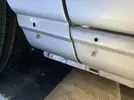
Balls!!! What now…???
This is where I came up with a sterling idea.. what if…..???
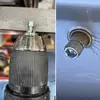
Yes, I got an M5 Allen Cap Head bolt, and ground the head down on the face of a file held in my vice with my drill (aka Pikey Lathe) until the diameter was small enough to match the shank diameter of the riv-nut. When I got the right diameter, I screwed it into the riv-nut with a bit of thread lock to hold it.
CHUFFED AS F**K with myself for thinking of that!!
So the side skirt was then ready to fit, but then I remembered, I needed to add the rubber seal to the top edge, before I fitted it. After a bit of groping around, I dug out the collection of old seals I had.
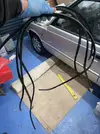
After a bit of scrubbing, scraping, polishing and swearing, I found the best one to use for the Nearside and fitted it to the side skirt, then bobbed the skirt onto the car:
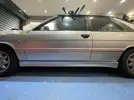
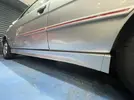
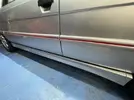
Absolutely delighted with the final result, everything fits nice and tight as Renault intended.
Even the little side-skirt end-cap (That covers the torsion bar) fits up nicely, with its black TORX fastening:
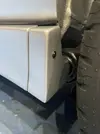
Thanks for having a read!
Duncan Grier
Well-Known Member
What @andybond said
Had the horror of dealing with aftermath on plastic cars...no fun
Great update @Big Steve - Raider love the thinking on your feet approach
Had the horror of dealing with aftermath on plastic cars...no fun
Great update @Big Steve - Raider love the thinking on your feet approach
Last edited:
Whilst I appreciate that your 11T is not going to see much salt. Have you taken any preventative measures to stop the rivnut and surrounding area oxidising in the air?
Yes I primer’d the area as soon as I drilled the hole.
Similar threads
- Featured
- Replies
- 86
- Views
- 2K
- Replies
- 4
- Views
- 363
- Replies
- 6
- Views
- 270
- Replies
- 2
- Views
- 265
