There is more to life with TurboRenault.co.uk

Register a free account today to become a member! Once signed in, you'll be able to participate on this site by adding your own topics and posts, as well as connect with other members through your own private inbox!

Renault 11 Turbo Phase 2 Restoration

I've been doing some research on the old interweb (little Gas Monkey Garage reference :grin.gif:) about what products to use on the car and found out that a Monthly Classic Car Magazine have done a 3 year test on anti-rust paint (and cavity wax) and the results are now in!
I managed to download a copy of the report to share with you as it makes for interesting reading, as one of the products that I've always been a fan of and actually used on my Raider (POR-15) came LAST in the test!! o_O:
View attachment 4055

View attachment 4054
View attachment 4052
View attachment 4053
You can see that the winner of the test for the external coating was RustBuster Epoxy Mastic 121 and is one of the products sold in the UK on the RUSTBUSTER website.
I read the information on the website and realised that they're not a million miles away from Peterborough (in Spalding) so again I thought I would have a ride over there and have a chat with the guy face to face:
View attachment 4051
I ended up walking away with a Chassis Pack of the Epoxy 121 in Aluminium Colour to hopefully match in with the final Silver colour the car will be painted in:
View attachment 4058
So now I've got the stuff to make a start on the underside of the car, I had half a day in the garage today and got stuck in! As I'd mentioned before I found a few bits that were a bit scabby following the sheep dip:
View attachment 4060
Ian (the guy at RustBuster) recommended that I used a wire brush to remove the loose paint and rust from the scabby areas, then over paint them directly with the Epoxy 121. He also recommended to paint all the seams and metal edges in the Epoxy 121 BEFORE I seam sealed them to ensure that there was no rust allowed to grow under the seam sealer.
I decided to split the car down into smaller sections to work on, rather than tackling it all in one fell swoop, so this was today's section to work on:
View attachment 4059
I used a selection of wire wheels in a drill to clean up all the area's and also had to scrape a few points with a screwdriver. The Epoxy 121 comes in 2 parts, and you have to mix them 1:1. I bought myself a load of mixing cups and small disposable brushes to make this job easier. I mixed just 120ml (60ml of both parts) of the 121 to take my first steps with this product:
View attachment 4057
The 121 went on quite well. It came with some thinners, but I didn't feel the need to thin it down. Here you can see I painted all of the seams & scabby bits I'd rubbed down. The plan is to then clean and paint the other sections of the underside of the car with the 121, and then I'm looking to spray the whole lot for the final finish.
View attachment 4063
Thanks for reading ;)
Just consulting my bible for the next steps!!! :) Thanks @Big Steve Anything you would have done differently, or alternative product?
 
Just consulting my bible for the next steps!!! :) Thanks @Big Steve Anything you would have done differently, or alternative product?
So far no, what I’ve done with that stuff from Rustbuster seems to have stopped it going any further.

I am planning on giving my new Megane 4rs that’s due sometime soon (whenever Renault can get it on a bloody ship and over to the UK 🙄) a spray with Lanoguard to stop any of that ‘orrible brown stuff before it starts. Might give it a spray under the 11 depending on what colour it comes out..?
 
Great half day on the 11 today. Even though it’s not warm outside, just the fact there’s a little spring sunshine about gets those motivational juices flowing...!!

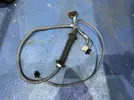
Started the day with the intention of going thru the drivers door wiring loom I had. As it was OE, it had the connection for the door lock included:
8A3B85E1-F5A1-466C-B848-E2A08B92F160.jpeg
well since I de-locked the doors when I got the car painted:
571040BF-EB89-4F34-9189-D03BDC00F6F6.jpeg
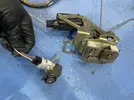
I don’t need the door lock switch connection as there’s nothing for it to plug into, and if I just left it, you know it was going to rattle like hell... so I took it out of the loom, and also re-dressed the loom:
050C4C8D-B427-4282-97B3-11CC1E534B5B.jpeg
With the door loom back in, I got up my OE Stash Garage loft and started to pull out a few goodies.

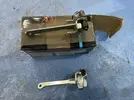
New door stays installed:
DD5BC2BE-262D-4E2F-A762-D2167C34AF34.jpeg
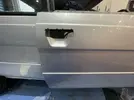
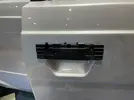
New door handles installed
E3583346-7C7F-41C7-88B1-9235162A7311.jpeg
270138F6-1FDD-44CC-AE52-341690D5B667.jpeg
I’ve left the trims off until the car is finished.

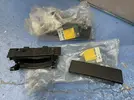
New door latches:
91F4B418-5FD1-43F9-91CC-F9ABF621BFBC.jpeg
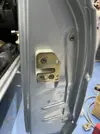
New strikers:
00EC4921-2C8A-4DA4-ABE3-6C1995A3CE97.jpeg

So with all that fitted, it was finally time to see how the door closes...
E55382BC-4DC8-4879-B94C-12361F8BE663.jpeg
Chuffed with how it looks and lines up fairly well!!
B760BBC7-A94E-4DC7-96AC-FDFDE71542B7.jpeg
138D2643-45E0-4F4B-A8A5-6C481D15284B.jpegThe door panel rear gap is a little wide, but I can fiddle with those gaps when I get everything else mounted:
CABA2C4A-0700-4F87-A2BA-CFC9FA1FFF9D.jpeg

Thanks for visiting my little 66 page thread 🧵
 
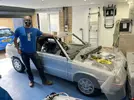
Have to say while I am used to the great level of detail and high standards @Big Steve - Raider works - well reflected in his raider, which btw still look great.....

.....however the 11T is on another level and while hard to believe looks even better in the flesh!!! Never seen a car so clean underneath and engine bay insane ;)

Also great to have a brief catchup, been too long. And most happy with my smash and grab of the OE treasure 'attic'
 
Rain stops outside play today... so I thought I would have an hour or two on the 11 Turbo this morning.

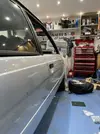
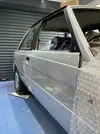
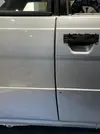
Finished setting the door latch - for now. Got the door closing nicely, but then saw that the body lines don’t quite line up well, unless the door is pushed down a little.. think when I put all the trim and glass into it, it will feel a lot better with itself..

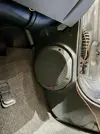
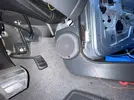
Once I finished that, I fitted the drivers side front speaker into the body, together with its Custom Rockford Fosgate front cover. Chuffed with how it looks:
C747A4B6-27E6-4182-8651-2E498CA4C640.webp
54EE6A1B-DC84-4D5F-8A40-D6B44D95809E.webp

Thanks for your patience...
 
Tbf the last big set up I had, I had to get rid off as the sub was causing issues with my eye/headache long after getting out of the car.

But I am tempted with a subtle head unit change, small underseat sub (in the van and 5), change of speakers all-round... May even replicate the shelf in the 5 to make a little stealth shelf and fit a 2nd headunit in the glove box or under a seat...with blue tooth/modern phone/stereo hook ups, you don't actually need access to the stereo.. can leave the original head unit in location and still use it if needed...

Where the 5 hasn't been used for a while I am itching to do something to it.
 
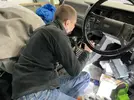
Had a couple of hours in the garage this afternoon with old @jas_racing and we decided to finish off the ICE System installation as there wasn’t that much more that needed doing:
D2AB5954-7F2B-4D58-AF1C-64A712082CFA.jpeg
Just a mix of hands to get all of the remaining Ariel, microphone and signal wires ran:
A67E696D-3E6A-4EEF-8155-2885DE36202F.jpeg
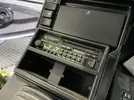
Soon had everything connected, and life in the components:
3737756C-2E71-406A-B706-0A0253A150CE.jpeg
D40C3555-68A3-4D2B-83D0-C69B05DDBB9C.jpeg
And we soon had some tunes coming out:


Thanks for reading 📖
 
Last edited:
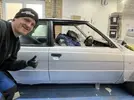
Fitted the electric window regulator to the drivers side door, together with the glass and rubber seals. Gave all the window seals a thorough scrub over with a red scotchbrite pad to remove the detritus and blooming on the rubber. They all came up really nice!

Pleased with how the window went back in, and everything’s working as it should.

@jas_racing was right, in saying that when the door furniture was fitted, the door will close better... sure enough, the door now closes really nicely with an 80’s “thunk

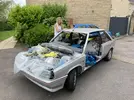
Now the drivers door was finished, I roped in my little sausage @Millie_Bee to help me push the car outside and turn it round:
3190E0D8-F5F5-402B-BE96-CBF0282B3C54.jpeg
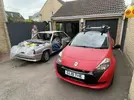
Couldn’t resist to get a pic of the 11 and my Clio Raider side by side on its way back in:
5DCF6F81-82C7-4205-8ED0-E3AF676F38D7.jpeg
Now she’s all safely ensconced back in the garage, and I can get cracking on the passenger side door:
36E01764-FC63-4595-93C4-6802B528D1BC.jpeg
EB475B1F-77AE-4007-BA64-C3206BAEDA16.jpeg
Thanks for reading 📖
 
Back
Top