There is more to life with TurboRenault.co.uk

Register a free account today to become a member! Once signed in, you'll be able to participate on this site by adding your own topics and posts, as well as connect with other members through your own private inbox!

Renault 11 Turbo Phase 2 Restoration

Good afternoon in the garage today... Made a concerted effort to try and get all of the hoses back in the engine bay (Carb Overflow pipe & Boost) together with the Intercooler:

View attachment 147469
View attachment 147470
View attachment 147471
View attachment 147472
View attachment 147473

I then realised that the O/S/F corner of the engine bay was (relatively) complete, so I thought I would have a go at fitting one of the headlights. Dug a box out of the secret stash:
View attachment 147474
And then chuckled when I looked at what date it was delivered.... FFS! 😳
View attachment 147476

Headlight fitted - AND IT ONLY BLOODY WORKS!!!!!!!!!!! :clapping.gif::
View attachment 147478
Then I fitted the indicator:
View attachment 147477

Thanks for reading :)
foooookin hell, that engine bay looks amazing :grin.gif: cracking job Steve
 
I'm hoping I'll get the headliner back in the 11 Turbo this Bank Holiday Weekend!!
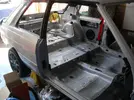
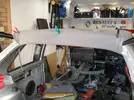
True to my word, I got the bit between my teeth today, and tried to get the head-lining back into the 11. First job was to clear out the inside of the 11 so I could climb around inside:
SAM_0828.jpg
I then dug out a pair of brand new sunvisors I'd picked up YEARS ago:
SAM_0830.jpg
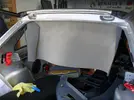
I then laid out the roof-lining and after taking one of my special SUPER brave pills, I got the adhesive flowing:
ezgif.com-optimize.gif
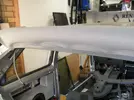
You can see that I ran out of adhesive on the final run across the headliner :ireful2.gif: but of course, I couldn't do anything about it.. so with the help of @Millie_Bee, we transferred the roof-liner into the car. I then fastened the front of the liner to the roof with the sun-visors - Now you see why I mentioned them above!! ;)
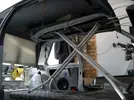
With the front of the roof-liner fixed up, we then pushed the adhesive against the roof, and held it all in-place with the trusty old Ironing board, and some foam:
SAM_0834.jpg
SAM_0835.jpg
SO DID IT TURN OUT OK??? I'll tell you when I remove the ironing board... I'm leaving it as-is for 24 hours, to give it the best chance of sticking.. (Fingers Crossed!!)

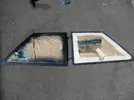
With the head-lining hurdle finally jumped, I then dug out the bag containing the rear 1/4 windows, and seals. I have 2x sets of rear windows, one from my car, and one from the Red 11 Turbo I broke. I was looking which was the best ones to use, and then saw that one pair of windows, had been etched with a Registration number that was from a completely different car...?! So it made it very easy for me to pick the right ones I would use. Problem with the chosen windows was the black plastic frames, had all faded, and were actually covered in silver spray, from a janky spray job that the car had some time ago:
SAM_0837.jpg
No end of G-Tecniq was going to make these black, so it was a job for paint. First task was to mask the windows:
SAM_0838.jpg
Then a couple of coats of Plastic paint:
SAM_0839.jpg
Which brought them out lovely & black, compared to the original finish:
SAM_0840.jpg
Next I cleaned the window seals up, and fitted them to the car:
SAM_0842.jpg
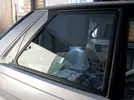
Then offered the window up:
SAM_0847.jpg
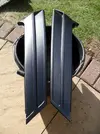
WOW! Looks great!! But i'm missing the trim?? So out with the paint again:
SAM_0848.jpg
And then fitted the rear 1/4 trims to the car:
SAM_0851.jpg
Chuffed to bits how it looks, and that things are progressing again once more!!

Thanks for reading :cool:
 
Another little job ticked off the list tonight, got the original “Plip” housing re-fitted to the headlining.
The rear retaining clip broke when I removed it from the car, so I knew I would have to come up with something to re-fix it to the car.
AA371826-8DDB-4961-A497-55F80D9F575E.webp
Not going anywhere now..

Thanks for reading 😎
 
Had a Wheely good couple of days :grin.gif: on the 11 Turbo..

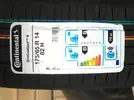
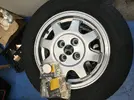
New Conti tyres arrived. Went for Continental’s as they’re the newest design of tread pattern that’s available on this old odd wheel size:
5885CD54-3236-4BDD-99D8-4F5C3E2F3B19.webp
6DAAC959-A61A-4B50-8ABA-61FA0E8599B3.webp
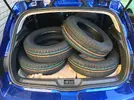
Got them loaded up into the back of the Meggy:
D963F720-BBF5-43FA-AAE2-2D7FE6DECC7E.webp
Then before you know it, they were on!
B9DCD7B9-7CA5-40A8-8F6E-DA5877D0AE06.webp
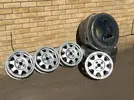
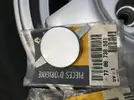
Dug out my NEW OE wheel centres that I found some years back:
7790CBDA-7B39-4ED5-B246-C0AFECF05BFB.webp
Then they were on the car!!
61096924-41ED-48DC-96B6-6DC962F4E493.webpShe looks very nearly complete in this photo..

Thanks for reading 😎
 
Looking good and sure newer rubber compound can only be a good thing!

Check front spacing to keep in check with new 16v wider rear beam setup ;)

Of course you could space rear out more but I would add the extra to the front to compensate as a starting point for oem handling characteristics
 
My mistake didn’t realise you had the 19 axle in the back . I put a 12 mm spacer on mine with VW wheel bolts if my memory is correct . It’s not the arch that didn’t look write it was the back edge of the skirt that bothered me I think .
It was easy for me back then , engineering company next door to make what was needed .
 
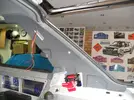
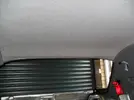
Needed to finish off the rear of the head liner. When I had it recovered, I'd asked the trimmer to leave 30cm of material spare so I could wrap it around the back of the roof, to cover any gaps that were left from using the Renault 9 headlining board:
SAM_0859.JPG
I pulled the excess material tight and secured it with a couple of clips/clothes pegs :D
SAM_0860.JPG
Then fitted the original trim piece to secure the material:
SAM_0861.JPG
Next was to fit the rear quarter mouldings to ensure everything is held in place and looking good:
SAM_0866.JPG
Then I trimmed off the excess material. Very pleased with how it's turned out:
SAM_0868.JPG
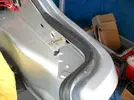
I then fitted a new boot seal:
SAM_0865.JPG
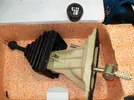
Now the Interior is clear to go back in, I started with the gearshift, and handbrake. I re-built a gearshift assembly some time ago and put it away in my "stores", so I dug it out, together with my brand new OE 11 Turbo Leather gear knob that I found many years ago:
SAM_0872.JPG
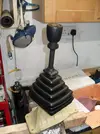
Liberal use of big feck off hammer, soon had it thrashed onto the gearlever:
SAM_0873.JPG
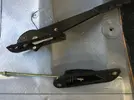
I then assembled the handbrake:
D767BA46-E074-45E2-B432-2BF8B3E81B1B.jpeg
The it was a case of installation:
ezgif.com-optimize.gif
Now the handbrake is in, I can get the handbrake cables finally fitted, and the final piece of heat-shielding to go on, underneath.

Thanks for reading :)
 
Back
Top