There is more to life with TurboRenault.co.uk
You are using an out of date browser. It may not display this or other websites correctly.
You should upgrade or use an alternative browser.
You should upgrade or use an alternative browser.
5 GT Turbo R5 GT Turbo - Complete strip down and re-build #1
- Thread starter Chris74#
- Start date
-
- Tags
- gt turbo r5 gt turbo turbo
Duncan Grier
Well-Known Member
Stock fronts I assume?
Chris74#
Well-Known Member
I’m after the rear discs, I put Brembo max on the front!Stock fronts I assume?
Chris74#
Well-Known Member
So, couldn't wait any longer for the painter to post my pedal and strut brace back, so I drove to Nantwich to collect them on Sunday morning! Got home and set about reassembling the pedal box!
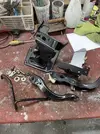

I then fixed the pedal box to the car and fitted the servo and master cylinder to that!
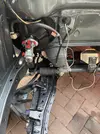
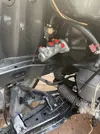
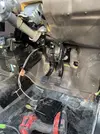
Cleaned up the rubber pads and fitted those too! Happy bunny!
This morning I got out there and fitted the new clutch and accelerator cable, also fitted the choke cable and ran the rear washer pipe though the bulkhead to the back of the car, after searching for the grommet for an hour!!
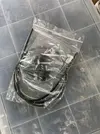
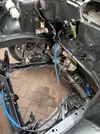
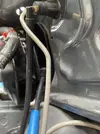
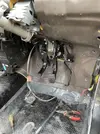
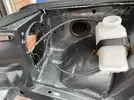
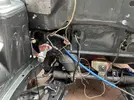
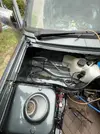
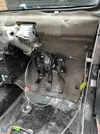
Finally think i'm ready for the dash!
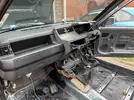
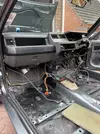
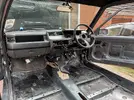
Fitted the column stalks and pissed about trying to re-route some of the cables as they were in the wrong place. Also decided to take the two small pieces of heater duct off to help me get the dash in, wish I'd left them on, I had a right game getting them in afterwards, got there in the end after much cursing! I also started to fit the heater controller, I should have connected the cables to the controller rather than the heater box, what a bast**d!! anyway my head fell off at this point so I put the car back in the garage and went into the house to sulk!! On reflection, major milestone hit today!

Thanks for reading guys!


I then fixed the pedal box to the car and fitted the servo and master cylinder to that!


Cleaned up the rubber pads and fitted those too! Happy bunny!
This morning I got out there and fitted the new clutch and accelerator cable, also fitted the choke cable and ran the rear washer pipe though the bulkhead to the back of the car, after searching for the grommet for an hour!!


Finally think i'm ready for the dash!


Fitted the column stalks and pissed about trying to re-route some of the cables as they were in the wrong place. Also decided to take the two small pieces of heater duct off to help me get the dash in, wish I'd left them on, I had a right game getting them in afterwards, got there in the end after much cursing! I also started to fit the heater controller, I should have connected the cables to the controller rather than the heater box, what a bast**d!! anyway my head fell off at this point so I put the car back in the garage and went into the house to sulk!! On reflection, major milestone hit today!

Thanks for reading guys!
Duncan Grier
Well-Known Member
Looks great 
Chris74#
Well-Known Member
Yeah, that "Major Milestone" comment didn't last very long, somehow in between testing the heater on the bench everything functioned as it should, to getting the dash in, the baffles in the heater box managed to jam up! It has taken me 3 weeks to face the reality that I need to remove the dash again! the one thing i wanted to avoid. I got out there yesterday morning for a couple of hours and got on with the inevitable! I did take my time and managed to get the dash out of the car without destroying it!
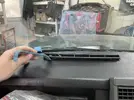
Left dashboard clip!
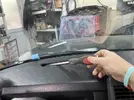
Centre Dashboard clip
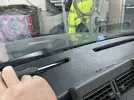
Right Dashboard clip

Lower Clips left & Right
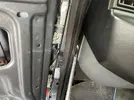
Unplugged everything again and removed the torx screws beneath the ashtray!
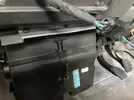
Also removed the choke cable
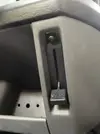
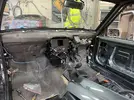
Dash out!
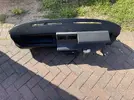
Feeling quite happy with my victory, I decided that I would stay and play a little longer and removed the heater box and got it on the bench!
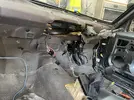

I split the heater box and connected the controller to it, I then spent 30 mins trying to work out the position of the baffles! Anyone that has split one of these will know that this is a world class pain in the arse!
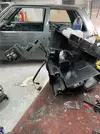
Whilst doing this I thought it might be helpful (for others) to get some pictures on the baffle positions at different settings on the controller dials!
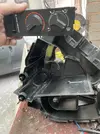
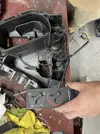
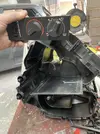
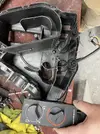
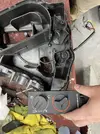

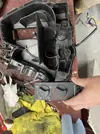
I then had to metal staple the box back together as the clips are slightly worn due to the repeated opening up!
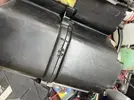
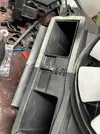
Also when I took the box out I realised I had left the little insulation cover off, so put this back on!
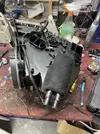
Heater box is now ready to go back in, I am leaving the controller attached this time!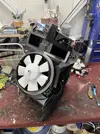
Thanks for reading guys!!

Left dashboard clip!

Centre Dashboard clip

Right Dashboard clip

Lower Clips left & Right

Unplugged everything again and removed the torx screws beneath the ashtray!

Also removed the choke cable

Dash out!


Feeling quite happy with my victory, I decided that I would stay and play a little longer and removed the heater box and got it on the bench!


I split the heater box and connected the controller to it, I then spent 30 mins trying to work out the position of the baffles! Anyone that has split one of these will know that this is a world class pain in the arse!

Whilst doing this I thought it might be helpful (for others) to get some pictures on the baffle positions at different settings on the controller dials!


I then had to metal staple the box back together as the clips are slightly worn due to the repeated opening up!


Also when I took the box out I realised I had left the little insulation cover off, so put this back on!

Heater box is now ready to go back in, I am leaving the controller attached this time!

Thanks for reading guys!!
Brigsy
Media Mogul. Instagram legend.
The heater flaps are a pain in the arse. Im sure they have marks or pointers on the cogs or whatever, i only found that out after mucho fuck about through trial and error rebuilding one.
Has your Extra van gone yet? If your chopping it up might be interested in a couple of cuts off the shell.
Has your Extra van gone yet? If your chopping it up might be interested in a couple of cuts off the shell.
Chris74#
Well-Known Member
Hey @Brigsy there is someone apparently coming to collect on Sat, if they don’t show I’ll cut off whatever you need a scrap the rest of it off! Question- is the rear beam on the extra van the same as the GTT, I had a look and it has twin torsion bars and looks remarkably similar!The heater flaps are a pain in the arse. Im sure they have marks or pointers on the cogs or whatever, i only found that out after mucho fuck about through trial and error rebuilding one.
Has your Extra van gone yet? If your chopping it up might be interested in a couple of cuts off the shell.
Chris74#
Well-Known Member
Oh yeah, the mess about with the heater box and the fact I had to remove the dash really knocked it out of me! Now it’s done though I’m hoping to find my enthusiasm again and crack on. I’d like to have it ready next summer!!!!Well that looks like a royal pain in the arse mate!
Brigsy
Media Mogul. Instagram legend.
Spot on, let me know if it falls through. Extra van rear beam is pretty much the same as gtt with drums, and larger stronger torsion bars.Hey @Brigsy there is someone apparently coming to collect on Sat, if they don’t show I’ll cut off whatever you need a scrap the rest of it off! Question- is the rear beam on the extra van the same as the GTT, I had a look and it has twin torsion bars and looks remarkably similar!
clarky_gtt
Well-Known Member
had my dash out more times than i remember
fortunately, i don't fit screens back in resto's until they're finished. Makes those top clips and life so much easier
fortunately, i don't fit screens back in resto's until they're finished. Makes those top clips and life so much easier
Chris74#
Well-Known Member
So, trying to get some momentum back into this bloody thing! I got out there yesterday morning and got the heater box and dash back in - without breaking anything!  It took some time, but I am almost glad it came out as putting it back this time, it seemed to go in and fit better, leaving the heater control unit attached was definitely the way to go!
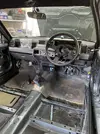
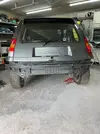
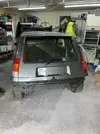
Once this was back in, I decided that it is finally time to start fitting the brakes. I jacked the car up, got the rear drivers-side wheel off and then the bumper. I need to re-fit the petrol cap and rubber filler spout surround first!
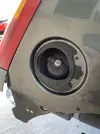
I battled with the rubber spout and petrol cap for a couple of hours before getting it to sit right! It took me a long time to realise that the bolts in the petrol cap had actually snapped off! So fitting that will have to wait until I can get some stainless steel M5 nuts and bolts!
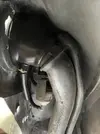
Today I got up and headed out to pick up some stainless bolts. I got back and started to piss about with the fuel filler cap! Whilst messing about, my butter fingers struck again and I dropped the bloody thing, and chipped the paint off the top!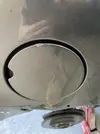
I am such a nob!!
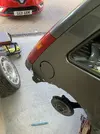
Disappointing to say the least!
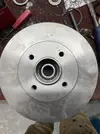
Anyway, I didn't dwell on it too long and started digging out the shiny new bits for the brakes! First I had to press the new bearings into the new rear discs - I started by getting the old bearings out of the old discs just to see how they all go together (never done this before)!
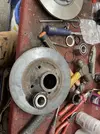
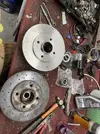
I then watched a Youtube video on pressing in wheel bearings and got straight on it! I used the old bearing to push the new one in.
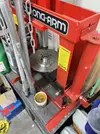
After a few minutes I had got the bearing in without making shite of it! Happy days!
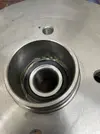
I then dropped the snap clip in!
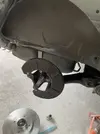
I gave the rear dust guard a wipe over and fitted the disc!
I then dug the new calipers out!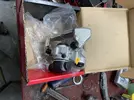
After a few minutes working out which one I needed, I then realised that the fixings for these are re-plated, in the loft! After another 30 mins looking I finally emerged from the loft victorious! and got the calliper on!
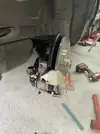
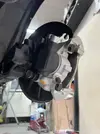

Then slotted the new Brembo pads in there. Do I need to fit the anti-rattle clips off the original pads as these have anti-rattle plates on them already and the original clips don't seem to fit with the pads??
I then decided to get one of the original restored wheels down out of the loft, with Uniroyals on!! Probably no good for the road (due to age) but would be OK for shows???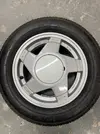
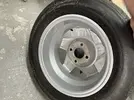
I then fitted the new rear damper and fitted the wheel!
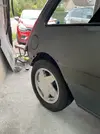
Thats all till next time!! Thanks for reading guys!

Once this was back in, I decided that it is finally time to start fitting the brakes. I jacked the car up, got the rear drivers-side wheel off and then the bumper. I need to re-fit the petrol cap and rubber filler spout surround first!


I battled with the rubber spout and petrol cap for a couple of hours before getting it to sit right! It took me a long time to realise that the bolts in the petrol cap had actually snapped off! So fitting that will have to wait until I can get some stainless steel M5 nuts and bolts!


Today I got up and headed out to pick up some stainless bolts. I got back and started to piss about with the fuel filler cap! Whilst messing about, my butter fingers struck again and I dropped the bloody thing, and chipped the paint off the top!

I am such a nob!!

Disappointing to say the least!
Anyway, I didn't dwell on it too long and started digging out the shiny new bits for the brakes! First I had to press the new bearings into the new rear discs - I started by getting the old bearings out of the old discs just to see how they all go together (never done this before)!


I then watched a Youtube video on pressing in wheel bearings and got straight on it! I used the old bearing to push the new one in.

After a few minutes I had got the bearing in without making shite of it! Happy days!

I then dropped the snap clip in!

I gave the rear dust guard a wipe over and fitted the disc!

I then dug the new calipers out!

After a few minutes working out which one I needed, I then realised that the fixings for these are re-plated, in the loft! After another 30 mins looking I finally emerged from the loft victorious! and got the calliper on!


Then slotted the new Brembo pads in there. Do I need to fit the anti-rattle clips off the original pads as these have anti-rattle plates on them already and the original clips don't seem to fit with the pads??
I then decided to get one of the original restored wheels down out of the loft, with Uniroyals on!! Probably no good for the road (due to age) but would be OK for shows???


I then fitted the new rear damper and fitted the wheel!

Thats all till next time!! Thanks for reading guys!
Last edited:
Chris74#
Well-Known Member
So, big thank you to @Duncan Grier for spotting that I have used the wrong calliper and have the handbrake on the top!So, trying to get some momentum back into this bloody thing! I got out there yesterday morning and got the heater box and dash back in - without breaking anything!It took some time, but I am almost glad it came out as putting it back this time, it seemed to go in and fit better, leaving the heater control unit attached was definitely the way to go!View attachment 207678
Once this was back in, I decided that it is finally time to start fitting the brakes. I jacked the car up, got the rear drivers-side wheel off and then the bumper. I need to re-fit the petrol cap and rubber filler spout surround first!
View attachment 207679
View attachment 207680
I battled with the rubber spout and petrol cap for a couple of hours before getting it to sit right! It took me a long time to realise that the bolts in the petrol cap had actually snapped off! So fitting that will have to wait until I can get some stainless steel M5 nuts and bolts!
View attachment 207681View attachment 207682
Today I got up and headed out to pick up some stainless bolts. I got back and started to piss about with the fuel filler cap! Whilst messing about, my butter fingers struck again and I dropped the bloody thing, and chipped the paint off the top! View attachment 207683
I am such a nob!!
View attachment 207684
Disappointing to say the least!
Anyway, I didn't dwell on it too long and started digging out the shiny new bits for the brakes! First I had to press the new bearings into the new rear discs - I started by getting the old bearings out of the old discs just to see how they all go together (never done this before)!
View attachment 207685
View attachment 207686
I then watched a Youtube video on pressing in wheel bearings and got straight on it! I used the old bearing to push the new one in.
View attachment 207687
After a few minutes I had got the bearing in without making shite of it! Happy days!
View attachment 207688
I then dropped the snap clip in!
View attachment 207689
I gave the rear dust guard a wipe over and fitted the disc!
View attachment 207690
I then dug the new calipers out!View attachment 207691
After a few minutes working out which one I needed, I then realised that the fixings for these are re-plated, in the loft! After another 30 mins looking I finally emerged from the loft victorious! and got the calliper on!
View attachment 207692
View attachment 207693
View attachment 207695
Then slotted the new Brembo pads in there. Do I need to fit the anti-rattle clips off the original pads as these have anti-rattle plates on them already and the original clips don't seem to fit with the pads??
I then decided to get one of the original restored wheels down out of the loft, with Uniroyals on!! Probably no good for the road (due to age) but would be OK for shows???View attachment 207709
View attachment 207710
I then fitted the new rear damper and fitted the wheel!
View attachment 207711
Thats all till next time!! Thanks for reading guys!
Chris74#
Well-Known Member
Hey @Brigsy no contact from the buyer of the van, so going to pull the rear beam off it, the alloys and any other handy bits and scrap it off! What cuts are you after mate?Spot on, let me know if it falls through. Extra van rear beam is pretty much the same as gtt with drums, and larger stronger torsion bars.
Chris74#
Well-Known Member
Nuts & Bolts???? This little lot cost £85?????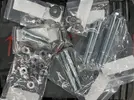
Still they will look the part when they are on! I managed to get out there this afternoon and got straight on with changing some of the rusty bolts for new!
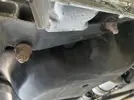
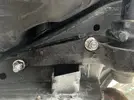
and this one
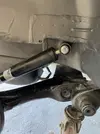
and new washer on this one..
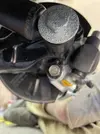
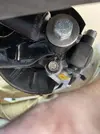
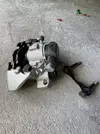
I then had to get the calliper back off as it is the wrong hand, it came off nice and easy and I painted the link plate for the calliper bolts!
Then on with the correct one! Handbrake at the bottom!! thank you @Duncan Grier
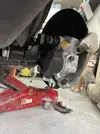
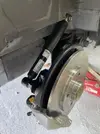
I then got the pads back in but still couldn't work out how to get the anti-rattle springs in!! FFS!!
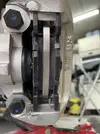
I bodged them in but knew they weren't right, then had an absolute nightmare trying to get them off! cue spring flying off and being at large for a couple of hours!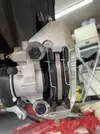
I left it and carried on! I cut a length of old brake pipe that I had saved and decided to use it as a template, after watching a you tube video on flaring brake pipes, I got to it!! I had a moment where I had to mither @Duncan Grier for some support as I was still unsure of the calliper, as the Haynes manual was confusing the life out of me! look at this!
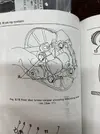
Anyway on with the brake pipes! I made my template and then got the new pipe out!
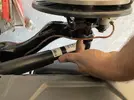
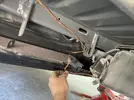
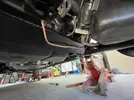
I also got the new hoses out just to try and work out how it all goes together!
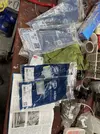
I also found the new clips for the brake pipe to rear beam! I got these part numbers from @Big Steve - Raider 's Renault 11 build! Thanks!!
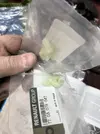
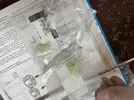
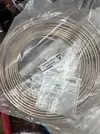
I got on with straightening a length to suit my template!
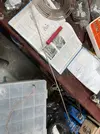
Not a bad tool that straightener (for a tenner!) I then put my new found flaring skills to use!
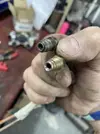
I then formed the new pipe to suit the template, only straighter!
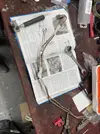
I then fitted the clips to the beam and got my new pipe in place!
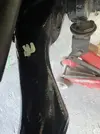
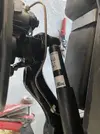
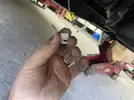
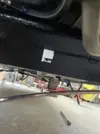
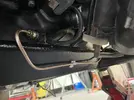
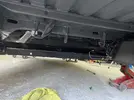
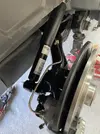
I then realised that I need some saddle clips for the hose connections, I thought I would just order some new ones, but £20 for two??? FFS, people really take the piss!
I had a dig around and found my minging ones and put them through the sand blaster, then primed, painted and lacquered, them....
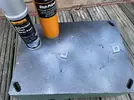
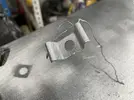
Whilst I was doing this, my son came in and asked what I was doing, I proudly took him around to show him the fruits of my labour - he comes straight out and asks "where are your anti-rattle clips?" I explained to him that I had tried a few times to get them on and they had since flicked off and are somewhere on the floor. He consulted the manual and came back and showed me where they are supposed to sit! I picked one up off the floor whilst expressing my deep disgust for these clips and showed him how they do not fit.....whilst doing this, the bast**d thing popped straight on! I then spent 10 mins searching for the other and did the same. My son left the garage with a very smug grin on his face! shabackanackafackanacka!!!!
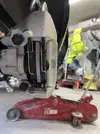
I then got the handbrake cables out whilst the paint was drying to try and get my head around them! and their route up the car!
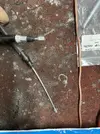
I hooked one over and left it at that......paint drying, heading in for a rest!
Thanks for reading guys!

Still they will look the part when they are on! I managed to get out there this afternoon and got straight on with changing some of the rusty bolts for new!


and this one

and new washer on this one..


I then had to get the calliper back off as it is the wrong hand, it came off nice and easy and I painted the link plate for the calliper bolts!

Then on with the correct one! Handbrake at the bottom!! thank you @Duncan Grier


I then got the pads back in but still couldn't work out how to get the anti-rattle springs in!! FFS!!

I bodged them in but knew they weren't right, then had an absolute nightmare trying to get them off! cue spring flying off and being at large for a couple of hours!

I left it and carried on! I cut a length of old brake pipe that I had saved and decided to use it as a template, after watching a you tube video on flaring brake pipes, I got to it!! I had a moment where I had to mither @Duncan Grier for some support as I was still unsure of the calliper, as the Haynes manual was confusing the life out of me! look at this!

Anyway on with the brake pipes! I made my template and then got the new pipe out!


I also got the new hoses out just to try and work out how it all goes together!

I also found the new clips for the brake pipe to rear beam! I got these part numbers from @Big Steve - Raider 's Renault 11 build! Thanks!!


I got on with straightening a length to suit my template!

Not a bad tool that straightener (for a tenner!) I then put my new found flaring skills to use!

I then formed the new pipe to suit the template, only straighter!

I then fitted the clips to the beam and got my new pipe in place!


I then realised that I need some saddle clips for the hose connections, I thought I would just order some new ones, but £20 for two??? FFS, people really take the piss!
I had a dig around and found my minging ones and put them through the sand blaster, then primed, painted and lacquered, them....


Whilst I was doing this, my son came in and asked what I was doing, I proudly took him around to show him the fruits of my labour - he comes straight out and asks "where are your anti-rattle clips?" I explained to him that I had tried a few times to get them on and they had since flicked off and are somewhere on the floor. He consulted the manual and came back and showed me where they are supposed to sit! I picked one up off the floor whilst expressing my deep disgust for these clips and showed him how they do not fit.....whilst doing this, the bast**d thing popped straight on! I then spent 10 mins searching for the other and did the same. My son left the garage with a very smug grin on his face! shabackanackafackanacka!!!!

I then got the handbrake cables out whilst the paint was drying to try and get my head around them! and their route up the car!


I hooked one over and left it at that......paint drying, heading in for a rest!
Thanks for reading guys!
Similar threads
- Replies
- 4
- Views
- 361
- Featured
- Replies
- 82
- Views
- 2K
- Question
- Replies
- 8
- Views
- 679
- Replies
- 6
- Views
- 268
