There is more to life with TurboRenault.co.uk

Register a free account today to become a member! Once signed in, you'll be able to participate on this site by adding your own topics and posts, as well as connect with other members through your own private inbox!

5 GT Turbo R5 GT Turbo - Complete strip down and re-build #1

Everyone has their own version of startup routines.

Personally I build the engine up and fill it with the oil ill use when running normally, 5w50 synthetic for a 21, same or 10w60 for a C1J. Crank until the oil lights go out, then fire up and let it run for a few secs before shutting off to listen for knocks or taps or nasty noises.
Once the cooling system is built up then it gets a full heat cycle, to fan temp with fast idle to start gradually increasing up to maybe 4000rpm. Full cooldown and retorque head bolts, set valve clearances, fullly assemble and ready for road test.
Then its just driving it, and gradually increasing load and revs, probably over the next 50 miles or so.

Bear in mind the heat cycle and 50 miles will see your engine do about half a million revolutions if its not bedded in after that then something is wrong. Oil and filter change around 500 to 1000 miles, then every 6k after that.

I dont subscribe to the "run in with mineral oil" stuff - synthetic only for me. Why would you put shit oil in a brand new engine build?
 
You defo dont want synthetic oil in whilst rings are fresh. Why use dear synthetic oil as it will need dumping straight away, and you want the rings to bed in fast so no need for synthetic protection? Mineral oil is not shit, especially in low load conditions like this.

Mineral oil in for first fire up. Cheapest 20/50 you can find for c1j.

Fast idle for 20 mins or so. Dump oil for fresh mineral and change filter.

No more starting up unless fault finding as you dont want loads of short heat cycles. Get out there and drive it and bed rings in.

Change oil and filter at 50-100 miles. Same at 250 miles. You can go to a thousand on mineral or straight onto synthetic at 500. Choice is yours.

Have sucessfully ran in loads of engines with this method. Minimal oil consumption and all have made good hp.
 
Last edited:
I’d do what Jon says cheap oil to run in less additives the better. The main thing is to get oil pressure before you fire it up. Some engines get oil pressure quicker than others. With no plugs in spin it over until you hear the note change as it gets oil pressure. Then plugs in and fire it up. Run it for 20 mins fast idle. If It’s a new cam maybe a bit more revs to bed it in. I’d also check the tappets after its cooled down.
 
Yes always prime oil system with king lead off before 1st start so oil pressure registers on gauge. Head retorque after 1st heat cycle, let engine fully cool overnight befor doing it, and reset valve clearances.
 
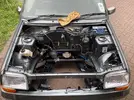
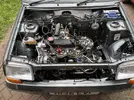
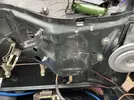
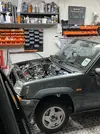
Decided to get out there for an hour or so after work this evening, just to start 'prepping' for the engine going back in. I original thought I would need to jack the car up remove the front wheels, pull the driveshafts, drop the hubs. Then I thought, just to get the engine in, I only need to pull the wheel cap covers and remove the drive shaft retaining nut, pull the driveshafts! So, I got to work and turned the car around, removed the bonnet and removed some of the brackets from the engine bay.
IMG_1151 2 Large.webp
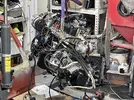
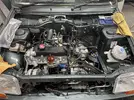
I gave the bay a wipe over to remove the dust and then wheeled the engine over to the car. I had to readjust the slings to get the engine to hang more level.IMG_1152 2 Large.webp
IMG_1154 2 Large.webp
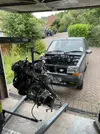
I also had to then drop the engine down as I had forgotten to extend the arm! I readjusted it and got some car mats to cover the front arms and bulkhead as advised by you guys! Was on my own so took it extra slow, but still managed to catch the bulk head on the way in! nothing too serious so I was quite pleased overall! Thanks for the car mat tips!!
IMG_1155 2 Large.webp
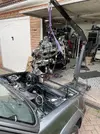
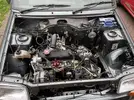
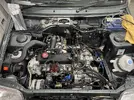
After a bit of fettling around, in it went, I had to remove the front stabilising stub on the gearbox/ engine joint at the front to get the engine in but other than that it went in quite easily!
IMG_1156 2 Large.webp
IMG_1157 2 Large.webp
I must get rid of that horn!!
IMG_1158 2 Large.webp
IMG_1160 2 Large.webp
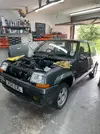
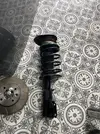
It seems that the springs I bought a few years back are not original GTT springs, I think they are off a bloody horse drawn cart how high they are!! FFS!
IMG_1159 2 Large.webp
Anyway, thats it for this update! 1 step closer!!

thanks for reading guys!
 
Absolutely flippin awesome work @Chris74# !! She looks beautiful!!
seems that the springs I bought a few years back are not original GTT springs, I think they are off a bloody horse drawn cart how high they are!! FFS
Yes I had this exact issue with mine, the “new” springs were WAAAAAY too high.

Think that was the reason I got the lowering springs.

If you want a proper set of OE springs I reckon Mike at GTT Spares would be your best bet..??
 
Thanks Steve, I got straight no to Mike as soon as I stepped back and saw how high it’s sitting!! 👍🏻😂
Absolutely flippin awesome work @Chris74# !! She looks beautiful!!

Yes I had this exact issue with mine, the “new” springs were WAAAAAY too high.

Think that was the reason I got the lowering springs.

If you want a proper set of OE springs I reckon Mike at GTT Spares would be your best bet..??
,
 
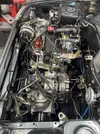
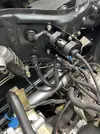
So - Springs ordered from Mike, NOS - bonus! Had a few hours at it over the past couple of days. Just working out where the wiring goes and so on! Found some damaged and really badly bodged connections too, so set about giving them the #74 treatment too! @Duncan Grier ;)
IMG_1171 Large.jpeg
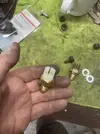
New switch for the water pump turned up!
IMG_1173 Large.jpeg
Then found that the wiring connector had been cut off and replaced with these!
IMG_1174 Large.jpegIMG_1175 Large.jpeg
Not good enough! so I had a dig around in the loft of wonders and managed to find the correct plug, so I snipped it off and got to work repairing this.
IMG_1176 Large.jpeg
Soldered and shrink wrap applied!
IMG_1177 Large.jpeg
The got some ducting on it, and hey presto!!
IMG_1178 Large.jpeg
Then got the AEI in place as I needed the connections from that to be in place.
IMG_1179 Large.jpeg
IMG_1180 Large.jpeg
Got the new water bottle on thanks to Mike, I couldn't remember which strap was to be used!IMG_1181 Large.jpeg
Then I pissed around with the anti-perc fan, The replacement wheel arch I fitted was obviously from a motor that didn't have an anti-perc fan as there were no holes for it! Doh!! I had to get the drill out and drill through my new paint! I touched it up after drilling with some epoxy paint, but it was definitely a twitchy arse moment getting the drill that close! Anyway all went OK and got the anitperc fan into position!
IMG_1184 Large.jpeg
This afternoon I got a couple of hours out there!
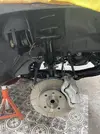
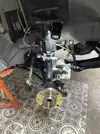
So the plan is to jack the car up, remove the wheels, remove the front struts so that I can change the springs when the new ones turn up. Whilst doing this, I also need to connect the gear linkage bar, and connect up the fuel lines to the pressure regulator, and then fit the driveshafts as I put it all back together. Once the new springs are on the front I will set it down ad see if I need to lift the rear anymore, it still looks a little low to me!
IMG_1185 Large.jpeg
IMG_1186 Large.jpegIMG_1187 Large.jpeg
IMG_1188 Large.jpeg
Yeah, definitely should have done this before I put the engine in! :)
IMG_1189 Large.jpeg
Got the offending strut out without too much bother!IMG_1190 Large.jpeg
Thats it for this week guys!!

Thanks for reading, I'm surprised you are not bored with this by now!! :)
 
Having a nightmare with the clutch! Fitted new clutch and cable, every time I push the clutch down, the cable pops out of the clutch pedal! is there a way to set it as you put it back together? its driving me mental!!!

Ive checked the clutch mechanism with a G clamp and it moves as it should!

Any ideas would be greatly received!
You pulling the lever and the cable is slipping out of the clutch arm..?? Take a couple of piccies..
 
Having a nightmare with the clutch! Fitted new clutch and cable, every time I push the clutch down, the cable pops out of the clutch pedal! is there a way to set it as you put it back together? its driving me mental!!!

Ive checked the clutch mechanism with a G clamp and it moves as it should!

Any ideas would be greatly received!
We're going to need pics of how you've fitted it up, the bell on the end of the cable locates in the fork so should be impossible for it to slip out under tension.
 
Back
Top