There is more to life with TurboRenault.co.uk

Register a free account today to become a member! Once signed in, you'll be able to participate on this site by adding your own topics and posts, as well as connect with other members through your own private inbox!

5 GT Turbo Phatty-The Return!

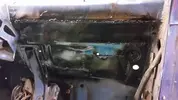
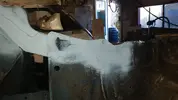
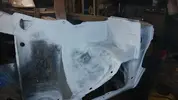
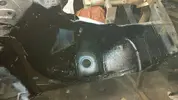
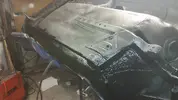
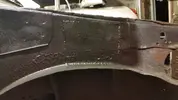
After seeing the rot it was time to dig in and start cleaning it up where surface and removing completely where it had set in.
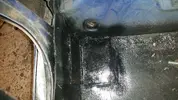
Hours and hours passed with 9" angle grinder with wire wheel fitted and 4 1/2" grinder with cutting wheel fitted to open it all out to expose the insides to see if it had gone in all the way.

20151231_143041[1].webp
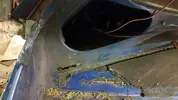
Axle mounting points are made up of the main chassis leg and a second strengthening plate over the top where it actually bolts through. Templates are required for the replacement plates so we got to work. All panels were removed by drilling out spot welds and taking off layer by layer for the multiple thicknesses.
20160104_182938[1].webp
Note the locating inserts for the axle mounting bolts. These act as a datum point for the repairs and gladly only minor surface rust was discovered once top layer was removed.
20160104_182944[1].webp
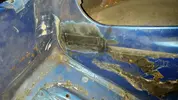
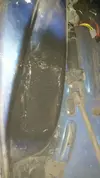
Inner sills were so bad we replaced them. Completely on drivers side and half way on passenger side as it was only the bottom inch or two that was rotted.
20160104_182948[1].webp
20151221_164539[1].webp
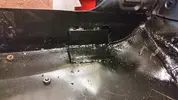
Care was taken to ensure points like the seatbelt mounting block were replaced correctly and cross members were attached in exactly the same place.
20151221_154600[1].webp
Out with the old and in with the new. Whoop Whoop! :clapping.gif:
 
The new jacking point remarkably fits perfectly so we used it to locate everything while sills were replaced.
20151229_154324[1].webp
Next we started to shape up the new floor panel out of slightly thicker than standard metal as that is all we could get at the time.
20151231_143049[1].webp This shaping was a time consuming task as there are multiple compound angles involved and various tension points but we got it in.
20160107_182013[1].webp
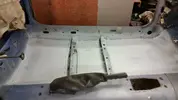
Drivers side completed. Unfortunately a very stormy night caused surface rust before we had a chance to paint it so this was wire wheeled off before painting. All seams have been sealed and every weld has the standard spot weld plus stitch welds down inside and out where the panels overlap.

Before anyone says it's not O.E. enough then Don't! I want it strong and solid for years to come and I couldn't give a monkeys about originality!

After learning many lessons on the first floor the passenger side was tackled and came together much quicker than the drivers.
20160107_205352[1].webp
20160109_141531[1].webp
20160109_155026[1].webp
As before stitch welds added to increase strength and ensure if it was ever in an accident that the panels wouldn't just tear off each other.
20160109_174517[1].webp
First layer of underseal going on. This was sprayed up inside the sills and chassis legs as well as on the outside so there is no exposed metal showing by the time we are done.
Basically the middle third of the car is now all either brand new or rust free metal and it is time to move on the sort the back and front to the same condition.

This last picture was taken this Saturday just gone. It was an expensive day as I realised how many "little" things I still needed so I ordered the following:

Door seal 10m length.
Boot/bonnet seal 8m length.
8mm Nickel Kunifer fuel line 10m.
3/16th brake pipe 2 rolls.

The fuel and brake lines front to rear will be replaced before the tank is refitted while still on the gimble for ease of access.
 
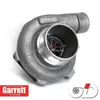
The "Saturday" expenditure didn't stop with the seals. It also included another visit to the Owen Developments website from which I already purchased my GTX2867 Mspec turbo.
gtx2867r_2.webp
This time it was for the other turbo related parts.
media.webp
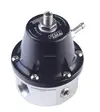
1200bhp capable fuel pressure regulator with -6An port fittings.

TS-0204-1102.webp
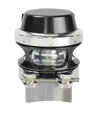
Race port blow off valve.

media_dualstage2.webp
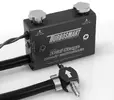
Switchable boost controller. This will be set up by Scoff for low boost (spring pressure) and high boost (21psi ish, maybe?)

All this as long as everything goes to plan this little lot should see me somewhere around the 400bhp mark hopefully.
 
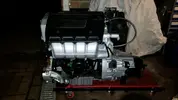
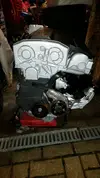
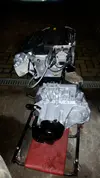
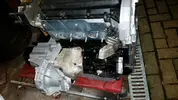
While things have been going on body wise I have been putting together the new heart for the beast.

20160114_175147.webp 20160114_175215.webp 20160114_175233.webp 20160114_175200.webp
Spec for the engine is...

1999 F7R 714 Base Engine fully stripped, inspected and rebuilt using the following....
Rebored block, drilled and tapped to fit oil return from turbo.
Wossner Forged Low Compression Turbo spec Pistons 83.93mm 8.5:1 compression ratio.
Forged H beam Rods with ACL Race Spec bearings and ARP Rod bolts.
Reground crank fitted with ACL Race Spec Bearings.
Brand New Genuine Renault Oil Pump, Oil pump drive chain and sprocket, Coolant Pump, Bottom End Gasket set, Crank timing belt pulley, Timing belt and tensioner kit.
Cylinder Head has been ported and flowed with new valves, guides, Piper 270 cams, Genuine Renault Head gasket kit including exhaust manifold gasket/heatshield and headbolts.
Inlet manifold has been flowed from throttlebody into the inlet and ports are matched to head.
Alloy Fuel Rail with pressure gauge.
Oil/Coolant heat exchanger changed for a larger version.
Turbo oil feed pipe T'd into the oil pressure switch drilling.
All other parts not replaced were refurbished and painted.
Complete engine balance including crank pulley through to clutch.
Also fitted are the ignition components previously mentioned including Ford style Crank Position sensor with mini-timer plug and custom alloy mounting plate, VW style wasted spark coilpack, 172 leads and NGK Plugs.

Custom built (by Gav) equal length tubular manifold made from 304 stainless steel to follow.

OMP Sprung Center Paddle friction plate with Hi Torque Pressure Plate.
Long Clutch Lever conversion from Megane Gearbox.
Clio 182 Fully Rebuilt Gearbox fitted with Quaife ATB LSD.
 
Last edited:
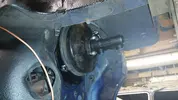
Back to the bodywork and the rebuilding of the rear axle mounting points and surrounding area.

Area inside chassis leg cleaned and painted to prevent future rusting.

20160120_162002.webp
Chassis leg patch incorporated.

20160120_180855.webp
Then the extra strengthening plate was fitted on top.

20160120_192534.webp
It was then stitch welded round the outside as well as the standard spot weld points being plug welded.

20160120_194853.webp
Then it was given a coat of Schutz to prevent rust.

20160122_163838.webp
This is the patch required on the side of the chassis leg where the bolt strengthening insert meets the leg.

20160122_170108.webp
Plug welded to the insert to keep it in place.
20160122_171018.webp
 
Last edited:
Once the dash was removed, the full extent of the rust around the bulkhead area was exposed.
The top portion had been plated from the outside by just sticking it on top of the rust.

20160108_192649.webp

Once the offending areas were cut out it became obvious that most of that area was held together by the paint.
The patches fitted were again sunk into the hole and welded on both sides. Not bothered to make it look pretty as it is all hidden but it is strong and safe.20160127_221138.webp

Seeing as how the outside was now schutzed I painted the inside with etch primer which has highlighted the stitch welding to strengthen the joins.

20160113_165932.webp

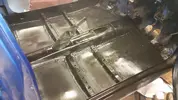
Next came the seam sealer and then a coat of black hammerite style paint to seal the floor and protect it further.

20160128_121321.webp

Next to be done were the front inner wheelarch areas.
A number of patches were needed to remove the rot and the main areas like the subframe mounts and chassis legs were stitch welded again for extra strength.

20160123_145838.webp

20160123_145850.webp

New bumper mounts were fabricated as the old ones were too far gone to be worth saving.

20160123_173634.webp 20160123_173641.webp
Another part of the car finished and schutzed for protection.
The area around the strut top was left clear to ensure the strut sits properly.

20160123_174926.webp
You can see the difference between the fresh schutz and the already dried stuff on the floor. The whole car will get an extra coat once it is fully done as I never want to see this rust stuff ever again.

20160123_174935.webp
This plate was already done but again was poor so it was redone properly.

20160127_221158.webp
Other little pieces were done but not photographed like the bottom of the arch lip had rotted off and was replaced and probably more Gav did without me knowing. :i-m_so_happy.gif:
 
Last edited:
After cleaning up the inner wheelarches at the rear a few more holes appeared.
This was only a bubble showing on the inside until the wire wheel touched it!

20160127_221109.webp
And afterwards.
There were also a handful of drill holes from where an amp had been rivited to the inner arch so these were plug welded too.

20160129_124218.webp

With the tank removed the floor above was cleaned up and reschultzed.
20160122_183908.webp

The first time the cage was fitted there were no extra floor plates in the car so we welded some in made from 4mm plate.
Front foot.

20160128_184930.webp

Rear cage hoop plate.

20160128_184953.webp

Rear hoop rear mount on wheelarch.

20160128_185031.webp
The cage was then fitted, the bolt holes drilled out and the high tensile bolts fitted. Nice to know I will be safe and secure if the worst should ever happen.


Once the underside was done it was time to replace all the brake lines and fuel lines with new and the master cylinder was replaced as well as it had seen better days. The servo although rusty on the outside was sound and functioning so was just cleaned up and painted.
20160126_143210.webp
 
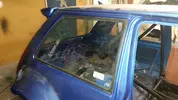
With the welding in the area complete it was safe to fit the new campus rear side windows. When I bought them I was asked "Why are you fitting them as everyone else is after opening ones? I replied with "Because the old ones leaked and I didn't want any chance of rust again."
I also will have fixed back bucket seats and cruciform on the cage so won't be getting anyone in the back.

20160129_135941.webp

Next up was the fitting of the new front doors. The old ones were cut down by about 5mm to allow the door to close after the side skirts were fitted on top of the standard sill with bonding agent and then filler and paint on top. Before being cut down the doors hit this and would have caused damage.
This is the passenger sill as it was.

20160128_163139.webp

And this is the drivers side after it was cut back ready to be mounted in a different way, i.e. from underneath. The gap in the middle is where the fibreglass is so thin the cutting wheel just tore it away and then the bigger gap to the front is where it was attached to the wing which hasn't got its lower bolts in place.

20160128_163124.webp Then the replacement doors were test fitted. Hinges were like a cock in a shirtsleeve so new insert bushes and pins were purchased and fitted. As we didn't have a small drill or a 90 degree drill head to get into the hinges we made up an extra long drill by welding a long bolt onto the end of the drill with a sleeve over it to keep it central and straight. Those of you who have done this job before know it can be an absolute bitch.

20160129_160013.webp

Then the actual door could go on.

20160128_121336.webp

For a first fit with the new hinge pins the alignment and gaps are almost perfect. I bought new seals for the doors off ebay. It is about £5 per meter and identical to the stuff you pay hundreds of pounds from Renault for. Once these were fitted the gaps were checked again and there was no daylight so hopefully now fully water tight.
 
Back
Top