There is more to life with TurboRenault.co.uk

Register a free account today to become a member! Once signed in, you'll be able to participate on this site by adding your own topics and posts, as well as connect with other members through your own private inbox!

5 GT Turbo my mid engined, rwd, cossie powered GTT updated 27/5

hahaha thanks passionford.com_forum_images_smilies_icon_biggrin.gif

well ive taken it apart again lol

ive cut the end tanks off the chargecooler ready for new ones,
cut the rad pipes off ready for bigger ones
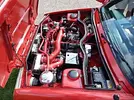
taken the plenum and going to cut the elbow and throttle off to get it turned around and improve the airflow into the plenum too
im in the process of getting a new header tank for the charge cooler system as well now
and a new throttle cable to suit the reversed throttle that will have less bends in it and they will be smoother allowing the cable/pedal to move easier

then can start on the heat management and tidying up lol

Always gary lol.

Well ive been cutting!
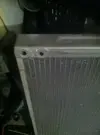
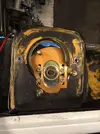
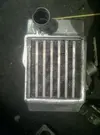
Cut the end tanks off the chargecooler ready for new ones
img.photobucket.com_albums_v313_stu21t_7462b282.webp

Pic of the core, meant to be the same core as they use on the wrc cars
img.photobucket.com_albums_v313_stu21t_a7d03dac.webp


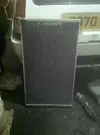
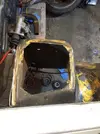
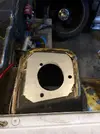
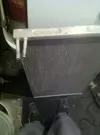
Ive cut the pipe in/outlets off of the chargecooler pre rad, going up to 25mm pipework
img.photobucket.com_albums_v313_stu21t_7a37a6b8.webp

img.photobucket.com_albums_v313_stu21t_39c72ec0.webp

img.photobucket.com_albums_v313_stu21t_48984335.webp


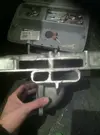
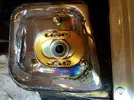
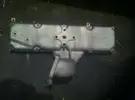
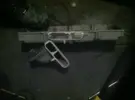
And im modifying the 4x4 plenum
I want to turn the throttlebody round to face the rear of the engine, this will help my boost run and also make the trottle cable run smoother giving a smoother/softer pedal
And at the same time it will improve the distribution of the air into each cylinder.
img.photobucket.com_albums_v313_stu21t_89e98506.webp

img.photobucket.com_albums_v313_stu21t_d4c127e2.webp

img.photobucket.com_albums_v313_stu21t_444bbcac.webp

Ive opened up the hole where it enters the plenum from 120x25mm (3000mm area) to 185x25mm (4625mm area) the area of a 60mm throttle body is 2828mm.
I will probably open up the width more when i get new grinding wheels.
 
Funny enough ive spent some money on it this week.
Wasnt gunna bother updating this thread for a while tho.

Ive had a year off the car after my daughter being born 16weeks early and being in intensive care for 5 months and us having to move to brighton for the whole time.


I did send off the chargecooler and inlet to AH fabrications to have the work done.
24weeks later they hadnt done a thing so i got the stuff sent back untouched!
Im now going to get a swedish plenum and rotate it 180degrees so the throttle faces backwards...

I bought acharge air temp gauge off isaac hunt on here. Lol


I will get something going on it fairly soon tho.
It has to be finished for next year!
 
all of that brings us up to where we are now.....


well I thought I would update this thread, finally lol.
the car has been off the road for nearly 3 1/2 years now, and in that time I have done very very little with it.


what I have done however is...
spent a lot of time with my daughter who is now three and doing very well.
got married in Cyprus last year,
img.photobucket.com_albums_v313_stu21t_C66C44E9_283C_450D_B5D3_E272B992F509.webp
img.photobucket.com_albums_v313_stu21t_20277FC0_260E_43C9_AA16_267EC19F70ED.webp


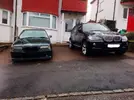
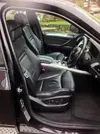
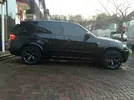
bought an X5 for the misses and done a few bits to that (love this car lol)
its a great spec too, heads up display, keyless, comfort seats, sports suspension delete, 4 zone air con, full multimedia inc. freeview, dab bluetooth and ipod, adaptive headlights... plus loads more.

only pic I can find from when I first got it.
img.photobucket.com_albums_v313_stu21t_A7871DE2_3D4A_45DA_8BB8_6E1F1804DAA9.webp
img.photobucket.com_albums_v313_stu21t_6BA058E4_68E3_45FB_B71D_6CC08DFFB3B1.webp
img.photobucket.com_albums_v313_stu21t_B58ABCD1_4ED9_4AA8_8411_25653820596A.webp


and now
img.photobucket.com_albums_v313_stu21t_CF71EE41_0AD1_4D75_B0AD_D4F9EE0D4555.webp
img.photobucket.com_albums_v313_stu21t_F6580CBA_51B6_4F04_90AB_5B22BCBE717C.webp


I have had the whole bodykit and front grilles colour coded, refurbed the wheels in gunmetal grey and had the side steps and bumper trims done to match, carbon badges, red calipers lol, drug dealer tints...
all that's left is to detail the bodywork and paint the interior trims to match the wheels...


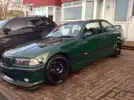
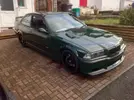
done a mini resto on my E36 M3 and put it back to std then sold it passionford.com_forum_images_smilies_icon_sad.gif
img.photobucket.com_albums_v313_stu21t_E0FA1A27_8794_4D14_8224_3FF33BAB4953.webp
img.photobucket.com_albums_v313_stu21t_4F033B2C_3738_4212_B507_7DD65A1DB151.webp
img.photobucket.com_albums_v313_stu21t_158BCCA6_835F_46B6_A945_0B64B0455BCA.webp


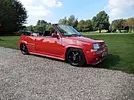
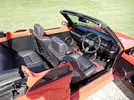
done a resto of my EBS GTT cabriolet
img.photobucket.com_albums_v313_stu21t_0AD1FA99_A50C_4E4A_B621_5381D596C368.webp
img.photobucket.com_albums_v313_stu21t_A9765BB9_3695_4918_ABEC_C61EC852D47C.webp
img.photobucket.com_albums_v313_stu21t_18CAE49E_1C32_4105_BE87_2D4E178799FE.webp


been very busy at work
and im most of the way through completely redesigning my bathroom at home.
 
now onto the 5.


selling my M3 gave me the kick I needed to start work on the 5 again.
since the last update I had finished all the ally welding I had started.
I bought some ally offcuts and a 60mm bend and made a cut n shut plenum.
its now all welded up and working.
the rads are all done with new inlet/outlets and bleeds,
the chargecooler is finished,
I got it all back together and working on temporary hoses/pipes just to test it was working.
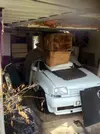
then I didn't even bother going in the garage for years lol.
until now.
img.photobucket.com_albums_v313_stu21t_6FFB0AF2_26DA_4734_BDAD_3DDC086BD818.webp


all I needed to do was fit the new hoses and do a bit of tiding up.


this is how it was
img.photobucket.com_albums_v313_stu21t_DCFFFF82_8843_4CEF_A7CA_F42D4A8EF396.webp


well I got a little carried away.
I bought a new header tank for the chargecooler and where I wanted to fit It I needed to drill a hole in the scuttle.
that escalated into ...
img.photobucket.com_albums_v313_stu21t_8BD2E5D7_E34E_40B8_A83F_262ADB296841.webp
img.photobucket.com_albums_v313_stu21t_BBD79A1B_748F_4768_8B5C_EC925E953D29.webp


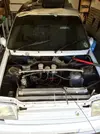
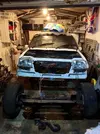
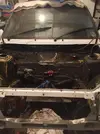
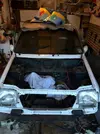
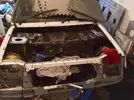
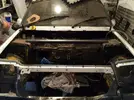
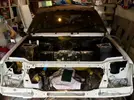
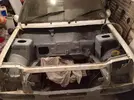
I have completely stripped the whole front end of the car.
I cut the whole scuttle out as its something I always wanted to do.
it looks a lot neater, gives more room and will let more heat out.


img.photobucket.com_albums_v313_stu21t_24799160_89D1_4D2E_B197_BB0A2A48E669.webp


then I thought why stop there lol.


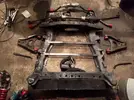
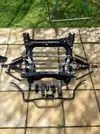
the subframe, wishbones, hubs, antiroll bar, and all associated parts have been removed, sandblasted and powder coated.
I bought new anti roll bar bushes and brackets as the old ones werent a great fit, new wheel bearings.
img.photobucket.com_albums_v313_stu21t_ED4E687C_006D_4626_97B3_0A2765AD2891.webp


img.photobucket.com_albums_v313_stu21t_676A64D0_C24B_4E7D_8666_10D2BCDF768D.webp


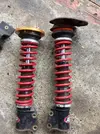
the suspension is also stripped and getting painted


nobody makes adjustable top mounts for the 5, so I made my own.
I bought a welder, ive never welded before but have always wanted to learn. so, in at the deep end lol...


img.photobucket.com_albums_v313_stu21t_42A74A31_6CCC_4126_B20B_CB8CC64FB7D1.webp


I cut the strut tops off and made some new plates so I could fit some top mounts I had bought that were meant for another car (E36 M3)


img.photobucket.com_albums_v313_stu21t_18DF54D7_D04F_4973_98BB_18E586EC98D9.webp
img.photobucket.com_albums_v313_stu21t_229C90E3_49D0_4447_958A_AFB8ED1F5858.webp
img.photobucket.com_albums_v313_stu21t_9D7A7B0F_89E0_4774_B0DA_57530199A13C.webp
img.photobucket.com_albums_v313_stu21t_E46D7044_0FD4_4C83_9B87_A4D037B0E8BF.webp
img.photobucket.com_albums_v313_stu21t_R5s_9981B49C_BF53_4026_A8F7_9687CAB724CB.webp


old vs new
img.photobucket.com_albums_v313_stu21t_F691CCC8_88CF_418B_B43C_86FF301AB11E.webp
img.photobucket.com_albums_v313_stu21t_0047C56F_8877_4673_8EC7_2D33CFE05BA0.webp


so now im a pro welder why stop there lol.


I cut out the std battery tray, which revealed some rust, so I cut the out and welded in a new panel.


after welding the top mount I cut away some more of the old scuttle to tidy it up and welded it to the strut tower, ive also welded up all the old bolt holes in the firewall that are not needed, made and welded some new brackets for various things...


next im going to make my own strut brace as obviously the old one wont fit any more.
while im at it im going to extend the roll cage from the A post to the turrets too.


Ive also bought a mini spray gun so I can paint the engine bay next too, I will paint the steering rack and shocks too.


any parts that are being removed are getting replaced or cleaned and painted to look like new.


this is where im at with it at the mo,
img.photobucket.com_albums_v313_stu21t_332AB962_FF73_4D57_B774_CDF359FC8BBD.webp


as well as the work that's been going on at the front of the car ive also been buying parts for the rest of the car.
img.photobucket.com_albums_v313_stu21t_163DDBA0_4047_49C2_86D0_A5D0DB359A93_1.webp


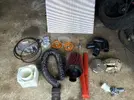
I have bought
titanium turbo blanket
titanium exhaust wrap
huge k&n air filter
flexible 2ply air duct
nimbus g2 (to make a heatshield for the chargecooler)
fibrglass matting (going to make a fibreglass airbox)
25mm firesleeve (to put over the chargecooler water pipes to keep cool)
new boost pipes
new chargecooler water pipes
new rear bumper quick release fixings
new longer throttle cable
new longer wheel studs


that's about all I can think of for now.


progress is slow as I only get 2 evenings a week to work on the car for 2hrs each but it is constant now.
I will keep the thread updated now to.
 
Another of my favourite GTTs, function over form, but now you've addressed the form too.
What Gearbox are you using? Is it a UN1 or Audi jobber?
 
I "think" it's fast. But haven't driven it for years lol.


My M3 was a very fast car and the 5 would show it a clean pair of heels but it's been so long since it was all working properly I honestly can't remember.
All I've driven is my work van and x5 recently so it will feel like a rocket ship I'm sure.
 
If you get any more problems with the gearbox then you might want to try GTO Engineering as they do Maxi Spec parts for the UN1 which has been tested to over 450bhp.

What driveshafts/inner joints have you used?
 
If you get any more problems with the gearbox then you might want to try GTO Engineering as they do Maxi Spec parts for the UN1 which has been tested to over 450bhp.

What driveshafts/inner joints have you used?

GTO Have all the UN1's built by (retired, ahem) Chris @ Mach1, save for the six speed conversion IIRC :)
 
Chris ended up rebuilding my box for me, with new 1st & 2nd synchros and hub and new thicker springs.
I also cut down the detent springs so it was easier to push the gears as I'm on cables.
And with new gear linkage connections it works a lot better.
 
you sold the M3????? are you MAD????

btw... it still looks as good as those photos I sent ALL those years ago
 
I know moggy.
It wasn't a decision I took lightly.
I didn't want to sell it but a guy kept on at me with a price I was happy with and I hadn't used it for so long I ended up letting it go.


Picked up the tube to make my strut brace and roll cage extensions today.
 
I know moggy.
It wasn't a decision I took lightly.
I didn't want to sell it but a guy kept on at me with a price I was happy with and I hadn't used it for so long I ended up letting it go.


Picked up the tube to make my strut brace and roll cage extensions today.

I had a similar call with the Fuego. Sucks, but it was the right decision.
 
Not much to see but
img.photobucket.com_albums_v313_stu21t_92C79287_14CC_41BD_A076_1573E486C588.webp
I finished all the welding today and got the strut brace tacked together. I will take it off to finish it.
Next job is to clean up the welds and clean the engine bay ready for some filler.
 
well I had the day off work today as I had the brown rain :cry:
So thought I'd make the most of it and spend some time in the garage.

img.photobucket.com_albums_v313_stu21t_8656729E_8748_4C96_AB72_AF48FFF2DC60.webp
All the grinding is done and the welds all cleaned up.
Then I scotched the whole engine bay, etch primed all the bare metal, filled and rubbed down then filled and rubbed down some more.
Then I re etch primed all the bare metal and seam sealed the welds that needed it.

img.photobucket.com_albums_v313_stu21t_915E3B24_F938_47C6_A86C_B5DA3AA3CED1.webp
I forgot to take pics of the stages but that's how it sits tonight.

Next job is to key it all up mop it down and get some high build primer on it.
I'm not after a perfect finish as I want it back on the road asap and I'm no expert, but it has to look good.
 
Back
Top