There is more to life with TurboRenault.co.uk

Register a free account today to become a member! Once signed in, you'll be able to participate on this site by adding your own topics and posts, as well as connect with other members through your own private inbox!

5 GT Turbo My C1J Forged build

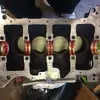
So crank is finally in.

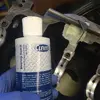
Assembly lube is made by Mahle and can also be used on the cam and tappets £8 for the bottle I've got total bargain and made by the same company that makes bearings
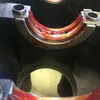
Remember to Apply lube to both lower and upper bearings and also a little on the crank journals, it breaks down into the oil so don't worry about using too much.
i723.photobucket.com_albums_ww235_fordy51_C1J_20Build_IMG_5163.webp
i723.photobucket.com_albums_ww235_fordy51_C1J_20Build_IMG_5164.webp
Don't forget your thrust washers need lube too
i723.photobucket.com_albums_ww235_fordy51_C1J_20Build_IMG_5166.webp

Also remember to add a bit of sealer to the dipstick tube in the block, I used loctite red gearbox flange sealer, holds gear oil fine so a little engine oil wont be a problem
i723.photobucket.com_albums_ww235_fordy51_C1J_20Build_IMG_5167.webp

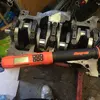
I traded my old 6 yr old Snap-on tech angle torque wrench in the other week for one of the new ones, any torque wrench will do, i just like accuracy
i723.photobucket.com_albums_ww235_fordy51_C1J_20Build_IMG_5168.webp

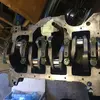
With any build... paint marks, purpose - 1 for memory that you've torqued them and 2 if you have any random failures or knocking from things undoing you see it very quickly when pulling the sump off
i723.photobucket.com_albums_ww235_fordy51_C1J_20Build_IMG_5169.webp

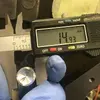
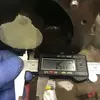
Now interestingly something I wasn't expecting, The small oil gallery plugs from Renault are undersized.
New plug 14.9mm and hole is 15mm.
Renault say press fit the aluminium plug so it expands, I've got the tool number but if its NLA or stupid price Illl lathe some bigger aluminium plugs put loctite on them and hammer them in
i723.photobucket.com_albums_ww235_fordy51_C1J_20Build_IMG_5176.webp

i723.photobucket.com_albums_ww235_fordy51_C1J_20Build_IMG_5175.webp
i723.photobucket.com_albums_ww235_fordy51_C1J_20Build_IMG_5177.webp

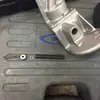
Also shimmed the new oil pump with a m6 spring washer but I might take it out and just fit 2 m6 stainless flat washers as it becomes the same size anyway's
i723.photobucket.com_albums_ww235_fordy51_C1J_20Build_IMG_5174.webp
 
All done now,
Loctite on the outside and Hammered them in with a tapered drift that matched the plugs taper

Seems firmly placed, I'll pressure test it before I start it tho
 
Manual says press fit, my Renault parts guy confirmed the part number from the 2004 tool catalogue no longer exists

They didn't even have it on the tool board for me to borrow

They only need to expand 0.1mm so don't really need too much umph to spread out, loctite just helps remove any last tiny bits of worry of them popping out
 
loads of progress loads of pictures to upload,

Engine is back in with its TTV flywheel and ap paddle clutch fitted
New cam followers from Renault fitted
Engine wiring loom finished
MLS headgasket
Drove the cylinder head down to CTM as wasn't happy with the work a local place did on it.
CTM ported out the head and matched inlet manifold. Used the valves, springs, retainers that I spec'd and supplied. They fitted new seats + multi angled, 8x new guides, all spring heights adjusted, back cut all valves, looks amazing with it all built up.
ARP lubed new high tensile bolts and torqued head down to 75nm, Will recheck after i've run the cam in.

Having a few issues with pipe routes atm.
Making things neat and tidy means new routing for everything, moving radiator even further over engine bay so intercooler pipe goes down past alternator but far enough away from alternator terminals.

Had some new oil pipes made up out of super strong pipes but they just didn't flex and bend much at all so those got thrown in the garage.
The turbo isn't having coolant feeds anymore which means i can remove 4 hoses from the bay.
Stainless manifold is crushing my renault starter heatshield so that needs removing, my own custom 2.5 downpipe doesnt sit right now because raceland manifold has moved everything around so having to remake a flange and 90 bend and weld into downpipe in right place again

Ordered a long list of hoses, blanks and bends from ASH hoses
New huge pipercross filter ordered
Special mocal fittings and special push on hose
 
Engine started today,

Idles smoother than ever, but has a knocking noise which i cannot pin point down at all, its not forged piston knock as its still there when hot

First i thought starter hitting flywheel, then i thought its a top end issue but cannot see any witness marks of something rubbing on something.
Now i'm thinking one of the rods is hitting the sump and i fucking hate taking the sump off in situ just to look as they never seal back up 100%. But then it turns over very smoothly

Has anyone had issues of forged rods hitting the sump or baffle plate?
 
Investigated the noise

Sump off,
Found the rod bearings are naffed for 20-30mins running

Wondering how it happened I micro-metered the crank, and it's within spec at 43.96/97mm on all journals

Still confused how it's happened I dug up the data sheet that came with the pec rods for the arp bolts

55lbft they list!

Yet they supply an arp 2000 series 3/8 socket head bolt, which arp list 28lbft!

Nearly twice over torqued! That's the last time I follow instructions

Ordered a new set of bearings from Cgb on Thursday night and they've arrived today

Going to triple check rod to liner clearance but atm it looks miles away, and engine didn't lock up before or feel strange when turning over

Hoping to fit new bearings tomorrow and plasti gauge it

Emailed Pec about this issue hoping to get a new set of bolts due to concerns of being over stretched, I'll measure them tomorrow as I wrote down the original lengths
 
You'd think so, we'll find out this week
luckily the Athena gasket coating isn't damaged otherwise i'd chase them down till i die that gasket is super expensive for a 77mm bore
 
I seen a similar problem on C1J build before and it was a combination of overall liner length/height, wider H section con rods and a very slight difference in pin to crown height.
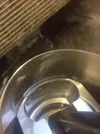
They all cleared during dry build & final build but once the stress & strain of a running engine was involved the rods just kissed the liner base, fortunately we had enough length on the liner bottom to piston at BDC to machine a couple of mm.
If you do find that the liners require trimming don't dye grind clearance pockets as this will cause a stress point on the liner but get the whole base trimmed with any chamfers or radius reproduced.
 
This is what confused me massively

Built this engine, 4 months it's been on the stand prepping the block fitting stuff etc was 100% certain it was right.

Turned over fine, never had resistance.

I'll get the liner base machined down by 1.5mm,
the piston skirt will very slightly protrude pass but by 0.5mm at most which when chamfered on the liner shouldnt make much different at bdc

My liners are 134.10mm
Originals are 134.15mm
Sure only 0.05mm shorter but probably why it's not louder than it is
 
I would not expect a 27lb difference in torque setting to make a difference enough to goose your big ends, thats crazy.

Poor show on the rods clipping the liners though, I think i'd be sticking a flea in the ear of the suppliers.
 
Back
Top