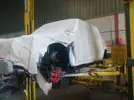
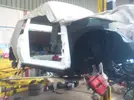
There is more to life with TurboRenault.co.uk

Register a free account today to become a member! Once signed in, you'll be able to participate on this site by adding your own topics and posts, as well as connect with other members through your own private inbox!

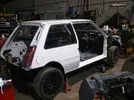
5 GT Turbo Irish EFI R5

Robx1r

Well-Known Member
hey i'm going to copy this from my own forum as i cant remember what i did last week let alone the last 5 odd years, but on the plus side you get the condensed version! :)

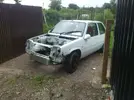
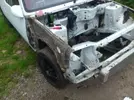
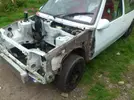
well i'll be collecting this on saturday or the next, whenever i get the chance to go down
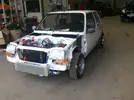
it came with a nice spares package so i'll be replacing the bonnet and getting rid of the spoiler and cannards on the front.
spec of it is
285mm discs up front and braided lines front and rear possibly yellow stuff pads
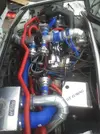
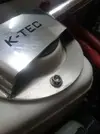
t28r roller bearing turbo 2 1/2 inch ktech elbow and side exit exhaust (surprisingly quiet)
gt tuning lobster intake.
group a carb and re jetted.
3 group a dumpvalves (i know)
2 gt tuning intercoolers 1 front mounted the other double capacity in standard location.
gt tuning alloy header tank
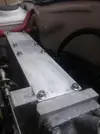
gt tuning cam cover
silicone hoses all over the place!
ktech front brace and gt tuning rear brace
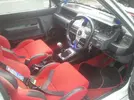
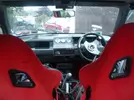
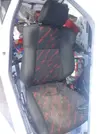
sparco buckets
avcr
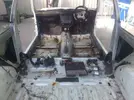
new carpet
i'm probably forgetting alot :happy)

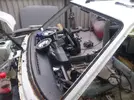
i141.photobucket.com_albums_r71_Robx1r_2011_07_02173352.webp
i141.photobucket.com_albums_r71_Robx1r_2011_07_02173339.webp
i141.photobucket.com_albums_r71_Robx1r_2011_07_02173322.webp
i141.photobucket.com_albums_r71_Robx1r_2011_07_02173411.webp
i141.photobucket.com_albums_r71_Robx1r_2011_07_02173433.webp
i141.photobucket.com_albums_r71_Robx1r_2011_07_02173520.webp

picked the car up today :):):) pulls like a train and the noise when it comes on boost!
i'm off to weigh the car tomorrow i reckon 830kg.
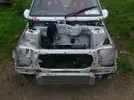
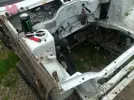
i've started the de-chaving process too! the spoiler and bonnet are gone! i'd have more pics but the camera died!
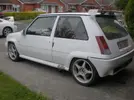
i141.photobucket.com_albums_r71_Robx1r_P7150044.webp
i141.photobucket.com_albums_r71_Robx1r_P7150045.webp
i141.photobucket.com_albums_r71_Robx1r_P7150046.webp

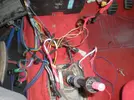
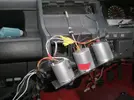
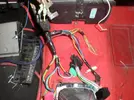
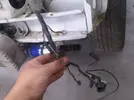
just a few pic from today of some of the wiring!
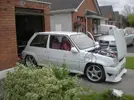
i141.photobucket.com_albums_r71_Robx1r_P7160002.webp
i141.photobucket.com_albums_r71_Robx1r_P7160004.webp
i141.photobucket.com_albums_r71_Robx1r_P7160005.webp

My god the mess of the wiring is boggling.:mad) i've spent since friday pulling useless dead end cabling (most of it speaker cable being used to power all maner of devices) i'm getting there though! :D
today mackey came down with a grinder so i could finish fitting the shortshifter and we tightend up the linkage in general,
so no more guessing as to what gear its in!:happy)
also found out my timex water gauge is a little shagged! within 4 minutes of the car running it was up to 140 degrees(wtf:
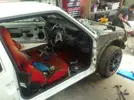
the splitters came off it eventually so i thought i would take another picture for ye! the mirrors will be coming off it at some stage too for the standard items.

i141.photobucket.com_albums_r71_Robx1r_P7180015.webp

Tomorrow i shall make a start on wiring up the radio and properly wire up the gauges and try to figure out where the goon cut the feed for the dipped headlights (and used that feed for the gauges)
 
nice and neat now. just the radio, central locking and leccy window there now!
i141.photobucket.com_albums_r71_Robx1r_P7210016_1.webp
random pictures!
i141.photobucket.com_albums_r71_Robx1r_P7230018.webp
i141.photobucket.com_albums_r71_Robx1r_P7230023.webp
well a few more parts arrived on friday!
a new De gasser hose. so i could drain the gungey rusty water and top up with nice new coolant! i have to say aside from being toxic antifreeze tastes rotten.
and a passenger side seatbelt rail so now i can drive with someone else in the car!.
i brought a friend out for a spin yesterday and thought fuck it i'll give it abuse pulling out of a junction.
first gear pulling away from a junction then at 4k boost kicks in wheels light up, BANG second gear still at full boost, Bang 3rd the car is actually coming to a stop still full boost, fucked it into fourth gear the speedo reads 60mph now and we are almost at a standstill.
so i thought i better stop before it goes wrong
fun times.

i dont want to guess but if it has the spec i was told (i doubt it) it could be anywhere between 180 - 200 bhp.
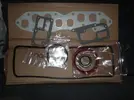
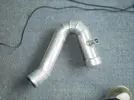
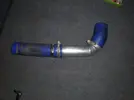
today i decide to take the intercooler out of the engine bay. i thought i would need some pipework made up but i had all i needed there (i just had to cut a bit off the pipe work.
i141.photobucket.com_albums_r71_Robx1r_P8170036.webp
i141.photobucket.com_albums_r71_Robx1r_P8180038.webp
well here is the end result
i141.photobucket.com_albums_r71_Robx1r_P8190040.webp
shot of the tubby what does the ar stamped on it mean
i141.photobucket.com_albums_r71_Robx1r_P8190042.webp
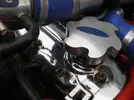
my oil cap has decided it wants to leak!
i141.photobucket.com_albums_r71_Robx1r_P8190041.webp
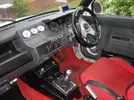
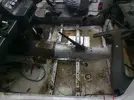
and the interior a little cleaner looking i might try and dye the seats back red as there is a bit of sun damage
i141.photobucket.com_albums_r71_Robx1r_P8190039.webp

ok well turned the boost up after a nice long discussion on one of the 5gt sites 1.24 on the avcr. only problem is its shit a cv joint. have one coming in from the uk soon hopefully. the gear box is getting worse so may start saving for a clutch. may as well do it while the box is out!.
i also added a poll. i'm debating getting a naca vent for the bonnet. but i'm thinking of going perspex with it!

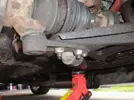
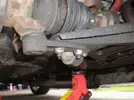
i had to change a drive shaft today so loads of piccies
i141.photobucket.com_albums_r71_Robx1r_P9020047.webp
i141.photobucket.com_albums_r71_Robx1r_P9020048.webp
i141.photobucket.com_albums_r71_Robx1r_P9020049.webp
i141.photobucket.com_albums_r71_Robx1r_P9020050.webp
i141.photobucket.com_albums_r71_Robx1r_P9020045.webp
i141.photobucket.com_albums_r71_Robx1r_P9020046.webp
 
Last edited:
well i decided to hunt for this elusive oil leak. so far i have replace the oil cap!
and at japfest when i was checking my oil i noticed that where the valve cover is bolted down was bubbling oil!
i141.photobucket.com_albums_r71_Robx1r_P9150001.webp
i141.photobucket.com_albums_r71_Robx1r_P9150003.webp
so i've cleaned the nuts down and and put a ring of silicon sealer around the base of the nut and i'm leaving them to dry before i put them back on. i didnt have any o rings in that size so i improvised.
also i emptied my catch can there was a bit of brown water in it and this was on the intake side of it
i141.photobucket.com_albums_r71_Robx1r_P9150004_1.webp
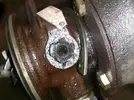
and i read somewhere about checking the serial number of a turbo to identify it?
i141.photobucket.com_albums_r71_Robx1r_P9150005_1.webp

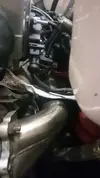
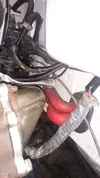
well fitted some heatwrap and re ran a few cables to try tidy it up a bit.
i also took off the heatsheild as it wa poorly mounted and was vibrating against the block which was increadably annoying.
i141.photobucket.com_albums_r71_Robx1r_P9200011.webp
Before
i141.photobucket.com_albums_r71_Robx1r_P8190040.webp
After
i141.photobucket.com_albums_r71_Robx1r_P9200014.webp

after nearly 3000 miles in my ownership and not a hiccup from the car it decides its time to menstruate.
i drove to the home place and hour and a half drive from where i live on some very nice twisty back roads and parked up out side a mates garage, we began to stip down a sierra cosworth for restoration so i had to move my car,
having removed the Anti perc fan its a nack getting it started after a good drive so i pumped the throttle a few time and when the car took it redlined i killed the ignition staright away and the damn turbo timer kept it going at the same time i copped the accelerator was stuck on the floor so i pulled it up and then the car stopped.
the return spring had snapped on the carb! so down to the local motor factors to get a new one, or so i thought talk about a bunch of morons i asked for a throttle return spring and he went routing for a book to look for it. I stopped him and said do you not have any springs i can pic the right one out so he handed me 3 bags full of springs, i found the nearest match and asked how much. "its 20 euro thats part of a drum brake repair kit" i really had no choice as i had no car.
with that problem fixed i moved the car and brought it for a quick spin to make sure. I pulled back into my mates yard and skidded to a halt as he had his back to me.
he wanted me to move it so i went to move it and the brake pedal sang straight to the floor!
i had burst a rear brake line one of the solid pipes leading to the compensator and the other pipe looked just as bad and the spring on the compensator was loose so i just got rid of that and had hassle with leaking joints and then to top it all off i went to bleed the brakes and someone had sheared off the bleed nipples on two of the calipers!

i141.photobucket.com_albums_r71_Robx1r_PB250042.webp
i141.photobucket.com_albums_r71_Robx1r_PB250043.webp
i141.photobucket.com_albums_r71_Robx1r_PB250044.webp
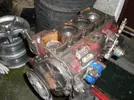
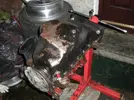
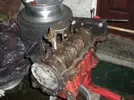
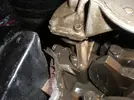
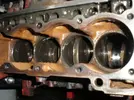
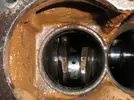
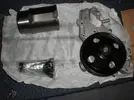
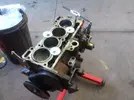
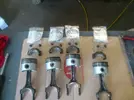
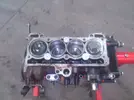
here the damaged liner is out and i'll take the piston out tomorrow
i141.photobucket.com_albums_r71_Robx1r_PB250040.webp
some damage was repaired here???
i141.photobucket.com_albums_r71_Robx1r_PB250041.webp
replace cheap with broke,
i141.photobucket.com_albums_r71_Robx1r_PB260001.webp
i141.photobucket.com_albums_r71_Robx1r_PB260002.webp
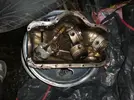
the amount of silicone sealer on the sump!
i141.photobucket.com_albums_r71_Robx1r_PB260003.webp
i141.photobucket.com_albums_r71_Robx1r_PB260004.webp
i141.photobucket.com_albums_r71_Robx1r_PB260005.webp
i141.photobucket.com_albums_r71_Robx1r_PB260006.webp
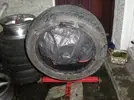
and this is a 16" tyre over my engine it fits over it with the sump in place, this is to keep it all clean
i141.photobucket.com_albums_r71_Robx1r_PB260007.webp

i did a bit more research into it and apparently the minimum head depth is 73mm on the renault where mine measures in at 71.4mm so the compression must of being mad high! explains why it was nippy off boost.
 
Last edited:
well my box arrived today!
i141.photobucket.com_albums_r71_Robx1r_PC220043.webp
i141.photobucket.com_albums_r71_Robx1r_PC220044.webp
i141.photobucket.com_albums_r71_Robx1r_PC220045.webp

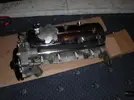
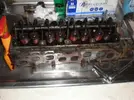
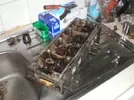
hi comp head all built up
i141.photobucket.com_albums_r71_Robx1r_PC280052.webp
spare lo comp head before refurb 4 wrung studs in it
i141.photobucket.com_albums_r71_Robx1r_PC270046.webp
i141.photobucket.com_albums_r71_Robx1r_PC270048.webp
i141.photobucket.com_albums_r71_Robx1r_PC270049.webp
i141.photobucket.com_albums_r71_Robx1r_PC270047.webp
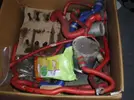
all the hoses in a box waiting to be cleaned
i141.photobucket.com_albums_r71_Robx1r_PC270050.webp
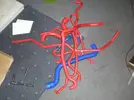
2 hours later all of them clean, i'm thinking of replacing the jubilee clips with something more pleasing on the eye if anyone knows where to get them
i141.photobucket.com_albums_r71_Robx1r_PC280051.webp

i141.photobucket.com_albums_r71_Robx1r_PC290060.webp
i141.photobucket.com_albums_r71_Robx1r_PC290062.webp
i141.photobucket.com_albums_r71_Robx1r_PC290059.webp

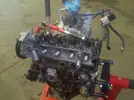
well i havent had much time between the globals and the bikes but the engine was put together, put in, topped up with oil and gearbox oil and then some coolant, and the water poured out of the back of the block!
the liners were sitting too proud!
so i had to pull the **** apart again, i used a different block this time which turned out to be a bad choice, new rings are ordered and i bought myself this off markeyb
i141.photobucket.com_albums_r71_Robx1r_IMG_20120717_WA0001.webp
i141.photobucket.com_albums_r71_Robx1r_IMG_20120717_WA0000.webp
i141.photobucket.com_albums_r71_Robx1r_IMG_20120718_WA0001.webp
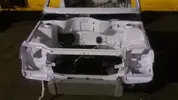
here is some progress pics on it gettin prepped for paint! new rings and a throttle spring arrived this week!
i141.photobucket.com_albums_r71_Robx1r_DSC_0112.webp
i141.photobucket.com_albums_r71_Robx1r_DSC_0111.webp
i141.photobucket.com_albums_r71_Robx1r_DSC_0110.webp
i141.photobucket.com_albums_r71_Robx1r_DSC_0114.webp
i141.photobucket.com_albums_r71_Robx1r_DSC_0113.webp
i141.photobucket.com_albums_r71_Robx1r_DSC_0109.webp
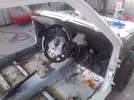
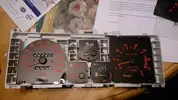
the original dash!
i141.photobucket.com_albums_r71_Robx1r_DSC_0115_1.webp

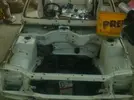
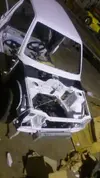
I took the windscreen out, while taking it out discovered that the bottom of it wasnt bonded at all!
i141.photobucket.com_albums_r71_Robx1r_DSC_0211.webp
and where it was being kept his dogs had eaten the wiring blocks and harness! so on the lookout for new ones
i141.photobucket.com_albums_r71_Robx1r_DSC_0208.webp
i141.photobucket.com_albums_r71_Robx1r_DSC_0205.webp
 
Last edited:
My water feature!
i141.photobucket.com_albums_r71_Robx1r_DSC_0204.webp
i141.photobucket.com_albums_r71_Robx1r_DSC_0200.webp
i141.photobucket.com_albums_r71_Robx1r_DSC_0271.webp
i141.photobucket.com_albums_r71_Robx1r_DSC_0273.webp
i141.photobucket.com_albums_r71_Robx1r_DSC_0291.webp
i141.photobucket.com_albums_r71_Robx1r_DSC_0292.webp
its now holding water so all is good!

4x100 et6 direct enough fit (fingers crossed!) ((30mm spacers on the rear and 25mm on the front))
they arrived today
i141.photobucket.com_albums_r71_Robx1r_DSC_0295.webp
i141.photobucket.com_albums_r71_Robx1r_DSC_0296.webp

i141.photobucket.com_albums_r71_Robx1r_DSC_0314.webp
i141.photobucket.com_albums_r71_Robx1r_DSC_0312.webp
i141.photobucket.com_albums_r71_Robx1r_DSC_0310.webp
i141.photobucket.com_albums_r71_Robx1r_DSC_0309.webp
i141.photobucket.com_albums_r71_Robx1r_DSC_0370.webp
i141.photobucket.com_albums_r71_Robx1r_DSC_0372.webp
i141.photobucket.com_albums_r71_Robx1r_DSC_0371.webp

Me and Our lad took both of the fuel tanks out last week or the week before as i figured i'm this far i may as well just do it right
i141.photobucket.com_albums_r71_Robx1r_DSC_0423.webp
old lines off ready to be copied!
i141.photobucket.com_albums_r71_Robx1r_DSC_0424.webp
while the lines and tanks where out i thought it would be pointless not to underseal it
i141.photobucket.com_albums_r71_Robx1r_DSC_0425.webp
i141.photobucket.com_albums_r71_Robx1r_DSC_0429.webp
i141.photobucket.com_albums_r71_Robx1r_DSC_0428.webp
i141.photobucket.com_albums_r71_Robx1r_DSC_0432.webp
i141.photobucket.com_albums_r71_Robx1r_DSC_0430.webp
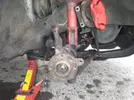
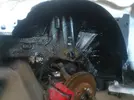
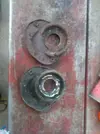
i had a grinding from the front driver shock so dismantled it to greese the bearing and found this
i141.photobucket.com_albums_r71_Robx1r_DSC_0426.webp

i141.photobucket.com_albums_r71_Robx1r_DSC_0574.webp

ourlad and shaneek9 came over and helped me do this
i141.photobucket.com_albums_r71_Robx1r_IMG_20121216_WA0000.webp
i also got this a christmas present!
i141.photobucket.com_albums_r71_Robx1r_DSC_0574.webp
 
and i put money down on these they should be ready for january :) :)
i141.photobucket.com_albums_r71_Robx1r_IMG_9540_zps3d05595a.webp
i141.photobucket.com_albums_r71_Robx1r_IMG_9544_zpscf3a5085.webp
i141.photobucket.com_albums_r71_Robx1r_IMG_9536_zps9da217e1.webp
i141.photobucket.com_albums_r71_Robx1r_DSC_0592.webp
i141.photobucket.com_albums_r71_Robx1r_DSC_0597.webp
i141.photobucket.com_albums_r71_Robx1r_DSC_0586_1.webp
just shows how tight the engine bay is! changing the oil filter is annoying to say the least!
i141.photobucket.com_albums_r71_Robx1r_DSC_0603.webp
i moved the expansion tank up to the scuttle panel to aid with bleading
i141.photobucket.com_albums_r71_Robx1r_DSC_0601.webp
i141.photobucket.com_albums_r71_Robx1r_DSC_0598.webp
this is what i made my battery relocation kit been working fine since i put it in and no rise in temp in the cable!
i141.photobucket.com_albums_r71_Robx1r_IMG_20121226_WA0001.webp
i141.photobucket.com_albums_r71_Robx1r_DSC_0608.webp
i141.photobucket.com_albums_r71_Robx1r_DSC_0612.webp
i141.photobucket.com_albums_r71_Robx1r_DSC_0667_zps022a7a0c.webp
i know very comfy seats dan!
i forgot these
i141.photobucket.com_albums_r71_Robx1r_DSC_0685_zps0dc685ff.webp
brand new renault window seals
i141.photobucket.com_albums_r71_Robx1r_DSC_0680_zpsae9220ac.webp
a european rear driver light!
i141.photobucket.com_albums_r71_Robx1r_DSC_0674_zps4129c370.webp
and some crappy arches
i141.photobucket.com_albums_r71_Robx1r_IMG_20130214_WA0001_zps9aacaaba.webp

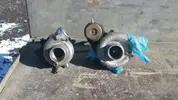
having driven the car for about 10 miles i found the gt28r to be far too laggy with the lower compression spooling at 5k so i went and bout a super low mile t2, here is the comparison,
i141.photobucket.com_albums_r71_Robx1r_IMG_20130312_WA0001_zpsab34dd05.webp
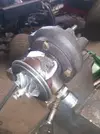
the water return feed was different to the setup that was on it so i went to take it off....... bad idea much like snorting a line of curry powder and running an obstacle course.
i141.photobucket.com_albums_r71_Robx1r_DSC_0735_zps8b70d31b.webp
the top of the banjo had snapped leaving a hollow corroded bolt stuck in, ....... it didnt want to leave and this hapend in the process
i141.photobucket.com_albums_r71_Robx1r_IMG_20130408_WA0001_zpsab90d2af.webp
game over for that turbo now i guess i'm going to have to buy a new one i'm getting a t25/25 when money becomes available,


Well it's been over two years and enough money to buy me a brand new car.
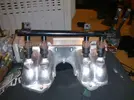
I've binned the carb manifold setup for something more reliable and safer for boost.
I purchased the cast efi manifold from the only other fuel injected 5 gt in Ireland I'm aware of.
So for the efi I needed the following
Manifold.
High pressure high flow fuel pump
Injectors (I settled with 330cc because they were cheap and should do for the time being)
New vacuum system and brake servo line
New intercooler hard pipe and reducer's/joiners
Modify the coolant circuit as the old manifold is water heated and the new isn't.
Fully mapable ecu. And all new water oil air temp sensors a tps crank angle and oil pressured
Throttle cable
This setup would allow me to run the standard flywheel trigger and pick up set-up. Running catch fire ignition and batch fire injectors. I'm going to make up a bracket and buy a cas so I can run full sequential inj and ign
As it stands now it runs giving me good oil pressure and no leaks it's is going to make its way to gripfab for some work next week and we'll see how it goes from there
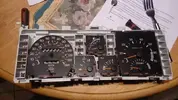
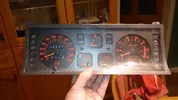
Replaced the faded dials with oe replicas
i141.photobucket.com_albums_r71_Robx1r_DSC_0060_zpsb506d9af.webp
i141.photobucket.com_albums_r71_Robx1r_DSC_0061_zpscac69f0d.webp
i141.photobucket.com_albums_r71_Robx1r_DSC_0063_zps7d22585f.webp
i141.photobucket.com_albums_r71_Robx1r_IMG_20130612_WA0008_zps9e8fcffd.webp
i141.photobucket.com_albums_r71_Robx1r_af0f3d518a3cf6471b52aa38550d42a0_zps707197b8.webp
New oil temp and pressure sensors
i141.photobucket.com_albums_r71_Robx1r_DSC_0005_zps75f64f89.webp
i141.photobucket.com_albums_r71_Robx1r_DSC_0006_zps3830a2f9.webp
 
Last edited:
my efi parts arrived too, but i didnt get many pictures of it but here is the tps and air temp sensor fitted, coolant temp for the ecu and one for the gauge,
i141.photobucket.com_albums_r71_Robx1r_DSC_0749_zpsb1b9d5fb.webp
because i'm going wasted spark i dont need the distributor, but removing it causes issues, the dizzy and oil pump are ran by a gear thingy driven by the cam, so if i removed the dizzy altogether the worm drive gear that runs the oil pump would climb out of place and i'd have no oil pump, so here is the soloution,
take one dizzy, mount it in a vice
i141.photobucket.com_albums_r71_Robx1r_1365090638507_zpsa99360e8.webp
cut it completly through just flush with the mounting plate remove the inner shaft and shorten a further half inch
i141.photobucket.com_albums_r71_Robx1r_DSC_0751_zpsd41dfe2f.webp
the hole that is left is 16mm so i found a 16.2 mm round peice of steel and sent it home after smearing the edges with loctite to seal it up
it still need to be tidyied up a little but its a lot better
i141.photobucket.com_albums_r71_Robx1r_DSC_0755_zpscf070531.webp
the spindel on the throttle was a little long for the tps to fit flush so it had to be cut and i had to make up a bracket for it
i141.photobucket.com_albums_r71_Robx1r_DSC_0750_zps4448d9f8.webp
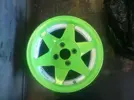
here is the wheels with 20mm spacers either side with a powder coated chrome!
i141.photobucket.com_albums_r71_Robx1r_DSC_0784_zpsedd343c0.webp
i141.photobucket.com_albums_r71_Robx1r_DSC_0786_zps47ac923a.webp
i141.photobucket.com_albums_r71_Robx1r_DSC_0783_zps33741c69.webp
 
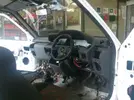
Cars back from stone so I set into fixing the clio dash into place and getting the gauges I got off baz-ctr fitted
i141.photobucket.com_albums_r71_Robx1r_DSC_0112_zpsz3fsojp3.webp
i141.photobucket.com_albums_r71_Robx1r_DSC_0115_zpsfic8mfib.webp
i141.photobucket.com_albums_r71_Robx1r_DSC_0114_zpsauhxtydx.webp[ / url]
In the end I had to take nearly 2 inches off the back of the dash to get it in!
I also got a delivery from probolt to tidy up the engine bay pricey but worth it I think!
i141.photobucket.com_albums_r71_Robx1r_DSC_0026_zpsw2lqpw1z.webp
i141.photobucket.com_albums_r71_Robx1r_DSC_0027_zpso9rjbzpk.webp
All I need to get it mapped is an actuator for a t25
I also fell victim to a bad earth which burnt up the negative on my coil so I'll have to attend to that!
i141.photobucket.com_albums_r71_Robx1r_DSC_0040_zpspf9navgk.webp

tapatalk.imageshack.com_v2_14_10_18_a3d89648765d54b7c341afd3bfce8809.webp
tapatalk.imageshack.com_v2_14_10_18_a8203a72097205d77a16c36bc591adbf.webp
tapatalk.imageshack.com_v2_14_10_18_06ecff78d48d8a710cd234952afa0933.webp
tapatalk.imageshack.com_v2_14_10_18_2c618c815409f86fe95facd548f06716.webp
tapatalk.imageshack.com_v2_14_10_18_7b30a334da8368505bfa2f58cb4fbcea.webp
tapatalk.imageshack.com_v2_14_10_18_6b71b4d99e03e1a7e7e8cb7efb2e72e4.webp
tapatalk.imageshack.com_v2_14_10_19_ac5a06051cafc65b5a0ea98093c89573.webp
tapatalk.imageshack.com_v2_14_10_19_7bbfc43c386fd0faa04be72e19841329.webp
tapatalk.imageshack.com_v2_14_10_19_ddbd0ca0d673d459170e81fd8216adb6.webp
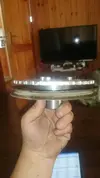
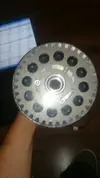
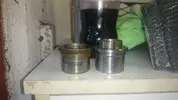
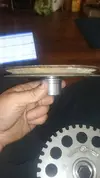
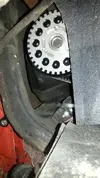
What you see here is a few days of head scratching and brain storming of a way to mount a 36-1 trigger wheel to the engine with out needing to modify anything just a bolt on job.
I do have to say it works quite well!
 
so i got around to sorting the noisy starter thanks to ash simmonds and sorted out the burnt earth with a massive favour from chris@efi

so after months of sitting in the back of the shed i give you this


got one of his first incarnations on mine - a bit different to that one though. Still using the Skoda FR I see.
yeah i think the fpr is going to mess things up for me! i need to sort out some heat shielding too!
i141.photobucket.com_albums_r71_Robx1r_DSC_0055_zpskxttzf3w.webp
i141.photobucket.com_albums_r71_Robx1r_DSC_0056_zps0wi7uvcr.webp

but i have to deal with this which i had payed to get sorted!
i141.photobucket.com_albums_r71_Robx1r_DSC_0057_zpsdw4damoa.webp
i141.photobucket.com_albums_r71_Robx1r_DSC_0058_zpsxwmtkk72.webp
 
I'd recommend wrapping that down pipe as a minimum LOL. And you did just mean fuel rail, not fuel pressure regulator?
 
i'm picking up some special heat wrap at the weekend!
the vacuum reference for the reg is very close to the down pipe!
i'm going to make up a heatshield for below the fuel rail and wiring and line under it with a material used in insulating jet turbine engines.
 
Back
Top