There is more to life with TurboRenault.co.uk

Register a free account today to become a member! Once signed in, you'll be able to participate on this site by adding your own topics and posts, as well as connect with other members through your own private inbox!

How (not) to make your Dauphine Handle

More Vanity:
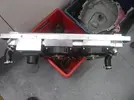
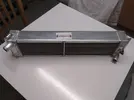
The Rad copped it in the accident, I was going to try repairing it, but there is no-one local to me any more . So after Several phone calls and e-mails I got a nice new Ally one from the nice people at Coolex in Nottingham.
IMG_20220929_213950235.webp

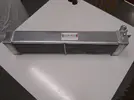
It is about 15% bigger in surface area compared to the old one (which was copper) as I am going with a Laminova Inter-cooler for the dry sump system, This will work as a heater for the oil up to about 85 degrees then a cooler thereafter. Getting everything hot on a dry sump system can be problematic, as the cooling function of the system is so much better
IMG_20220929_214008019.webp

Nice job and a whole lot lighter , just need to re-design the carrier frame, to be easily removed from the Chassis

More Soon.............
 
About Face.
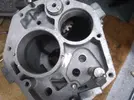
Enough playing with my own toys and back to other peoples, Whilst collecting my Rocker cover from Paul Green In Sheffield last weekend (I was in Brum coz my Boy's band were at the UKCMA awards) I collected the casings for his close ratio 5 speed. I've been at this on and off for the last year as Paul has been about 4 years finding all the bits.
This is close ratio hybrid No. 8. I keep on telling myself that this one is the last one, as they are a pain in the Ass to make with a lot of fiddly stuff to do.
The 1mm Tungsten was not going to weld 10mm plate and infact the 1.6 is at it's limit here also, but anyway.

IMG_20221001_145444216.webp

That's the hole filled in now it needs flattening off.
Then the plate is internally screwcut where the shift pivot mount used to go.
Then you need to make a new pivot bolt that screws into the thread you just cut its about M27.6 X1 That's the great thing about screwcutting in the lathe you can make things any size..

IMG_20221001_160120448.webp

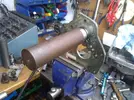
Its a big old bit of steel. THen once the power hacksaw has spent 45mins cutting it off and its tidied up you can admire it.

IMG_20221001_160150599.webp

Finally the shifter assembled and the addes 5th speed selector shaft support bush (which is another PITA to do) needs to be welded in and reamed to full size

IMG_20221001_164014871.webp

I'm glad this part is nearly over trust me, just need to not Bugger up welding it in .............
 
Yesterday was a long day....
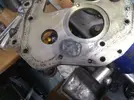
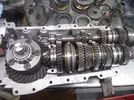
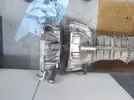
Started by dismantling the gearbox and trying out the plate and bush for clearancing work on the casings.

IMG_20221003_194907944.webp

This has to be done by hand as my Mill does not have enough throat to take it. You can see above how the anti-rotation pin has to move 180 degrees out of the way. The more observant among you will also be able to see the centrepunch mark on the shoulder of the casting (just on the shiny bit) for the 4th rail to go through. Right on the height change to make it easy!!!!

IMG_20221003_194902718.webp
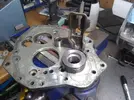
Next up is Weld the bush to the plate for 5th selector rail. This will always go out of shape, so it goes back on the Mill to be reamed to final size.

IMG_20221003_194854945.webp

Once it is trued up it gets a flat put on it to give some clearance at the casing. There is not a lot of room to work here

IMG_20221003_200331003.webp

Then it all gets put together for a try out.

IMG_20221003_202728196.webp

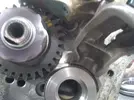
You can just see the bush for the rail next the gear teeth..

IMG_20221003_202712293.webp
Finally after much Faffing about I think I need to take about 4 thou off the shoulder of the pivot pin as there is a bit of rock on the selector shoe Bolt, and that should be ready for final cleaning and assembly.

Honestly it has been up and down more times than a Tart's Knickers. Why do I do this......................
 
Went down to see an old mate today..
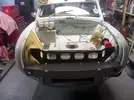
He has a speed shop and has been there for getting on for 40 years, there is always lots of interesting stuff lying around. It's on an old WW2 Airfield which just adds to the charm.
A few years back someone bought him the model V8 engine, which he assembled and left lying about in the office.
I spotted it lying on a shelf and pissed myself laughing at what had happened to it, when I asked about it he said it looked better like that..........

IMG_20221008_145206920.webp


The reason for going was that he is the Wrinkle finish Expert, so the rocker cover got done, while we munched biscuits and watched stupidity on the internet. I used to practically live there as a young Man. Happy Days..


IMG_20221008_211824833.webp


It's on and looking good.........
1 tiny job of the huge list which grows every day...........
 
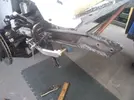
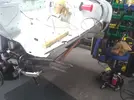
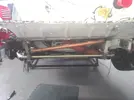
Loads to do and can't be bothered!! A great combination. I did get into the workshop this Afternoon/Eve. and got to work on the cooler group. Made up the frame and got the welder to stick it together. Sorted the Rad mounts and fitted it in.
This is the front View

IMG_20221011_205326314.webp

Next job was to make up the brackets for the cooling fan and Heater fan and fit them

IMG_20221011_205342812.webp

View looking down . I need to try it all in the car to check the fit then dismantle it all and make the brackets that will hold the frame to the Chassis. I also need to fit the ducting around the frame that creates the Plenum chamber the Rad sits in.

IMG_20221011_205358794.webp

Fun Fun Fun.................
 
Looks a very tidy solution! Nice work as always

Would love to get welding some aluminium and build that skill, best finish MIG welding first mind 😀
 
Got the gearbox casings back from the Bodyshop (they've been getting painted) Just waiting the bolts from the platers to assemble. These Concours guys, honestly..
The Dauph Grinds on at Glacial Pace. I have now finished all the mods to the chassis leg, so it is ready to go on, just got the inner to finish triming and it can all be screwed together for welding. No Quick way to do this just one bit at a time and keep checking.

Crash repair odds (36).webp

The front of the leg has been boxed and the old bumper mounting holes have been sleeved for strength.

Crash repair odds (37).webp

I used an ally former and some clamps to get the overlap on the leg tidied up and a nice tight fit and make sure it is in the right place for the front ARB mounting.

Crash repair odds (38).webp

and

Crash repair odds (39).webp

Happyish with that it comes off and gets the ARB bracket welded on.

IMG_20221022_144345542.webp

other side

IMG_20221022_144416442.webp

Full Pen Visible on the welds.
This represents a good 8 hrs pissing about and plenty bad language in the process.

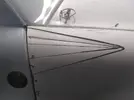
The Last big Fault to be corrected (last, who am I Kidding!!) is the shape of the replacement wing at the Door/scuttle/Bonnet corner
Basically wrong shape - Too much material.

Crash repair odds (33).webp

This will need the opposite of a Dressmakers Dart to correct.
I'll need to find the point where the curve starts to go wrong and drill a hole, the cut with the grinder from the hole to the top, bottom and centre of the faulty curve then close the triangles together to reform the curve to the correct profile. Sounds Easy don't it..

Crash repair odds (35).webp

With this corrected the diaphragm can be glassed to the wing to keep it all in shape and then it is just all the shut lines that need straightening up.......
I have Pinched a nerve in my neck or back which is giving me a weak arm and a couple of tingly fingers, just to add to the fun in general
I'm getting too old for this shit.............
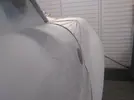
 
Hours and hours of fun going on there! Great work as always 😉

So much truth in hours lost measuring, marking, drilling, measuring, measuring marking and cuting/drilling.....

Take it easy and hope you bounce back soon @Steve Swan
 
It's Chaos here

IMG_20221027_154441602.webp

We have 5 gearboxes in the space for 1-2......... One is my own!!
IMG_20221027_151802058.webp

This arrived today NG1 (395 replacement) from a Europa. Did you know. If I found one of these Bellhousings. I could Fit a BDG in the Dauph !!!!!!!!
Moving Swiftly along...........
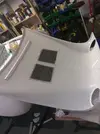
You can see how shallow the R16 type bellhousing is compared to the Renault/Ford item.

IMG_20221027_151951515.webp

Finally in your best Chief Inspector Dreyfus Accent repeat after me.
Every Day and in Every Way I'm Getting Better... and Better..

IMG_20221027_195247051_HDR.webp

More Soon. If I'm spared...........
 
I have been busy with lots of little bits and pieces to have it all sorted before it gets lost in the Bermuda triangle AKA the bodyshop.
The wing fits ok except the rear edge is completely the wrong shape owing to too much material
Thus

Crash repair odds (33).webp

After some cutting and re-profiling of the diaphragm panel and a few choice words we have

IMG_20221108_205257462.webp


This will have to be tacked up with Fibreglass resin, then it comes off and will be properly laminated up and the rivets will be removed/glassed up

Looks better though

IMG_20221108_205308966.webp


Should have been a Dressmaker!!!
Said to my Young friend at the body shop that he should change it to a spray tan Joint, so he could paint Women instead of cars . Would be great when he is busy and I go in to help with the Rubbing Down.....
Ah - Well I can dream Can't I...........
 
Just messaged my Courier to collect 3 gearboxes and a box of trash and take to 3 various addresses. Hopes that the workshop would be emptier/tidier were dashed however when a call yesterday ended with having to arrange a gearbox collection, mind you -3+1 =-2, so things will be better.
Had a tiny bit of luck with the Dauph (for a change) It is supposed to be painted Renault 386 Blanc Glacier, but it is a bad tint, so it is 386 white but a bit more blue/grey/purple than standard. I just wanted it to be easy and was going to go Diamond White, but the paint factors had 3 litres of Glasurit 18 line in 386 on the shelf which was ridiculosly cheap as it had been mixed and never collected, so I bought it and added another 4litres to the order. Problem was when we painted the car we used the bad tint first and it looked great, both myself and the painter had looked at both tins of paint, but not at the same time and had not noticed the error. Upshot was we had to darken the correct mix and go with a unique colour. The same factors has just made up more paint and had a right old game getting it close, but I think it is good enough and we now have a formula.
Anyway I wanted to coat the inside of the fibreglass panels as the rest of the car has been done and it helps with colour stabilisation on translucent panels. I was just about to order some plain white Flowcoat to seal up the inners when I noticed they did tints in BS or Ral colours. A quick look revealed that mint white was close to what I wanted, so I got a half litre and brushed it on, It's so close I won't need to paint the inside of the panels, so there is a job saved, also if I have to repair any slight damage in future Flowcoat is better to work from than a painted surface Result...
IMG_20221115_201334495.jpg

Close enough for me

IMG_20221115_201357839.jpg


Doing this had added about 300g to the weight of the wing and bonnet, but will be less likely to break down over time and is much easier to keep clean, being a sealed surface. Onward.............
 
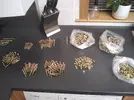
I am finishing off a close ratio hybrid for Paul Green, it has been grinding on for near a year more off than on to be honest, but I am trying to get it buttoned up for good. paul asked to get the cases painted and supplied plated bolts to put it together. This was fine, but he didn't have all the bolts, as I had the rest. After a discussion I decided to send my near 30 years worth of Buckshee nuts bolts and washers to be plated, as it was not expensive.

It all came back in one sack, so that was an hour of my life I ain't getting back

IMG_20221121_170015993.jpg

Then I had to find multiple containers to put it all in rather than the large container I have raked through for years . That's progress I suppose........
 
What do you do when you are busy and have multiple things to finish off ?
You start another project of course.
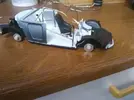
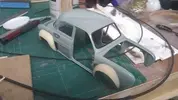
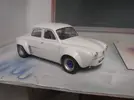
Years ago when Malcolm was a nipper he got me a model Dauphine at Christmas, one of the 1/18th Norev Jobs
It is quite a nice model, but it don't look nuffin like my Dauphine, so when trawling the interweb I found a Guy doing a Proto conversion kit, so I had to have it.

Start by disassembling the original

e6c8c5e3-bb14-44f0-848f-46b95d8627f5.webp

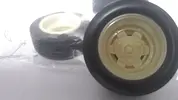
The wheels were the clincher as they are Gotti X13 same as I have on my car

367cf5eb-5cd4-45db-9177-c2238a9560e1.webp

Then you Grind the prep areas and stick the bits on.............a5652830-256c-4e39-aa20-3671f08aa63f.webp

Same as the fullsize thing really

Then after a couple of nights of pissing around I am here

IMG_20221122_214255950.webp

IMG_20221122_214312861.webp

Now me being me, I have to scratchbuild a rollcage then I need to sort out some decals and it should look a bit more funky than the original.

Then I need to get into the workshop and finish the real thing off plus several other things....................
 
Making a model roll cage is slightly easier than the full thing, still a bit of a menace

IMG_20221125_144716922.webp

Once it's painted and inside you'll never know anyway
Mind you, I'll be able to keep this one in the care home..........................


IMG_20221125_144741401.webp

Need to get out in the cold. I'm not keen, have any of you noticed???
 
Back
Top