There is more to life with TurboRenault.co.uk

Register a free account today to become a member! Once signed in, you'll be able to participate on this site by adding your own topics and posts, as well as connect with other members through your own private inbox!

How (not) to make your Dauphine Handle

So you basically changed the toothed ring, kinda like the shrink fit starter ring gear?
Yup. That's the Idea, except it has to take a shit load more torque.I actually just spotted the steel midget flywheel in my own photo showing just that. My excuse is that the crank had come to me for modification, so I didn't pay much attention to the flywheel
 
Went testing on Sunday at a socially distanced Forrestburn trackday. Had a great time and the car felt good, it threw up an ignition problem which we managed to work around, but now need to solve
Malcolm first clip Me second
Links


I will post up on the issue when I get it straight in my own head first.........
 
While we were at Forrestburn a new problem surfaced. The coil got hot and I mean hot enough to pucker the sticker on it After checking all the earths and wiring connections, I was coming to the conclusion that there was some issue with the Lumenition somewhere, like it was causing too much coil on time. I decided to pinch a shot of the Dizzy from the 1700 which has a Pertronix ignitor fitted. This worked and the coil got slightly warm and that was it. I did not want to spend fortunes as it's just the spare motor really, so took a chance on a powerspark hall effect type ignitor which is much cheaper than most of the others on the market.
Problem is their Ducellier kit is primarily designed for internal adjust with vacuum advance, and as Ducel are pretty unique with their wiping self cleaning points on the vac unit, I was going to have to make this fit a 5G external adjust Dizzy with no baseplate.
Old Pal Paul Cunningham came to the rescue with a scrap internal adjust Dizzy from a 4 or 5 or 12 and I set to pics are easier than words

1.1.webp
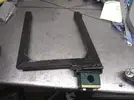
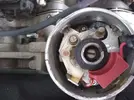
Original Lumenition set up with its own baseplate no mountings there

3.webp

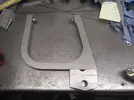
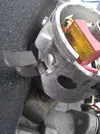
Scrap Dizzy about to loose its baseplate

5.webp

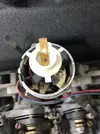
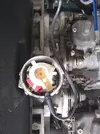
New Powerspark unit fitted to baseplate in 5G body with Vac advance mech welded up

6.webp

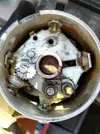
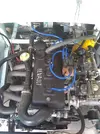
The only mod reqd to the 5G body is to relocate this hole 5mm clockwise to line up with wrong baseplate drilling

7.webp

And you're done! wish they did a non vacuum kit with the hall sensor inside the red block as all their other kits are. Would be even easier, I have mentioned this to Powerspark who e-mailled back to say they would check it out. Anything on Sidedraughts will not need vac unit.
 
Also. Was still having slight voltage fluctuations, so pinched the other Kubota Denso alternator and fitted that voltage is more stable than before, so the regulator in the other unit must be iffy
Workshop now full of other peoples problems needing solved, speak soon
Happy motoring
 
Plug lead sets available from: Mr-Retro-Leads-Plugs on e-bay for 5G Alpine motor. These do away with the extensions on the plugs and are much more user friendly. You will need to tell him the lengths and the colour you want. You can also specify 90deg or straight connections to the cap and coil. I used 2x 250mm long and 2x 265mm long with all 90 deg connections to keep the leads low. I used a short 400mm coil lead. Really pleased with these.


IMG_20210731_193754645.webp
 
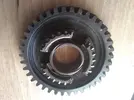
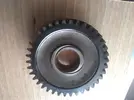
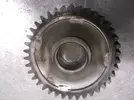
Been busy removing monuments from the workshop. Everybody starts to collect them. Little and sometimes large jobs that you kinda loose interest in and leave lying in your way. Anyway I've cleared out the outstanding gearbox work except a service job that's gone awry and is looking like another monument, but that's another tale and have been having a cull on outstanding projects. One of the biggest is an old close ratio gearset robbed from a R17 Gordini. These are the best set of factory ratios ever made by Renault and make a superb competition set. I was given the topshaft minus bearings and 5th gear and hub. A broken first, good first second hub, second and third, a damaged third/fourth hub no 4th or 5th gear. Watching the usual French online dustbin sites eventually yielded a 3rd and 4th gear for sensible money, so a start was made on assembly. An old R16 box donated its topshaft bearings and 5th speed gear and hub, so that's that. The mainshaft is a reclaimed 4 speed converted to 5 speed I did ages ago. The broken 1st is the problem, I have been looking for one for a long time and nothing, so decided to remove the broken centre from the close ratio gear and cut down a standard 1st to donate it's centre. Today that milestone was reached. Machining hard steel is a total PITA you need to take cuts that bite in making it difficult to work to exact sizes, light cuts tend to result in no material removed and a lot of heat generated. Most of yesteday resulted in an outer gear ring at 80.07mm (Yep I was aiming for 80.00 dead) and a centre at 80.14 giving 0.07mm interference or just under Two and a half thou. Usual rule of thumb on interference is a thou per inch, but as material is all hard then a bit less would be good sense as cracking the gear ring open would not be a good idea. I decided some sort of test was required before trying it for real, so the hub went in the freezer and I popped the Ring in the oven along with the tea and coked at Gas mark 6 180c for 35 mins. I really should have taken a picture of the wife's face as the oven timer goes off and I race through, she sits down weapons in hand and I produce one bit of metal from the Freezer and another from the oven and sit down and measure them (while the chicken was resting after cooking) The cold bit had went down to 80.12 and the hot bit up to 80.20, so all looking good, it was all hastily removed before she noticed the lovely print the hot gear made in the nylon chopping board.
This morning after waving her off to work I cranked the oven up to 230c and soaked the gear ring for an hour, Malcolm arrived home and was briefed on the procedure and remarked on the faint smell ( which was the nylon from the chopping board burning off the gear face. If you have never shrunk anything it's fun and frightening in equal measure. If it goes to plan great, if it catches at all you are Fu--ed big time!
I am pleased to report it all went swimmingly and all that needs doing are 3 decent tack welds for a bit of security. Now just need the Carbide drill taper reamer and taper pins to show up to finish the mainshaft, what could go wrong.....................


IMG_20210903_111218276.webp


IMG_20210903_111210901.webp
 
Tacked up the conjoined gear

IMG_20210908_192420217.webp

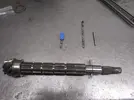
Attention now turns to the mainshaft. This is a 4 speed which has been machined down to accept a cut off 5 speed end. This needed pinning together , but it is a nightmare mix of hard and super hard material. I kissed it with the grinder to give me a flat surface to work from then a solid carbide stub drill drilled through to the small end diameter of 5mm, this went much better than expected, although there were a few exciting moments as it went through the cased surfaces.
This was followed by a 5mm taper pin reamer and the dodge here is not to really tighten the collet on the spindle and as expected when the reamer starts to cut on the whole surface it has a tendency to jam up, by not tightening the collet it stops rather than snapping.
Next up it gets dismantled cleaned smothered in studlocker (strongest grade) screwed together and the pin fitted and left to set.

IMG_20210908_192527928.webp

Once that lot had set the pin was sawed down and put between centres in the lathe and the ends cleaned up

IMG_20210908_193146581.webp

Next job assemble all the bits on to it.
 
The gearbox saga continues, I got all the close ratio bits from old pal Wheeler. He is the man who primarily taught me what bits were what and what could be swapped about. I had assumed (that word again) that I had all the correct bits, so you can imagine my horror as when I try to fit the mainshaft into the box, it won't! Long story short I had a late type standard topshaft which has the same numbers of teeth as the close ratio shaft, but not the same profile, a couple of e-mails followed to the effect of " you know those bits you gave me about 12 years ago? Well one bit is wrong, you wouldn't have the right bit kicking about would you?"He had a look and found a brand new topshaft which when it arrived was found to be a standard item also. Game over. Miraculously a couple of days later he mailed to say he had found the correct one and I await its arrival . In other disastrous news a parcel courier has lost a CKD gearbox kit I sent to Mexico. The customer is an old one and the parts were all his and he wanted it uninsured.............. It is a whole load of trouble I could do without.
Happy Motoring
 
I mentioned a while back, about a method of holding the engine lid partly open to reduce aerodynamic drag. @Adey 's pikey solution was simple and produced the look, but I don't think a scrutineer would pass it and there is the issue of what would happen to the wibbly wobbly engine lid at 3 figure speeds. Plan A was a dismal failure and plan B wasn't much better, then I discovered push button bonnet pins were a thing (what a time to be alive) and Plan C seems to be a winner. The issue was trying to get 3 positions Closed, race and open without any fuss, but I was unable to get the angles to reconcile, so have now got 2 settings Race on the pins locked, push the buttons and open the lid and when not needed the strut pins get turned upside down in their holders locking them down out of the way allowing the lid to be fully closed


Engine cover stays (1).webp

Push button thingys installed

Engine cover stays (2).webp

Original struts from plans A&B modified to suit push button locks


Engine cover stays (3).webpEngine cover stays (3).webp

Racing and posing position

Engine cover stays (4).webp

Struts turned upside down and locked - lid closed

Happy with that definite victory from the jaws of defeat etc. etc.
 
Today..... I have mostly been on Advanced Bodging
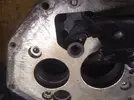
The close ratio gear saga is done with and I now have all the correct bits and the gear train is assembled. There are a couple of ways of putting it all together, I usually favour the R5 set up for customers, as it is an easy to live with double H pattern. However on my own stuff, which is always close ratio, I tend to favour the R17G set up as the lockout mechanism is better from a manic gearbox abuser point of view. This needs a 4th rail fitting into a box not designed for this which is where the bodging comes in. What has to be done is the steel bearing plate from the 17G is drilled to take a steel bush to carry 5th gear selector shaft, the actual sidecase needs drilling to clear the 5th shaft. I had intended to take it to a mate with a large turret mill, who is away on holiday , and it won't fit my small mill, so I had to do it by hand using a homemade toolmakers button which although a proper technique, when used with a pistol drill is proper bodgery...
IMG_20211001_201156542.webp

The steel plate is modified to carry a 20mm od bush which was steppped off on the mill from the endcase to get the correct position. The bush visegripped in, is from toolsteel and drilled internally to 13mm same as the 5th gear shaft. This bush is heated up cherry red and quenched to harden it so that it acts as a guide for the drill that is put through it to relieve the case
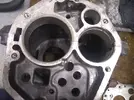
IMG_20211001_201122581.webp

Thats the 4th rail in with a bit of clearance the original 365 case here is solid ally to carry the shaft, but no such luck here. The anti rotation pin for the bearing has to be relocated 180 degrees to get it out of the way. The excess material being removed with a carbide cutter in a drill in true RAF style!!
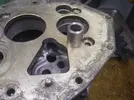
IMG_20211001_201209945.webp

This shows the mild steel bush that will be welded to the steel plate to provide the bearing bush for 5th gear selector shaft, after an internal screwcutting job on the hole, half visible in the left of the picture
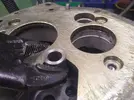
IMG_20211001_201235615_BURST000_COVER_TOP.webp

Bush in with vicegrips to check clearance (not a lot of room here)
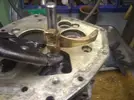
IMG_20211001_201247346.webp

5th selector in place, can move freely up and down without binding, RESULT! now the halfcase plate bush and endcase need assembling to check all is correct before welding the bush (coz there's no way back from there)

It is going to be a busy time ahead with this to finish in the next week or two, Paul Errington is bringing the 8 up for major surgery, and is bringing bits for another 2 gearbox jobs which have stalled owing to lack of bits which will be back on after his visit
Worryingly I keep having impure thoughts about a GT40 replica. I really fancy building a proper missile, but official retirement is still 18 months off, anyone got any sensible suggestions, as I appear to be all out of sense at the moment.
Happy motoring while we still can
Steve
 
I bought a R25 PRV turbo from a local fella out of his stalled Ferrari P4 replica, he wanted to go yank crate V8 with it, but he'd been at it ten years and I wouldn't back him to finish it......that's on the back of my mind if he's still not done anything with it, he was angling to me to work on it ......but there's fookin hundreds of hours work on those kit things, be interesting to see if the kit car market comes back to life with the end of ICE new cars, I envisage a need for 'as new' petrol toys for enthusiasts?
 
Back
Top