There is more to life with TurboRenault.co.uk

Register a free account today to become a member! Once signed in, you'll be able to participate on this site by adding your own topics and posts, as well as connect with other members through your own private inbox!

How (not) to make your Dauphine Handle

You could have a point there. I got into this selling some boxes to Tornado sports cars, as you do, you have a peek at the product, then wish you hadn't. To that end there is a UN1/13 under the bench. I fancy fitting the Quaife straight cut 1st/2nd conversion set and a diff. This would work better with a big V8 that will rev to 6k and be good for 600 lbs/ ft. Hey wait a minute... You are supposed to be taking me out of this.
 
You know these Renault boxes more than anyone, opinions vary on UN1 when pushed , whatever you do to it, I've no direct experience, purely what heard.
Mid engined kit V8 beasty seems the next logical step for a man of you engineering talents , think I've reached my limits with rusty cars now, can't be arsed anymore.
 
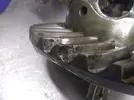
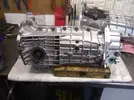
When I'm not trying to sort R8'S I also work on other Renault bits. I had a Renault 17 Gordini 365 close ratio box in for overhaul, it had been in storage for many years and was in good overall condition, but water had got in, probably condensation and made a hole in the crownwheel, scrapping it. Luckily for the owner a fellow R8 owner had found another and purchased it for a close ratio set for a Renault 8 Hybrid, so he was keen to sell the CWP as he cannot use it. It is now ready to go back to its owner. I think it may be going into a Matra Djet as an upgrade on the Estafette Trans which was original

OUCH

IMG_20210824_212317896.webp

Finished

IMG_20211016_160234499.webp

IMG_20211016_160318242.webp


IMG_20211016_160253299.webp

There was a lot of effort went in to these cases.
 
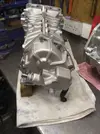
I need my Quadra 'box casing vapour blasting, I took it somewhere that sat on it for six months and then I picked it up as it was before.

It's only 48k miles and mint as regards operation, just need it stripping, cases blasting, rebuilding. Fancy it?
 
I need my Quadra 'box casing vapour blasting, I took it somewhere that sat on it for six months and then I picked it up as it was before.

It's only 48k miles and mint as regards operation, just need it stripping, cases blasting, rebuilding. Fancy it?
Can I get back to you on this soonish....
 
It's not going anywhere for a while mate :D
A bit like me then!
I have a UN1 13 here (secret project GT40 box ssshhhhh) which needs a once over, there are no local vapour blasters here, but last week I learned that one of my old Racing acquaintances has bought one for personal use. I need to see him and find out whats what. It may be a dead end though. The 365 cases were beaded the old fashioned way, then boil washed, then a drop coat of silver on them. They came out better than I had expected.
I can get the blasting done no probs. I can even take it apart - how hard can that be - but its the putting it back together (so it works properly) that I dont like. Gearbox internals have never been something I have been inclined to learn. This is a UN7, basically a UN1 with a transfer box on the back.
 
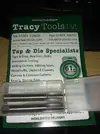
I recieved an order of 2 M15x 1.5mm Taps for a mainshaft modification From Tracy Tools
I've probably mentioned them before, but if not they are a fantastic company to deal with. Good kit Good prices

IMG_20211103_132025694.webp

If you live nearby well worth a visit not as much fun as the old place at Dartmouth, but an aladin's cave nonetheless.
 
M15? Odd size.
Very. It is the largest diameter that can be accommodated I'll get on to it next week and put up some pics. Juniors band is touring next week so I won't have access to a car during the day. This is why there was a push on to get Paul's bits to a certain stage, so I can have a productive week in the workshop next week. Out of interest, and if anybody is actually reading here is the link to Son's band's latest release from that you will find more if you want to


Last edited:
AS well as @paule78 's R8. I have a small mod on hand for an old Friend. It is converting a 4 speed R16 mainshaft to 5 speed and was going well until I used my new M15 Taps and managed to blunt both of them before finishing tapping the Female thread. Looks like being a cheapskate and going with carbon steel was a mistake on this quite hard material, so no pics of this either HO HUM.........
 
No R8 today, so it's back on the mainshaft. I started with the 5th gear end which has been cut off a scrap 5 speed box this has to be bored to 2 different diameters to form the female socket and female screwthread, the hard part is actually boring it out as there is an oil hole through the centre of it which got case hardened along with the outside of the shaft, however it is carbide to the rescue and once it is opened out to 12mm and 40mm deep the the 13.5mm bore is cut to allow tapping the thread on the bottom 20mm and the top 20mm is rough bored to 18mm with a slot drill. This is where things started to go wrong, going with carbon steel was a mistake as it blunted both taps before the thread was finished, so another call to Tracys for an HSS tap cut the thread like a hot knife through butter.
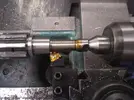
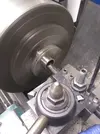
Today starts with accurately boring the 20mm hole 20mm deep.IMG_20211110_135958593.webp

Something to remember with a single point boring bar on hardish material is it's tendency to deflect. This means taking lightish cuts 10 thou or so till you are about 10 thou undersize, then you fit a new tip and take another cut and see where you are at now and I was actually 8 thou undersize, ok take a 3 thou cut and were 2 thou undersize (multiply lathe dial by 2 as it works in radius not diameter, beginners mistake right there) Experience tells me on light cuts less than 2-3 thou this machine will go a half thou oversize probably due to the tool pulling into the work (Boring bars are a law unto themselves) So take a smigin under a thou cut and check

IMG_20211110_141222652.webp


AND

IMG_20211110_141236792.webp

That'll Do.

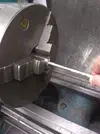
With that bit on one side we start on the 4 speed Mainshaft
IMG_20211110_143137897.webp

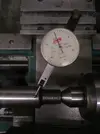
Less than a Quarter thou TIR (total indicator reading) Runout That'll also do
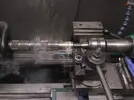
Put on the Brave pants and wade in

IMG_20211110_143408046.webp

Stay away from the swarf it's sharp and bloody hot. To be fair any machine smaller than a Boxford is not going to cut this, it is really hard material.....
More soon..............
 
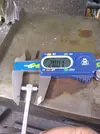
So you keep dodging the hot bits of metal until you have your witness diameters of 19.98mm and 14.8mm
Then change tools and set up for screwcutting
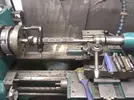

IMG_20211110_192958542.webp


This next shot shows a thread gauge. You will not screwcut successfully without one. You align the edge of the gauge on the diameter to be screwcut and adjust the toolpost to have the point of the tool exactly at 90 degrees to the job
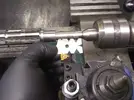
IMG_20211110_193016188.webp

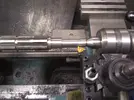
Next set the lathe as slow as it goes and set the screwcutting gearbox to give the correct pitch (1.5mm|) and put the leadscrew gear into Metric . I have put undercuts into each end of the diameter to be screwcut as you need a lead in and out for tool tip. i know this creates a stress raiser, but there is no other way. You give it 10 thou on the cross slide feed wheel engage the leadscrew and away you go you have to not touch any of the controls after this except the power and reverse controls contrary to what some textbooks tell you
You power up and cut all the way to shoulder, stop (this is why 50 rpm is fast enough) back the tool out select reverse and back up to the start point then you go in 10 thou more than last time and repeat . Next time go in another 10 thou and the demon tweak here is to add 1-2 thou on the combination slide to prioritise the cut on one flank, this helps to stop the tool diging in and again is not found in the textbooks.
After 40 thou depth you go up in 5 thou steps as the cut is getting quite large. I started under 15mm, so went up to 55 thou max.
I started with this
IMG_20211110_193315154_BURST001.webp

And finished up with this

IMG_20211110_193847916.webp

I wont lie the last 3 cuts are quite nerve wracking, but it all came out good.

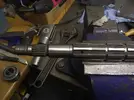
Next Put back in the 3 jaw and cut to length with grinder in toolpost mount (one of my dodgier attachments) Clean both parts and butter with Studlock and screw together
IMG_20211110_195821795.webp

Tomorrows job is to drill and pin it

Thanks for watching............
 
Back
Top