There is more to life with TurboRenault.co.uk
You are using an out of date browser. It may not display this or other websites correctly.
You should upgrade or use an alternative browser.
You should upgrade or use an alternative browser.
Brigsy
Media Mogul. Instagram legend.
Suspension and stoppers.
Its still April 2021 and next job on the list was to fit the Northloopcup roll correction kit. This was a simple plug and play job so was a nice easy couple of hours work.
Hubs fitted.
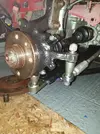
Offered up the custom reyland rotor and bells to the Jamsport wilwood kit. Hit a snag initially as the caliper was fouling the disc but was due to the fact i had the adaptor brackets on arse first so flipped them over and equal clearance on both sides of the disc.
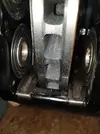
Checked clearances all round just incase. Disc looks tight to the lower rose joint in the pic but in reality there is ample clearance.
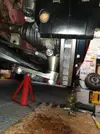
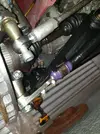
Mocked up. Can remember looking at it and thinking suspension/brake porn:LOL:
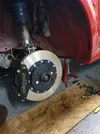
Popped wheel on to check clearances, again all good, no spacers required.
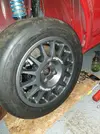
Dropped on the deck for furthur checks. Note knacker tight ndo gearbox.
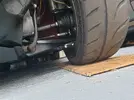
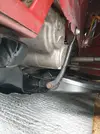
I then removed the discs to save any surface rust as knew deep down it would be several months until it was moving under its own steam. I also wanted to make sure the calipers were right and not causing any issues, binding etc to save potential damage to the new discs. Fitted the original jamsport discs which are modified toyota avensis iirc, Also had 2x sets of pads for the wilwoods - ferodo ds2500 & ds3000, fitted the 3000s.
Bled the brakes up next. I was expecting a fight bleeding the drained abs block so opted for cheap dot4 fluid. Brakes bled up straight away with a wicked pedal and didnt even need to cycle the abs block. That was a good thing luckily as no engine bay wiring fitted at that point.
Whilst there i bled the clutch up. Its a clio v6 pedal box, Steve always had issues with the clutch and had changed the clutch master cylinder for a different one instead of the oem v6 clutch master. I believe its mk3 clio master cylinder currently fitted, which is almost plug and play.
Clio v6 pedals, quite a nice mod over stock 182.
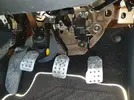
Had pressure bleeder hooked up and was really struggling to get a good clutch pedal. Anybody who has had the experience of bleeding a megane 2 rs clutch from fresh will know that they can be a right b*****d to bleed especially when the slave is not pre filled. As i was struggling, i got Shez to get in the car to pump the clutch. Pedal pressure started to come up and boom the f**king clutch pipe pops out of the master cylinder as not fitted correctly, pissing brake fluid all over her feet and the carpet. Thankfully brake fuid is water soluble so it was a case of massive clean up and wet vac the carpet/mats with no damage done.
Said pipe and master cylinder in situ.
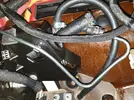
With much swearing i removed the clutch master and pipe. Sounds easy i hear you say, i can confirm its a right b*****d of a job. Removed drivers seat, laid on my back almost working blind to remove the circlip holding the master cylinder to the pedal. Considered removing the dash at one point but struggled on and managed to get it out.
Once on the bench it was clear the metal feed pipe fitting that goes to the slave cylinder was not going fully home in the master cylinder so the pipe retaining clip would not fully locate in the groove on the metal pipe.
I carefully fettled the plastic master cylinder for clearance until the pipe went fully home and give the pipe a good tug and it proved itself to be secure and would not pop out. Refitted and kept my fingers crossed that no leaks, clutch bled up with what felt like a reasonable pedal but 25mm or so of dead spot before anything happened. Helix 6 paddle clutch felt awful as expected, but would need the car running to actually see if any good.
More to come. Thanks for reading!!
Its still April 2021 and next job on the list was to fit the Northloopcup roll correction kit. This was a simple plug and play job so was a nice easy couple of hours work.
Hubs fitted.

Offered up the custom reyland rotor and bells to the Jamsport wilwood kit. Hit a snag initially as the caliper was fouling the disc but was due to the fact i had the adaptor brackets on arse first so flipped them over and equal clearance on both sides of the disc.

Checked clearances all round just incase. Disc looks tight to the lower rose joint in the pic but in reality there is ample clearance.


Mocked up. Can remember looking at it and thinking suspension/brake porn:LOL:

Popped wheel on to check clearances, again all good, no spacers required.

Dropped on the deck for furthur checks. Note knacker tight ndo gearbox.


I then removed the discs to save any surface rust as knew deep down it would be several months until it was moving under its own steam. I also wanted to make sure the calipers were right and not causing any issues, binding etc to save potential damage to the new discs. Fitted the original jamsport discs which are modified toyota avensis iirc, Also had 2x sets of pads for the wilwoods - ferodo ds2500 & ds3000, fitted the 3000s.
Bled the brakes up next. I was expecting a fight bleeding the drained abs block so opted for cheap dot4 fluid. Brakes bled up straight away with a wicked pedal and didnt even need to cycle the abs block. That was a good thing luckily as no engine bay wiring fitted at that point.
Whilst there i bled the clutch up. Its a clio v6 pedal box, Steve always had issues with the clutch and had changed the clutch master cylinder for a different one instead of the oem v6 clutch master. I believe its mk3 clio master cylinder currently fitted, which is almost plug and play.
Clio v6 pedals, quite a nice mod over stock 182.

Had pressure bleeder hooked up and was really struggling to get a good clutch pedal. Anybody who has had the experience of bleeding a megane 2 rs clutch from fresh will know that they can be a right b*****d to bleed especially when the slave is not pre filled. As i was struggling, i got Shez to get in the car to pump the clutch. Pedal pressure started to come up and boom the f**king clutch pipe pops out of the master cylinder as not fitted correctly, pissing brake fluid all over her feet and the carpet. Thankfully brake fuid is water soluble so it was a case of massive clean up and wet vac the carpet/mats with no damage done.
Said pipe and master cylinder in situ.

With much swearing i removed the clutch master and pipe. Sounds easy i hear you say, i can confirm its a right b*****d of a job. Removed drivers seat, laid on my back almost working blind to remove the circlip holding the master cylinder to the pedal. Considered removing the dash at one point but struggled on and managed to get it out.
Once on the bench it was clear the metal feed pipe fitting that goes to the slave cylinder was not going fully home in the master cylinder so the pipe retaining clip would not fully locate in the groove on the metal pipe.
I carefully fettled the plastic master cylinder for clearance until the pipe went fully home and give the pipe a good tug and it proved itself to be secure and would not pop out. Refitted and kept my fingers crossed that no leaks, clutch bled up with what felt like a reasonable pedal but 25mm or so of dead spot before anything happened. Helix 6 paddle clutch felt awful as expected, but would need the car running to actually see if any good.
More to come. Thanks for reading!!
DaveL485
Staff member
Thats interesting, cos the Clio V6 owners are sturggling for clutch masters at the moment.different one instead of the oem v6 clutch master. I believe its mk3 clio master cylinder currently fitted, which is almost plug and play.
Brigsy
Media Mogul. Instagram legend.
Indeed, the pedal box is all inside the cabin. This is it out of the car.
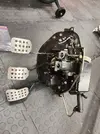
It just needed the hydraulic pipe reshaping and the cylinder fettling a little so the pipe clips in properly. Loads of different sized masters available if you sniff round, all seem to be the same twist fitment and pushrod length the same.

It just needed the hydraulic pipe reshaping and the cylinder fettling a little so the pipe clips in properly. Loads of different sized masters available if you sniff round, all seem to be the same twist fitment and pushrod length the same.
Brigsy
Media Mogul. Instagram legend.
Bit of an interim update inbetween the project thread.
First wash since its been coated with gtechniq before csf. It was not really mucky, more dusty with a few bugs on the front and brake dust all over the front wheels. I didnt even need to contact wash the bodywork, BH snowfoam and rinse was all that was necessary and it came up great. Blow dry, wheels needed a bit of work but easily cleaned with BH autowheel/agitation with wheel brush.
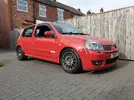
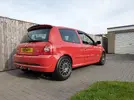
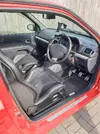
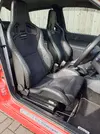
Interior still pretty clean just needs a little hoover
I have also correctly wired up the Epas ecu. The epas had the usual box of tricks with potentiometer which was to put it bluntly, s**t.
The steering was too heavy at slow manouvres and too light at speed making the car feel nervous which did not inspire confidence on faster b roads. Even the mrs said it felt like the steering was way too light at speed and needed constant movement on motorways etc.
I was forever adjusting the potentiometer when driving, but it either felt like no assistance at all or way too much, compared to my other clio dci's with epas as standard fit which feel acceptable. Also felt like the epas was cutting out on idle and not working.
I pulled out the s**t box of tricks and wired the epas ecu up properly. I done a bit of research beforehand and @incy-spider had some great info about wiring it up correctly on this post.

 cliosport.net
Basically the issues with the potentiometer and box, is that it fiddles the vss and rpm inputs on the ecu to allow different amounts of assistance. The setup is flawed as vss only goes down to 14kmh so you never get the true light steering required for low speed manouvers on idle as it assumes you are still moving, so combined with lairy 6 paddle clutch, gripper plated lsd, low speed driving was a bit of a chore, and with this being a road car i wanted more refinement. Also the ecu adjusts itself so there is no need to even have the adjustability, let the ecu adjust according to vss and rpm, i.e. fully integrate it to the vehicle systems.
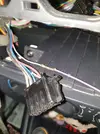
I wired the Epas ecu vss up to the oem stereo vss speed wire. Crimp and dual wall heatshrink for a proper reliable connection.
I then added the rpm feed from the Ecumaster Black ecu. This was easy, my oem dash is wired up to the canbus feed from the ecumaster, so i had a spare rpm/tacho output free. So added a wire to the ecu plug and into the white loom plug in fusebox, using the cruise control wiring in car to join to the ecu as it is not used.
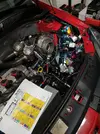
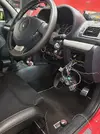
I then wired up the diagnostic line from the epas ecu to the obd for a quick test. I used ren0link to get in the ecu parameters with minimum fuss.
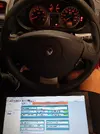
I found that initially the rpm was half what the dash was saying so simply increased the multiplier on the ecumaster tacho settings to 2 and the rpm then read correct to the dash.
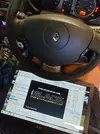
Note can to usb stream running in the background as was doing some canbus sniffing using ecumaster usb to can module.
Tested and working great, vss and rpm both working fine.
The epas works great now. Low speed assistance is good, steering super light and does not randomly cut in and out like previous. As soon as speed is up, the steering gives a weighted feel so half decent feedback. Its not as good as the oem Hpas, but more than acceptable, just feels like the dci or any modern car, no more nervous feeling at speed due to excessively light steering.
Will give it a good test on the Trophy weekender coming up this weekend.
Thanks for reading!!
First wash since its been coated with gtechniq before csf. It was not really mucky, more dusty with a few bugs on the front and brake dust all over the front wheels. I didnt even need to contact wash the bodywork, BH snowfoam and rinse was all that was necessary and it came up great. Blow dry, wheels needed a bit of work but easily cleaned with BH autowheel/agitation with wheel brush.


Interior still pretty clean just needs a little hoover


I have also correctly wired up the Epas ecu. The epas had the usual box of tricks with potentiometer which was to put it bluntly, s**t.
The steering was too heavy at slow manouvres and too light at speed making the car feel nervous which did not inspire confidence on faster b roads. Even the mrs said it felt like the steering was way too light at speed and needed constant movement on motorways etc.
I was forever adjusting the potentiometer when driving, but it either felt like no assistance at all or way too much, compared to my other clio dci's with epas as standard fit which feel acceptable. Also felt like the epas was cutting out on idle and not working.
I pulled out the s**t box of tricks and wired the epas ecu up properly. I done a bit of research beforehand and @incy-spider had some great info about wiring it up correctly on this post.

EPAS fault help
Hi there guys and gals ive just converted my clio 172 cup over to epas and ive came across a couple of issues but not sure what to do next as i cant find anyone that has the same issue. the first problem is that when moving the car in the garage at full assistance the system doesnt fully work...
Basically the issues with the potentiometer and box, is that it fiddles the vss and rpm inputs on the ecu to allow different amounts of assistance. The setup is flawed as vss only goes down to 14kmh so you never get the true light steering required for low speed manouvers on idle as it assumes you are still moving, so combined with lairy 6 paddle clutch, gripper plated lsd, low speed driving was a bit of a chore, and with this being a road car i wanted more refinement. Also the ecu adjusts itself so there is no need to even have the adjustability, let the ecu adjust according to vss and rpm, i.e. fully integrate it to the vehicle systems.
I wired the Epas ecu vss up to the oem stereo vss speed wire. Crimp and dual wall heatshrink for a proper reliable connection.

I then added the rpm feed from the Ecumaster Black ecu. This was easy, my oem dash is wired up to the canbus feed from the ecumaster, so i had a spare rpm/tacho output free. So added a wire to the ecu plug and into the white loom plug in fusebox, using the cruise control wiring in car to join to the ecu as it is not used.


I then wired up the diagnostic line from the epas ecu to the obd for a quick test. I used ren0link to get in the ecu parameters with minimum fuss.

I found that initially the rpm was half what the dash was saying so simply increased the multiplier on the ecumaster tacho settings to 2 and the rpm then read correct to the dash.

Note can to usb stream running in the background as was doing some canbus sniffing using ecumaster usb to can module.
Tested and working great, vss and rpm both working fine.
The epas works great now. Low speed assistance is good, steering super light and does not randomly cut in and out like previous. As soon as speed is up, the steering gives a weighted feel so half decent feedback. Its not as good as the oem Hpas, but more than acceptable, just feels like the dci or any modern car, no more nervous feeling at speed due to excessively light steering.
Will give it a good test on the Trophy weekender coming up this weekend.
Thanks for reading!!
Last edited:
Brigsy
Media Mogul. Instagram legend.
Trophy weekender 2022 update.
I had fancied doing the Trophy weekender for years after seeing all the pics from previous years. The problem is i did not actually have a trophy to do it in until recently, so the goal was always to take number 54 to the welsh mountains. Steve had always planned to do the tour but various things had stopped it happening over the years.
Checked fluid levels and filled up with tesco 99 on Friday, had a leisurely drive down to @Moggy_rs on Friday evening. Travelled light with no tools as no room to carry anything with the fuel system and battery in the boot! Trophy was looking super clean before the journey but as per sods law, the heavens opened and it was lashing down most of the way.
Arrived in wales and noted that we had only used approx 1/4 a tank of fuel in 180 miles, the fuel economy for 980cc injectors is really good on the EfiParts map.
Morning views
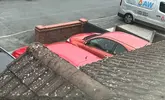
Set off to the meeting point in Llangollen on the sat morning. Raining obviously and the R888R semi slicks were proving to be quite useless in these conditions, running wastegate boost pressure of 8psi - 2 & 3rd gear was pretty useless and no grip at all so was hoping for it to dry out.
Trophys arrive and a quick catch up with everybody.

Set off and followed @Tim. for the first few miles, driving part of the evo triangle. Its a shame its ruined by the average speed cameras but nice roads regardless. We had broke away from the rest of the group so arrived at the first stop early.

Shortly followed by the rest of the group.
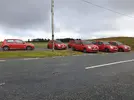
Done the rest of the evo triangle then sadly we got split up from the group. Moggy was our tour guide in the R knowing the roads well and set the pace, Leisurely as this was a sightseer, yet spirited in places when the conditions were right. With changing conditions we actually got a dry spell and the roads were quiet in places so could enjoy the awesome roads without any risk or drama.
Not sure on the roads but we had a good clear run on some great roads when away from the villages and had a Yaris Gr and a megane 275 tag on the back of us for a few miles.
Stopped to stretch legs and check the views out for a few minutes.
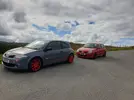
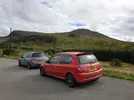
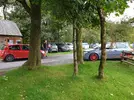
Stopped for dinner with great views.

Managed to rejoin the group by chance spotting everybody parked up.

Went off on the afternoon run enjoying more roads. Super tight in places!!
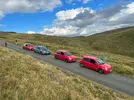
I had fancied doing the Trophy weekender for years after seeing all the pics from previous years. The problem is i did not actually have a trophy to do it in until recently, so the goal was always to take number 54 to the welsh mountains. Steve had always planned to do the tour but various things had stopped it happening over the years.
Checked fluid levels and filled up with tesco 99 on Friday, had a leisurely drive down to @Moggy_rs on Friday evening. Travelled light with no tools as no room to carry anything with the fuel system and battery in the boot! Trophy was looking super clean before the journey but as per sods law, the heavens opened and it was lashing down most of the way.
Arrived in wales and noted that we had only used approx 1/4 a tank of fuel in 180 miles, the fuel economy for 980cc injectors is really good on the EfiParts map.
Morning views

Set off to the meeting point in Llangollen on the sat morning. Raining obviously and the R888R semi slicks were proving to be quite useless in these conditions, running wastegate boost pressure of 8psi - 2 & 3rd gear was pretty useless and no grip at all so was hoping for it to dry out.
Trophys arrive and a quick catch up with everybody.

Set off and followed @Tim. for the first few miles, driving part of the evo triangle. Its a shame its ruined by the average speed cameras but nice roads regardless. We had broke away from the rest of the group so arrived at the first stop early.

Shortly followed by the rest of the group.

Done the rest of the evo triangle then sadly we got split up from the group. Moggy was our tour guide in the R knowing the roads well and set the pace, Leisurely as this was a sightseer, yet spirited in places when the conditions were right. With changing conditions we actually got a dry spell and the roads were quiet in places so could enjoy the awesome roads without any risk or drama.
Not sure on the roads but we had a good clear run on some great roads when away from the villages and had a Yaris Gr and a megane 275 tag on the back of us for a few miles.
Stopped to stretch legs and check the views out for a few minutes.


Stopped for dinner with great views.

Managed to rejoin the group by chance spotting everybody parked up.

Went off on the afternoon run enjoying more roads. Super tight in places!!

Brigsy
Media Mogul. Instagram legend.
Awesome views.
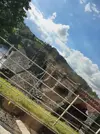


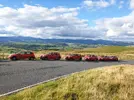
Had a great time and really enjoyed it noting almost 270miles and 3/4 of a tank of fuel used on the Sat. Ticked over 45k on the way back to Moggys.
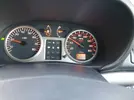
This was largely a shakedown for the trophy as ive not really used it in anger too much so was hoping there would not be any little issues, but had nothing luckily. Good job as no phone reception in the mountains and no tools!!
Can report it all works good. Engine wise, i had the ecu data on display on my phone using tunerview and the coolant temps were mid 80s with oil temps low to mid 90s so that was bang on.
The handling felt excellent. The bilstein b14, roll correction kit and gripper diff feel awesome, turn in is positive and sharp. Ride is good and not crash bang like some coilover setups so a good compromise for b road driving. Steering felt great with the correctly wired up epas giving decent weight and feedback.
I mostly kept it in 4th gear on the more spirited parts using the turbo mid range torque only changing into lower gears for tighter bends which made driving quite easy. The wilwood 4 pot front calipers with ds1:11 pads and reyland disc combo worked excellent as expected no fade, scrubbing off speed easily.
Only downside to it is the Helix 6 paddle clutch nearly wearing my knee out, but i have plans to sort that very soon.
Returned home over 600 miles done on the Sunday afternoon. Massive thanks again to Moggy for the hospitality and being our host fo the weekend, proper enjoyed it.
Thanks for reading!!


Had a great time and really enjoyed it noting almost 270miles and 3/4 of a tank of fuel used on the Sat. Ticked over 45k on the way back to Moggys.

This was largely a shakedown for the trophy as ive not really used it in anger too much so was hoping there would not be any little issues, but had nothing luckily. Good job as no phone reception in the mountains and no tools!!
Can report it all works good. Engine wise, i had the ecu data on display on my phone using tunerview and the coolant temps were mid 80s with oil temps low to mid 90s so that was bang on.
The handling felt excellent. The bilstein b14, roll correction kit and gripper diff feel awesome, turn in is positive and sharp. Ride is good and not crash bang like some coilover setups so a good compromise for b road driving. Steering felt great with the correctly wired up epas giving decent weight and feedback.
I mostly kept it in 4th gear on the more spirited parts using the turbo mid range torque only changing into lower gears for tighter bends which made driving quite easy. The wilwood 4 pot front calipers with ds1:11 pads and reyland disc combo worked excellent as expected no fade, scrubbing off speed easily.
Only downside to it is the Helix 6 paddle clutch nearly wearing my knee out, but i have plans to sort that very soon.
Returned home over 600 miles done on the Sunday afternoon. Massive thanks again to Moggy for the hospitality and being our host fo the weekend, proper enjoyed it.
Thanks for reading!!
Only downside to it is the Helix 6 paddle clutch nearly wearing my knee out, but i have plans to sort that very soon.
That made me chuckle. I quite like the feel of the helix TBH.
Brigsy
Media Mogul. Instagram legend.
This one is a heavy duty pressure plate with the 6 puck, absolutely awful
That made me chuckle. I quite like the feel of the helix TBH.
Moggy
Gone but not forgotten
It’s the only thing he moaned about all weekend
That made me chuckle. I quite like the feel of the helix TBH.
He Got out buzzing after a good bit of road, and after saying it was epic, moaned about the clutch.
Tbh, I think it’s the sign that we are all just getting older
Skipped leg day too many times?It’s the only thing he moaned about all weekend
He Got out buzzing after a good bit of road, and after saying it was epic, moaned about the clutch.
Tbh, I think it’s the sign that we are all just getting older
Brigsy
Media Mogul. Instagram legend.
Epic bit of road, proper enjoyed thatIt’s the only thing he moaned about all weekend
He Got out buzzing after a good bit of road, and after saying it was epic, moaned about the clutch.
Tbh, I think it’s the sign that we are all just getting older
Knees still not thanking me for it though today. It best get ready for the paddle clutch in the extra this weekend
Brigsy
Media Mogul. Instagram legend.
Back to the project post.
Last post was around April 2021 and the suspension and brakes were completed, so at a guess this was late April / early May.
Next job on the list was to sort some minor paintwork to the front jacking points. The sill lip had been jacked up incorrectly cracking the paint in the past.
I stripped off all the panels up front and the sideskirts. No hidden nasties under the sideskirts all good and no rust.
Sill lip dollied straight, cleaned back to bare metal. Used Bilt Hamber deox gel to make sure any sign of slight corrosion was gone.
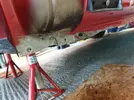
I then applied BH Hydrate 80 over the bare metal, followed by BH epoxy mastic in black. I went over the bare primered area on the end of the sill for extra protection as all hidden behind the wing.
I then went over the epoxy mastic with some buzzweld chassis black the full length of the sill lip for more protection as the original paint is very thin, and so it looked uniform and all the same colour. I was considering doing this capscium red but its not seen from the top so black is ok.
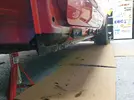
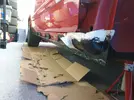
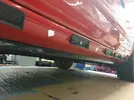
I then give it a liberal coating of BH dynax uc all over the sill lip inside and out, done the jacking points, inner arches, behind arch liners etc for long term protection. Nice matt finish to it once cured.
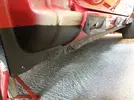
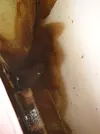
Whilst looking at rust protection i decided to take the rear doorcards off and check the inner sills and inner rear arches as a known rust spot now the clios are getting older. This has been garaged for 90% of its life so was not too worried but always worth doing.
Passenger side looking mint
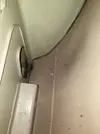
BH dynax ub to protect it.
Drivers side again great condition
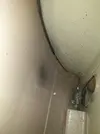
Liberal application of BH dynax ub
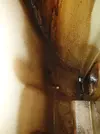
Took roughly a week to do all of this but should see the car last a long time.
I knew deep down that the wiring needed to be done next as i had done all the quick wins so needed to get prepared for the task ahead.
More to come. Thanks for reading!!
Last post was around April 2021 and the suspension and brakes were completed, so at a guess this was late April / early May.
Next job on the list was to sort some minor paintwork to the front jacking points. The sill lip had been jacked up incorrectly cracking the paint in the past.
I stripped off all the panels up front and the sideskirts. No hidden nasties under the sideskirts all good and no rust.
Sill lip dollied straight, cleaned back to bare metal. Used Bilt Hamber deox gel to make sure any sign of slight corrosion was gone.

I then applied BH Hydrate 80 over the bare metal, followed by BH epoxy mastic in black. I went over the bare primered area on the end of the sill for extra protection as all hidden behind the wing.
I then went over the epoxy mastic with some buzzweld chassis black the full length of the sill lip for more protection as the original paint is very thin, and so it looked uniform and all the same colour. I was considering doing this capscium red but its not seen from the top so black is ok.


I then give it a liberal coating of BH dynax uc all over the sill lip inside and out, done the jacking points, inner arches, behind arch liners etc for long term protection. Nice matt finish to it once cured.

Whilst looking at rust protection i decided to take the rear doorcards off and check the inner sills and inner rear arches as a known rust spot now the clios are getting older. This has been garaged for 90% of its life so was not too worried but always worth doing.
Passenger side looking mint

BH dynax ub to protect it.

Drivers side again great condition

Liberal application of BH dynax ub

Took roughly a week to do all of this but should see the car last a long time.
I knew deep down that the wiring needed to be done next as i had done all the quick wins so needed to get prepared for the task ahead.
More to come. Thanks for reading!!
Mark_L
Well-Known Member
All worthwhile, won’t regret it when all the others are rotting away.Back to the project post.
Last post was around April 2021 and the suspension and brakes were completed, so at a guess this was late April / early May.
Next job on the list was to sort some minor paintwork to the front jacking points. The sill lip had been jacked up incorrectly cracking the paint in the past.
I stripped off all the panels up front and the sideskirts. No hidden nasties under the sideskirts all good and no rust.
Sill lip dollied straight, cleaned back to bare metal. Used Bilt Hamber deox gel to make sure any sign of slight corrosion was gone.
View attachment 207189
I then applied BH Hydrate 80 over the bare metal, followed by BH epoxy mastic in black. I went over the bare primered area on the end of the sill for extra protection as all hidden behind the wing.
I then went over the epoxy mastic with some buzzweld chassis black the full length of the sill lip for more protection as the original paint is very thin, and so it looked uniform and all the same colour. I was considering doing this capscium red but its not seen from the top so black is ok.
View attachment 207190
View attachment 207191
View attachment 207192
I then give it a liberal coating of BH dynax uc all over the sill lip inside and out, done the jacking points, inner arches, behind arch liners etc for long term protection. Nice matt finish to it once cured.
View attachment 207193
Whilst looking at rust protection i decided to take the rear doorcards off and check the inner sills and inner rear arches as a known rust spot now the clios are getting older. This has been garaged for 90% of its life so was not too worried but always worth doing.
Passenger side looking mint
View attachment 207194
BH dynax ub to protect it.
View attachment 207195
Drivers side again great condition
View attachment 207196
Liberal application of BH dynax ub
View attachment 207197
Took roughly a week to do all of this but should see the car last a long time.
I knew deep down that the wiring needed to be done next as i had done all the quick wins so needed to get prepared for the task ahead.
More to come. Thanks for reading!!
Did it to Lou’s Ph1 when we bought it about 12 years ago, sills still look mint, I coated the outside before replacing the skirts too.
Brigsy
Media Mogul. Instagram legend.
Lets start filling in some more blanks.
April - November 2021.
Not a lot happened in this period to be fair! Wiring was needed and i was still putting it off. Was also doing a load of work to the Kangoo.
November/December 2021.
Promised the mrs that id get it fired up before the new year. Started bolting more parts on and making custom boost hoses, fitted all the coolant hoses. They mostly fitted but needed cutting and carefully routing to avoid any chafing and heat.
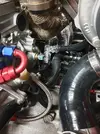
Boost hoses mocked up. Old ones did not fit/was not happy with fitment. Its knacker tight and every mm counts. Note X marked for AIT sensor placement. Used murrayconstant tension clamps opposed to normal jubilees, all pipes swaged as i definitely was not removing bumper to be refixing popped off hoses.
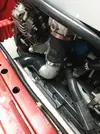
Intercooler mocked up. Custom design, 70mm thick bar and plate garrett core rated to 500hp.

Heater hoses were a pig to route to stop any chafing. Simple jobs like this were taking me hours to get right, i had to spend the time so it could be nice and reliable.
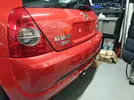
Ordered some fresh standard plates to replace the pressed ones that were fitted. Had to get a pic with the plate off, looking clean.
I started reckoning up a sensor list and what plugs id need.

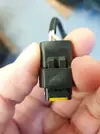
Had the old plugs for reference. Problem was is i didnt want loads of joints so was looking for new plugs or at least new pins. Spent hours looking for new ones so below pics to identify, might help somebody in the future.
Delphi sicma 2pin for megane crank sensor
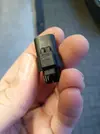
Delphi sicma 3 pin for early 197 cam sensor.
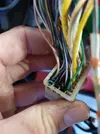
Looked at the white connector of doom in the engine bay fusebox. Can remember thinking f**k that at the time!!
The question is did i make the start up deadline? Did i shite.
Thanks for reading and more to come!!
April - November 2021.
Not a lot happened in this period to be fair! Wiring was needed and i was still putting it off. Was also doing a load of work to the Kangoo.
November/December 2021.
Promised the mrs that id get it fired up before the new year. Started bolting more parts on and making custom boost hoses, fitted all the coolant hoses. They mostly fitted but needed cutting and carefully routing to avoid any chafing and heat.
Boost hoses mocked up. Old ones did not fit/was not happy with fitment. Its knacker tight and every mm counts. Note X marked for AIT sensor placement. Used murrayconstant tension clamps opposed to normal jubilees, all pipes swaged as i definitely was not removing bumper to be refixing popped off hoses.

Intercooler mocked up. Custom design, 70mm thick bar and plate garrett core rated to 500hp.

Heater hoses were a pig to route to stop any chafing. Simple jobs like this were taking me hours to get right, i had to spend the time so it could be nice and reliable.

Ordered some fresh standard plates to replace the pressed ones that were fitted. Had to get a pic with the plate off, looking clean.

I started reckoning up a sensor list and what plugs id need.

Had the old plugs for reference. Problem was is i didnt want loads of joints so was looking for new plugs or at least new pins. Spent hours looking for new ones so below pics to identify, might help somebody in the future.
Delphi sicma 2pin for megane crank sensor

Delphi sicma 3 pin for early 197 cam sensor.

Looked at the white connector of doom in the engine bay fusebox. Can remember thinking f**k that at the time!!

The question is did i make the start up deadline? Did i shite.
Thanks for reading and more to come!!
Similar threads
- Replies
- 181
- Views
- 11K

