There is more to life with TurboRenault.co.uk
You are using an out of date browser. It may not display this or other websites correctly.
You should upgrade or use an alternative browser.
You should upgrade or use an alternative browser.
Clio Clio 197 with forged Megane r26 engine
- Thread starter stephenvenning
- Start date
DannyAG200
Active Member
and Sc couldn't find that in 4 months?
I rest my case against them! Just like my intercooler and hardpipe kit will not fit my conversion to which it did and I won't be able to wire It myself. Which I did.
He doest deal with the cars anymore hence why that side of the business is no longer and he's back to his original job
stephenvenning
Well-Known Member
Well yesterday I received the news I had been waiting for 5 months, my car is fixed and running sweet. Hopefully fingers crossed I can pick it up this weekend and get a few miles on it before mapping.
Well yesterday I received the news I had been waiting for 5 months, my car is fixed and running sweet. Hopefully fingers crossed I can pick it up this weekend and get a few miles on it before mapping.
 :ay:
:ay:jordan richmond
New Member
Wooooo hooooooo finally get some more videos and pictures of her now mate
Sent from my iPhone using Tapatalk
Sent from my iPhone using Tapatalk
DaveL485
Staff member
Brilliant news! I bet you're relieved. I had some good news on my long term overrunning project this week too, must be something in the air!Well yesterday I received the news I had been waiting for 5 months, my car is fixed and running sweet. Hopefully fingers crossed I can pick it up this weekend and get a few miles on it before mapping.
stephenvenning
Well-Known Member
UPDATE:
I know its been a long time without a decent update so i apologise. Anyway today was a very good day, the culmination 2.5 years of hard work, I actually got to drive it. The car drives great and with the extra torque it is so much easier to drive even when limiting myself to 3k revs before getting it mapped. The gearbox is sweet as a nut and shifts soooo smoothly. Cant really put the Quaife LSD to the test until mapped and running intended power. Power delivery is so smooth with a lovely induction noise and typical turbo noises which we all love. The clutch is very tricky especially doing hill starts but i always knew this was the case with a 4 puc paddle clutch, I will get used to it over time.
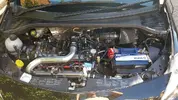
Today I just gave the car a clean inside and installed my rear seats. I also wiped over the engine bay to remove any dust, Ill need to install the battery tray again, that will be a job for tomorrow.
In the week I plan on detailing the car and get it protected for the winter weather. Im also going to be installing the rest of the fuel system on the weekend ready for mapping at the end of the month.
Pictures as always:
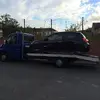
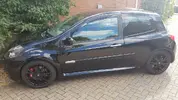
Quick video:
http://vid1373.photobucket.com/albu...e Uploads/VID_50950402_010143_zps9hvsbwkm.mp4
Thanks as always
I know its been a long time without a decent update so i apologise. Anyway today was a very good day, the culmination 2.5 years of hard work, I actually got to drive it. The car drives great and with the extra torque it is so much easier to drive even when limiting myself to 3k revs before getting it mapped. The gearbox is sweet as a nut and shifts soooo smoothly. Cant really put the Quaife LSD to the test until mapped and running intended power. Power delivery is so smooth with a lovely induction noise and typical turbo noises which we all love. The clutch is very tricky especially doing hill starts but i always knew this was the case with a 4 puc paddle clutch, I will get used to it over time.
Today I just gave the car a clean inside and installed my rear seats. I also wiped over the engine bay to remove any dust, Ill need to install the battery tray again, that will be a job for tomorrow.
In the week I plan on detailing the car and get it protected for the winter weather. Im also going to be installing the rest of the fuel system on the weekend ready for mapping at the end of the month.
Pictures as always:


Quick video:
http://vid1373.photobucket.com/albu...e Uploads/VID_50950402_010143_zps9hvsbwkm.mp4
Thanks as always
stephenvenning
Well-Known Member
UPDATE:
Another week with the clio and all is going great. There are though a few problems I need to address first before mapping. First one being the problem of overheating that these conversions seem to have. It really showed up when we had that freak heat wave earlier in the week. The cause for this is I believe a mixture of things; 1, the radiator is too small, therefore a megane radiator is on the way as we speak and will be fitting that next weekend. 2. the ducting for the radiator is terrible, now that the bottom vent is filled by an intercooler and the top vents mainly for the engine intake, the radiator is hardly getting any air to it. To remedy this Im going to install ducting from the top vents down into the radiator. Also Ive noticed 200's with this conversion rarely get this problem, the reason I believe is the top vents on them is far lower down than a 197, hence they get far better airflow through the radiator.
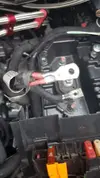
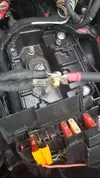
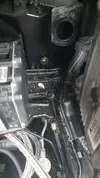
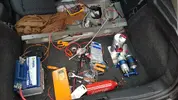
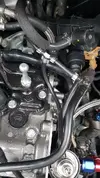
Today I set about relocating the battery in the boot to make way for a cold air intake on to bring down them intakes temps a bit. I picked up some 25mm^2 cable, crimps, heatshrink and a 100A fuse from work. I crimped a large 35mm^2 ring tag on the existing wires for the battery, I then attached the cable using another ring tag and a m6 bolt which I tightened and loctited in position, 5 layers of heat shrink were then shrunk over the connection. Next up I drilled a 10mm hole into the bulk head with a suitable grommet and ran the cable into the cabin by the foot well, teh cable was then ran all the way down the car under the kick plate/side trim and into the boot where it was terminated at the battery, the earth for the battery was attached to the chassis in the boot. Looks so much neater now in the engine bay. I still need to secure the battery but for this time being this will be fine.
Tomorrow I am going to be installing my fuel system into the car in order for me to break the 300 hp mark.
Pictures:
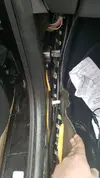
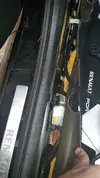
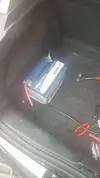
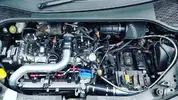


stephenvenning
Well-Known Member
UPDATE:
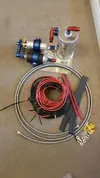
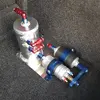
Bit of a late update as didnt have time yesterday. Well Ive managed to install half of my fuel system. I first set about wring in the pump. You use the green wire (12V feed) on the pump sender and run this to a 12V relay, so when the stock pump primes and turns on, the relay closes contact and the HP pump comes on. A 12V 60A cable is run from the battery to one side of the relay contact, then another 60A cable is run to the HF pump. I have also spliced into the green wire and installed a security switch and hidden it in the car, so when the switch is open the pump will not power on and hence the car will not start, i recommend more people do this, really easy, only took an hour or two and easy to find electrical components and could save your car from being nicked.
Next up was plumbing it up as much as I could, I ran the return line to the swirl pot and the overflow from the swirl pot back into the top of the sender unit. All torques motorsport grade fittings were used along with Teflon braided line. The swirl pot assembly was bolted to the floor using m5 cap head bolts with hank bushes being crimped into the floor of the car. The rising rate pressure reg boost reference was also connected using a T off of a vacuum line.
Next week Im going to fit the new megane radiator, finish the fuel system and build some aluminium boxes for the battery, hopefully my varley top battery will arrive this week.
Pictures:

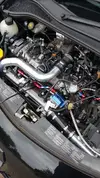
Thanks
Bit of a late update as didnt have time yesterday. Well Ive managed to install half of my fuel system. I first set about wring in the pump. You use the green wire (12V feed) on the pump sender and run this to a 12V relay, so when the stock pump primes and turns on, the relay closes contact and the HP pump comes on. A 12V 60A cable is run from the battery to one side of the relay contact, then another 60A cable is run to the HF pump. I have also spliced into the green wire and installed a security switch and hidden it in the car, so when the switch is open the pump will not power on and hence the car will not start, i recommend more people do this, really easy, only took an hour or two and easy to find electrical components and could save your car from being nicked.
Next up was plumbing it up as much as I could, I ran the return line to the swirl pot and the overflow from the swirl pot back into the top of the sender unit. All torques motorsport grade fittings were used along with Teflon braided line. The swirl pot assembly was bolted to the floor using m5 cap head bolts with hank bushes being crimped into the floor of the car. The rising rate pressure reg boost reference was also connected using a T off of a vacuum line.
Next week Im going to fit the new megane radiator, finish the fuel system and build some aluminium boxes for the battery, hopefully my varley top battery will arrive this week.
Pictures:


Thanks
jordan richmond
New Member
Love this thread one of the best on the site[emoji1303]
Sent from my iPhone using Tapatalk
Sent from my iPhone using Tapatalk
Neal R19
Well-Known Member
Awesome looking fuel system mate!
Shame everything is already back together though, would love the OE pump part nr and pressure on reg, if it isn't too much hassle? Atleast yours can be removed from the top now!
Which fuel pump part number are you after mate? 225 or clio?
stephenvenning
Well-Known Member
stephenvenning
Well-Known Member
UPDATE:
This weekend the girlfriend was in Paris for the weekend, I booked Friday and Monday off and got to work sorting out the little niggly problems. First up was an oil change, pretty simple, no different from a clio oil change really. Topped back up with castrol edge and new renault filter. The old oil looked fine, no bits of metal in it
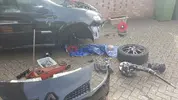
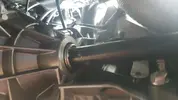
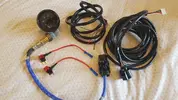
Ive always since getting the car back had a slight gearbox leak, would notice every morning when leaving for work there would be a small patch of gearbox oil on the drive. I did worry that it was leaking between the two casing halves of the gearbox, this would mean an engine out job to then have to open back up the gearbox and re-seal. Luckily it was found to be a duff driveshaft seal, got a new one ordered. This did mean that the drive shaft would need to be removed, a right pain in the arse job. The lower ball joint was undone along with the the tie rod and droplinks, the strut bolts were then undone and the whole hub assembly and driveshaft was slid out of the car. (Gearbox was drained before this) the old seal was pulled out and a new one installed. Driveshaft re installed and the hub was secured. The box was refilled with Fuchs Titan sintofluid and success, no leaks. While the driveshaft was out I removed the second lambda sensor and installed a wideband sensor instead (Second lambda sensor is only for emmisions) the cables were then ran into the cabin into an AEM afr gauge. This allows me to monitor the engines air fuel ratio on the go for peace of mind.
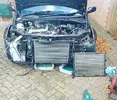
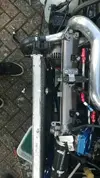
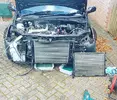
Today I set about installing a megane radiator, as I mentioned a few posts ago that i was suffering from overheating in hot weather. The megane radiator is huge compared to the clios. The old rad was removed and the megane rad mocked up, checking all the hoses would reach etc. Location holes were then drilled into the lower subframe. The top crash bar has to be trimmed a little in order for the rad to fit in the stock location. The rad was still a bit tight though, to cue this I spaced down the lower front subframe by 10mm, this gave me enough room for everything to line up correctly. The light however was fading and I had to stop work. I did manage to plumb up the system and bleed any air out of it. Tomorrow I shall finish the radiator setup and go out for a long drive to make sure its all running correctly and see if the temps remain lower than before.
Photos:
Thanks
This weekend the girlfriend was in Paris for the weekend, I booked Friday and Monday off and got to work sorting out the little niggly problems. First up was an oil change, pretty simple, no different from a clio oil change really. Topped back up with castrol edge and new renault filter. The old oil looked fine, no bits of metal in it
Ive always since getting the car back had a slight gearbox leak, would notice every morning when leaving for work there would be a small patch of gearbox oil on the drive. I did worry that it was leaking between the two casing halves of the gearbox, this would mean an engine out job to then have to open back up the gearbox and re-seal. Luckily it was found to be a duff driveshaft seal, got a new one ordered. This did mean that the drive shaft would need to be removed, a right pain in the arse job. The lower ball joint was undone along with the the tie rod and droplinks, the strut bolts were then undone and the whole hub assembly and driveshaft was slid out of the car. (Gearbox was drained before this) the old seal was pulled out and a new one installed. Driveshaft re installed and the hub was secured. The box was refilled with Fuchs Titan sintofluid and success, no leaks. While the driveshaft was out I removed the second lambda sensor and installed a wideband sensor instead (Second lambda sensor is only for emmisions) the cables were then ran into the cabin into an AEM afr gauge. This allows me to monitor the engines air fuel ratio on the go for peace of mind.
Today I set about installing a megane radiator, as I mentioned a few posts ago that i was suffering from overheating in hot weather. The megane radiator is huge compared to the clios. The old rad was removed and the megane rad mocked up, checking all the hoses would reach etc. Location holes were then drilled into the lower subframe. The top crash bar has to be trimmed a little in order for the rad to fit in the stock location. The rad was still a bit tight though, to cue this I spaced down the lower front subframe by 10mm, this gave me enough room for everything to line up correctly. The light however was fading and I had to stop work. I did manage to plumb up the system and bleed any air out of it. Tomorrow I shall finish the radiator setup and go out for a long drive to make sure its all running correctly and see if the temps remain lower than before.
Photos:


Thanks
stephenvenning
Well-Known Member
UPDATE:
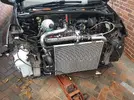
Haven't been on here for a while so thought id update with progress so far. First of all the radiator has made a HUGE difference, temps don't go above the 3rd marker even after some hard abuse and sitting in traffic. So I would definitely recommend fitting one if anyone is thinking of doing the conversion.
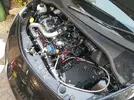
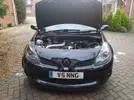
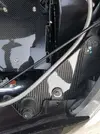
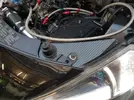
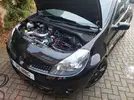
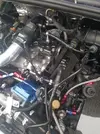
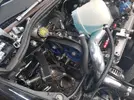
With most of the mechanical work finished for now, I set about making the engine bay a bit tidier, mainly around the crash panel and top of the bumper. I sprayed the top of the bumper satin black as the plastic was faded and no amount of trim restorer was bringing it back to life. I also bought some new oem stickers to go back on, looks like new! Now because the bumper has been on and off so many times the plastic had become really scratched and faded on the top of the slam panel, this wouldn't do. To remedy this I made up some real carbon trims to cover up them areas. I first applied masking tape to the area and carefully cut out the outline in the tape, I then peeled off the tape and this gave me a template. The template was used to mark out the carbon, I cut it out on a band saw at work using a fine blade, this gave a really nice edge. I then proceeded to sand and bevel the edges so there was no sharp edges. Holes were drilled for the bumper stops and headlight mounting holes. Fitted them in my lunch break and I think they look the part, really neaten up that hole area of the bay. I'm going to add some more carbon touches in the bay and around the car before next year.
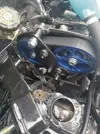
Reading through the specs on the timing belt the other week I realised I had not torqued the camshaft pulleys properly, I couldn't leave this, as when pushing more power the last thing I would want is for the pulley to slip and potentially write off then engine. I took a saturday and basically changed the cambelt again. Both engine mounts need to be removed and the cam cover removed while supporting the engine with a jack. The cam slots were easy to get to as Ive got no battery in the bay now. Torqued the pulleys up to spec and turned over two revolutions of the crank and all was good. Engine timing was still spot on.
Before mapping which Ill get onto in a bit I needed to finish my fuel system, I linked up the tank to swirl pot line and the HF pump to rail line, Only took 30 mins. Then the pump was primed a few times and the engine was fired up, the pressure was then set to 3.5 bar like the stock setup and then I checked for leaks. However my god is the bosch 044 loud! Ill definitely need to make a box up for the fuel system with sound deadening for when I do long journeys, then the box can be removed for shows etc.
Right onto mapping, and unfortunately it didn't go to plan. Got to EFI for 10 and on the rollers. Scoff tried to access my ecu to use his own software for mapping, but there was a problem, my ecu appears to have a fast chips map on it which locks the ecu. This would be fine on a weekday as you could get a code off fast chips to unlock the ecu, but this was a sunday and fast chips werent replying. Im now on the hunt for a spare ecu now so scoff can reset it to factory settings and then map it properly not using henk software. Top bloke and really helpful, its just one of them annoying things I suppose, no one was to blame. We did however get the car on the dyno and do a few pulls, its making about 245 hp which isnt too bad, and its running safe which means I can give it more revs now, pulls like an absolute train, cant imagine what its going to be like at 350+.
More updates will be up shortly, with more touches being done and prep being done for another go at mapping and expo in november.
Thanks
Haven't been on here for a while so thought id update with progress so far. First of all the radiator has made a HUGE difference, temps don't go above the 3rd marker even after some hard abuse and sitting in traffic. So I would definitely recommend fitting one if anyone is thinking of doing the conversion.
With most of the mechanical work finished for now, I set about making the engine bay a bit tidier, mainly around the crash panel and top of the bumper. I sprayed the top of the bumper satin black as the plastic was faded and no amount of trim restorer was bringing it back to life. I also bought some new oem stickers to go back on, looks like new! Now because the bumper has been on and off so many times the plastic had become really scratched and faded on the top of the slam panel, this wouldn't do. To remedy this I made up some real carbon trims to cover up them areas. I first applied masking tape to the area and carefully cut out the outline in the tape, I then peeled off the tape and this gave me a template. The template was used to mark out the carbon, I cut it out on a band saw at work using a fine blade, this gave a really nice edge. I then proceeded to sand and bevel the edges so there was no sharp edges. Holes were drilled for the bumper stops and headlight mounting holes. Fitted them in my lunch break and I think they look the part, really neaten up that hole area of the bay. I'm going to add some more carbon touches in the bay and around the car before next year.
Reading through the specs on the timing belt the other week I realised I had not torqued the camshaft pulleys properly, I couldn't leave this, as when pushing more power the last thing I would want is for the pulley to slip and potentially write off then engine. I took a saturday and basically changed the cambelt again. Both engine mounts need to be removed and the cam cover removed while supporting the engine with a jack. The cam slots were easy to get to as Ive got no battery in the bay now. Torqued the pulleys up to spec and turned over two revolutions of the crank and all was good. Engine timing was still spot on.
Before mapping which Ill get onto in a bit I needed to finish my fuel system, I linked up the tank to swirl pot line and the HF pump to rail line, Only took 30 mins. Then the pump was primed a few times and the engine was fired up, the pressure was then set to 3.5 bar like the stock setup and then I checked for leaks. However my god is the bosch 044 loud! Ill definitely need to make a box up for the fuel system with sound deadening for when I do long journeys, then the box can be removed for shows etc.
Right onto mapping, and unfortunately it didn't go to plan. Got to EFI for 10 and on the rollers. Scoff tried to access my ecu to use his own software for mapping, but there was a problem, my ecu appears to have a fast chips map on it which locks the ecu. This would be fine on a weekday as you could get a code off fast chips to unlock the ecu, but this was a sunday and fast chips werent replying. Im now on the hunt for a spare ecu now so scoff can reset it to factory settings and then map it properly not using henk software. Top bloke and really helpful, its just one of them annoying things I suppose, no one was to blame. We did however get the car on the dyno and do a few pulls, its making about 245 hp which isnt too bad, and its running safe which means I can give it more revs now, pulls like an absolute train, cant imagine what its going to be like at 350+.
More updates will be up shortly, with more touches being done and prep being done for another go at mapping and expo in november.


Thanks
Similar threads
- Replies
- 1
- Views
- 489
- Replies
- 23
- Views
- 6K
- Replies
- 83
- Views
- 8K

