There is more to life with TurboRenault.co.uk
You are using an out of date browser. It may not display this or other websites correctly.
You should upgrade or use an alternative browser.
You should upgrade or use an alternative browser.
Clio Clio 197 with forged Megane r26 engine
- Thread starter stephenvenning
- Start date
stephenvenning
Well-Known Member
UPDATE:
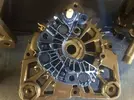
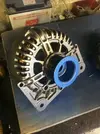
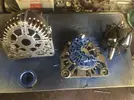
A fair bit has happened since my last post, Ill start with the bit most people wont be interested in, the alternator. I first gave the iron core a coat of anti corrosion paint to tidy it up really as i cant be dealing with rusty parts on my build. I then took the rectifier module and pulley wheel and gave them a blast with the sand blaster to remove all the crud and corrosion, I followed this by painting them the same metallic blue that the cam pulleys were painted in, to make the alternator look a little less boring turned out rather well i think.just needs re assembling now and the bearings to be replaced.
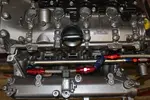
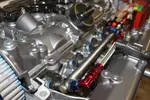
To make the rocker cover look that little bit better, i had all the bolts zinc plated which makes them almost chrome looking. This should also protect the bolts from rust, which would look rubbish, especially with all the work that's gone into this project.
Over the last few weeks one of my side lights had blown and it was time to replace, a job that I had been putting off as I dont have the smallest of hands I therefore made the decision to change them to bright white LED bulbs and at the same time change all the indicators to Osram Diadem. I must say this has really modernized the front end. These LED's are so bright! makes my projector headlights kind of pointless now

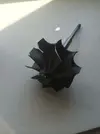
Right onto the most anticipated bit and how my turbo is going. This week I received the 9 blade HL turbine wheel from ARD tuning again, lovely bit of kit and really well made, cant recommend this company enough for td04 parts. This turbine is slightly larger than the L wheel and should make for better spooling.
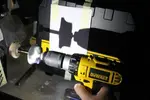
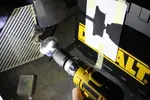
In order to accurately measure the rotating contour on the compressor and turbine wheel I used a method known as shadow graphing. This is done by projecting the objects profile onto a piece of paper and then tracing the outline. I setup a basic jig with my phone light, compressor wheel mounted in a drill and the a piece of card as the back drop. two points were marked on the piece on the card at 94mm apart (2 x the diameter of the inducer) this gave me a reference point to line the shadow up with to give me a shadow double the size of the actual compressor wheel. The lights were turned off and the drill was turned on, the outline was then traced.
Using a radius gauge to curve was determined to be a 20mm radius, but remember this is a 1:2 scale, so the actual radius I have to make a tool to is 10mm. Proper engineering that

Thanks for reading.
A fair bit has happened since my last post, Ill start with the bit most people wont be interested in, the alternator. I first gave the iron core a coat of anti corrosion paint to tidy it up really as i cant be dealing with rusty parts on my build. I then took the rectifier module and pulley wheel and gave them a blast with the sand blaster to remove all the crud and corrosion, I followed this by painting them the same metallic blue that the cam pulleys were painted in, to make the alternator look a little less boring


To make the rocker cover look that little bit better, i had all the bolts zinc plated which makes them almost chrome looking. This should also protect the bolts from rust, which would look rubbish, especially with all the work that's gone into this project.


Over the last few weeks one of my side lights had blown and it was time to replace, a job that I had been putting off as I dont have the smallest of hands

Right onto the most anticipated bit and how my turbo is going. This week I received the 9 blade HL turbine wheel from ARD tuning again, lovely bit of kit and really well made, cant recommend this company enough for td04 parts. This turbine is slightly larger than the L wheel and should make for better spooling.

In order to accurately measure the rotating contour on the compressor and turbine wheel I used a method known as shadow graphing. This is done by projecting the objects profile onto a piece of paper and then tracing the outline. I setup a basic jig with my phone light, compressor wheel mounted in a drill and the a piece of card as the back drop. two points were marked on the piece on the card at 94mm apart (2 x the diameter of the inducer) this gave me a reference point to line the shadow up with to give me a shadow double the size of the actual compressor wheel. The lights were turned off and the drill was turned on, the outline was then traced.
Using a radius gauge to curve was determined to be a 20mm radius, but remember this is a 1:2 scale, so the actual radius I have to make a tool to is 10mm. Proper engineering that


Thanks for reading.
stephenvenning
Well-Known Member
Cheers pal. There will be plenty more coming in the next few months.I am really, really enjoying this thread
stephenvenning
Well-Known Member
Top banana. Liking that alternator, you must have far too much time on your hands though lol
Thanks, I wish! I'm doing a engineering HND/HNC so always doing college work, only get time to do this on the weekend.
stephenvenning
Well-Known Member
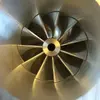
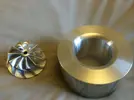
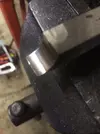
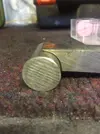
I managed tonight to machine a practice turbo housing. I secured a 80mm dia alumium bar in the four jaw chuck and then bored out a hole to 47.7mm, this allowed me 0.7mm clearance. I also grinded up a 10mm radius tool and cut the contour into the edge of the hole. With a bit of light sanding and polishing its pretty much perfect, this gives me much more confidence in machining the actual turbo compressor housing. some changes have to be made to radius tool to get it cutting more efficiently. But anyway pretty successful evening!

Thanks!


Thanks!
stephenvenning
Well-Known Member
Flipping spiders !
Would the inlet benefit from a anti surge compressor housing
Possibly, the guys in the Volvo world use 20t wheels and have little problems with surge. If I do get some then ill probs sell this turbo off and go for a smaller compressor wheel.
stephenvenning
Well-Known Member
Not when it's from the off cuts bin from work lolThats an expensive chunk of ally!
stephenvenning
Well-Known Member
UPDATE:
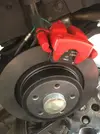
Havent had much time to update this thread so here goes. First of as MOT time approaches my rear discs desperately needed replacing, did this over the weekend, gave the callipers a good clean as well. slight problem with the handbrake now though, Im sure it just needs adjusting, no problem to do. the brand new discs make the rear end look so much better, old ones were beyond rusty.
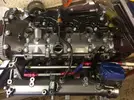
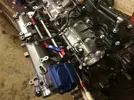
Now onto the engine build, the turbo has again taken a back seat at the moment while the CHRA is out for balancing. I did in the meanwhile purchase another throttle body as the old one was damaged. This was cleaned thoroughly with degreaser and then shot blasted, using the same paint as the rest of the engine is painted, I gave a few coats with 3 coats of lacquer. The pivot points of the throttle body was then oiled with ZX1. The top cap of the throttle body was painted metallic blue, this matches in with the AN fittings nicely.
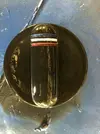
I was looking at the oil filler cap and thought it needed brightening up a bit and to make it more individual to the car. On the oil cap there is three grooves, I therefore created a french flag with this. Using an airbrush and thin masking tape I filled in this slots with the colours of the french flag. The oil cap was then given 3 coats of lacquer. Im really pleased with this and itb was pretty much free, a win win then
Next time Ill hopefully should have the CHRA back from balancing and have the compressor housing machined at last
Pics as usual:
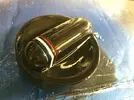
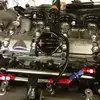
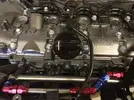


stephenvenning
Well-Known Member
Cheers guys for the kind words. There will be some more little touches to be done. Hopefully my clio comes off the road in November ready for show season next year.
stephenvenning
Well-Known Member
PDATE:
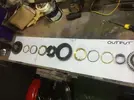
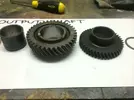
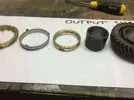
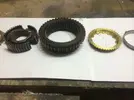
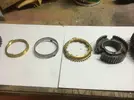
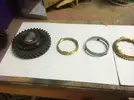
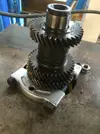
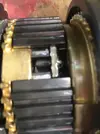
Not to much progress as Ive been on holiday and had callipers to do. I have managed to completely strip the output shaft of the gearbox, this was done by using a bearing puller/splitter to remove the end tapered roller bearings, with these off I took the shaft to work and used the 20 ton press to press the gears off of the shaft, it was then disassembled and laid out in order and then thoroughly cleaned with solvent degreasers. The input shaft is proving a bit more of an arse to disassemble, there is a nut on one end that is screwed onto the shaft to hold the bearings on, problem is that its bloody tight and holding it securely is proving a pain. i did try it in a lathe 4 jaw chuck but it still would turn. I plan on getting an old 197 clutch and using the spline to hold the shaft securely while I undo the nut. Also I have started cleaning the cases and will shot blast the outside this week and then remove all the bearing races and seals and then give it a lick of paint. Anyway im sure ill have more to show you next time

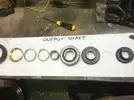
Thanks guys
Not to much progress as Ive been on holiday and had callipers to do. I have managed to completely strip the output shaft of the gearbox, this was done by using a bearing puller/splitter to remove the end tapered roller bearings, with these off I took the shaft to work and used the 20 ton press to press the gears off of the shaft, it was then disassembled and laid out in order and then thoroughly cleaned with solvent degreasers. The input shaft is proving a bit more of an arse to disassemble, there is a nut on one end that is screwed onto the shaft to hold the bearings on, problem is that its bloody tight and holding it securely is proving a pain. i did try it in a lathe 4 jaw chuck but it still would turn. I plan on getting an old 197 clutch and using the spline to hold the shaft securely while I undo the nut. Also I have started cleaning the cases and will shot blast the outside this week and then remove all the bearing races and seals and then give it a lick of paint. Anyway im sure ill have more to show you next time


Thanks guys
Tony Smith
Well-Known Member
Hadn't seen this thread before. Great work, thanks for all the hard work that's gone into the thread. Look forward to seeing it finished should be awesome.
stephenvenning
Well-Known Member
Thankyou mate, there will be plenty more interesting stuff to come.Hadn't seen this thread before. Great work, thanks for all the hard work that's gone into the thread. Look forward to seeing it finished should be awesome.
DaveL485
Staff member
Love the way you get into every single corner of it...I mean, who the hell strips down an alternator? Flipping brilliantThankyou mate, there will be plenty more interesting stuff to come.
Similar threads
- Replies
- 1
- Views
- 489
- Replies
- 23
- Views
- 6K
- Replies
- 83
- Views
- 8K

