There is more to life with TurboRenault.co.uk
You are using an out of date browser. It may not display this or other websites correctly.
You should upgrade or use an alternative browser.
You should upgrade or use an alternative browser.
Clio Clio 197 with forged Megane r26 engine
- Thread starter stephenvenning
- Start date
stephenvenning
Well-Known Member
Thankyou mate, I dont like to leave anything as I know Ill regret it when the engines in, hence making a massively overkill build for the power lol.Love the way you get into every single corner of it...I mean, who the hell strips down an alternator? Flipping brilliant
stephenvenning
Well-Known Member
Hello again guys
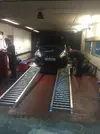
Not to much to update on again. But first things first Ive just been enjoying the clio this week, finally cleaned it in over a month and went for a meet up at Eurospec for a dyno day. It was really a great day and really glad how much my clio made, 193.2HP and a reasonably straight curve, these rollers are also known as the "heart break" rollers and normally read lower than others, so there is a possibility that its making a wee bit more. It will be hopefully a good 150HP more than this by next time its on the dyno
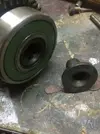
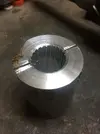
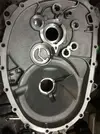
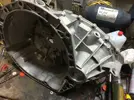
Anyway back to the build, and to my relief I have finally undone the nut on the end of the input shaft. I couldnt find a clutch plate for love nor money to help me hold shaft so I could undo the nut. Therefore I had to make an aluminum collet in order to hold on the spline so I could get a breaker bar and get it undone, man it was tight! Also managed to remove all the bearing races and seals from the bell housing side of the casing, I then shot blasted the outside ready for paint. The casing was then cleaned 3 times in hot soapy water to remove all dirt and sand.
All the seals, synchros and bearings are being delivered this week so I can then get the bearing races installed and also paint the casings.


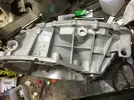
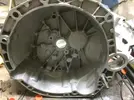
Thanks everyone.
Not to much to update on again. But first things first Ive just been enjoying the clio this week, finally cleaned it in over a month and went for a meet up at Eurospec for a dyno day. It was really a great day and really glad how much my clio made, 193.2HP and a reasonably straight curve, these rollers are also known as the "heart break" rollers and normally read lower than others, so there is a possibility that its making a wee bit more. It will be hopefully a good 150HP more than this by next time its on the dyno
Anyway back to the build, and to my relief I have finally undone the nut on the end of the input shaft. I couldnt find a clutch plate for love nor money to help me hold shaft so I could undo the nut. Therefore I had to make an aluminum collet in order to hold on the spline so I could get a breaker bar and get it undone, man it was tight! Also managed to remove all the bearing races and seals from the bell housing side of the casing, I then shot blasted the outside ready for paint. The casing was then cleaned 3 times in hot soapy water to remove all dirt and sand.
All the seals, synchros and bearings are being delivered this week so I can then get the bearing races installed and also paint the casings.


Thanks everyone.
stephenvenning
Well-Known Member
UPDATE:
Quite of bit of progress this week. First I managed to disassemble the input shaft, was quite simple once the nut was removed. The bearing was pressed off and then the components were laid out in order meticulously like i did on the input shaft. I then cleaned the gears with engine degreaser and then packed them away ready to be sent out for treatment.
I also cleaned up the other half of the casing by first shot blasting the outside and then thoroughly cleaning the inside with hot soapy water and degreaser. Removed the bearing race where the diff sits, the other bearing race will need a bead of weld running on the inside of it, once this is done, the weld pulls the bearing race inwards and it should just fall out
I had the Friday off so took the opportunity to take the turbo CHRa down the turbo dynamics for rebuilding and balancing, when i get it back Ill be ready to machine the housings to suit.
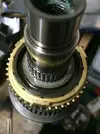
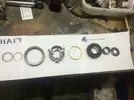
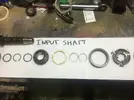
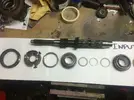
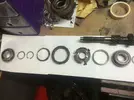
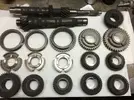

Thanks
Quite of bit of progress this week. First I managed to disassemble the input shaft, was quite simple once the nut was removed. The bearing was pressed off and then the components were laid out in order meticulously like i did on the input shaft. I then cleaned the gears with engine degreaser and then packed them away ready to be sent out for treatment.
I also cleaned up the other half of the casing by first shot blasting the outside and then thoroughly cleaning the inside with hot soapy water and degreaser. Removed the bearing race where the diff sits, the other bearing race will need a bead of weld running on the inside of it, once this is done, the weld pulls the bearing race inwards and it should just fall out
I had the Friday off so took the opportunity to take the turbo CHRa down the turbo dynamics for rebuilding and balancing, when i get it back Ill be ready to machine the housings to suit.


Thanks
stephenvenning
Well-Known Member
That would be mean lol luckily I outlined all of the gears and wrote down the part numbers in orderJeez....there's a lot of sprockets in that gearbox. the little devil on my shoulder wants me to sneak into your garage and swap a few of them around View attachment 9297 LOL
You know what I hate ?That would be mean lol luckily I outlined all of the gears and wrote down the part numbers in order
Prior planning !
Where is the fun when it all starts going tits up and you get that heavy sinking feeling in your stomach ?
( no - kidding. good plan )
DaveL485
Staff member
stephenvenning
Well-Known Member
TURBO TIME!
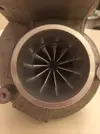
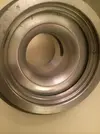
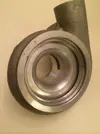
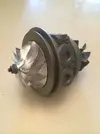
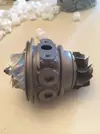
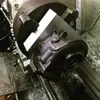
Right got some exciting news hopefully on the turbo side of my build. sent my CHRA off to Turbo Dynamics to get it balanced. It came back today and looks great, they have vapour blasted the core and rebuilt with new bearings and balanced. This therefore enables me to finally start machine the housings to suit. Should get the compressor cover done this weekend. I also made up a fixture to be able to mount the hot side of the turbo in the lathe, it needs some counterweighting to reduce vibration as it is off centre turning.
Gearbox parts are being sent off next weekend for shot peening and superfinishing. Also getting a quiafe atb diff ordered this weekend which should be here by next week.
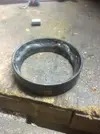
There was one bearing race that wouldnt budge inside the casing and there was no way of pulling it out. To get it out I welded a bead of weld on the inside of the race. Once it cools the weld pulls in out the bearing race, effectively shrinking it. It just fell out after. I gave both casings a good wash again and dried them with an airline. They will be painted once Ive installed new bearing races.
Finnally Ive sent off all the bolts for the engine and gearbox for zinc plating, they will be nice and shiny when they come back
Anyway thanks for reading as always, will update on the turbo on Sunday.


Norwich Nick
Well-Known Member
Good work. love this thread as it's all about the engineering, often you don't see the magic happen or the work involved.
Keep it up :i-m_so_happy.gif:
Keep it up :i-m_so_happy.gif:
stephenvenning
Well-Known Member
Good work. love this thread as it's all about the engineering, often you don't see the magic happen or the work involved.
Keep it up :i-m_so_happy.gif:
Thanks mate, appreciate it. I find too many project threads these days focus on the aesthetics of a car build or the end result rather than the engineering and the steps inbetween.
stephenvenning
Well-Known Member
It's a handy trick... If you know how to weld of course lolwelding around the bearing race.....brilliant.
stephenvenning
Well-Known Member
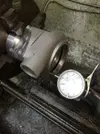
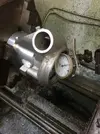
As promised there are updates with the turbo. Managed to set it and clock the turbo housing in the lathe to within 0.01mm. Ive bored it out to size of 47.3mm diameter (Leaving me 0.3mm for sanding and blending) Surface finish was very good and I took a 0.2mm final cut to achieve this. Ill contour to radius tomorrow and then blend with emery cloth.
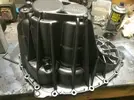
Also managed to paint the gearbox housings the same gunmetal colour the rocker cover is painted in.

A short video link:
http://vid1373.photobucket.com/album...psoeww95wa.mp4
Thanks,
Also managed to paint the gearbox housings the same gunmetal colour the rocker cover is painted in.


A short video link:
http://vid1373.photobucket.com/album...psoeww95wa.mp4
Thanks,
stephenvenning
Well-Known Member
Kind of, I used to be a sheet metal worker/fabricator. At the moment I'm a test/electrical engineer so don't do any machining work. Ive learnt most machining off my dad who is a machinist and we have a lathe in the garage which is handy.I am assuming you do this kind of thing ( metal work / engineering ) for a living , rather than for shits and giggles ?
stephenvenning
Well-Known Member
Similar threads
- Replies
- 1
- Views
- 489
- Replies
- 23
- Views
- 6K
- Replies
- 83
- Views
- 8K

