There is more to life with TurboRenault.co.uk
You are using an out of date browser. It may not display this or other websites correctly.
You should upgrade or use an alternative browser.
You should upgrade or use an alternative browser.
Clio Clio 197 with forged Megane r26 engine
- Thread starter stephenvenning
- Start date
stephenvenning
Well-Known Member
stephenvenning
Well-Known Member
Cut the metal away with an air nibbler. No sparks.
That's what I'm gonna use, picking one up at screw fix tomorrow.
stephenvenning
Well-Known Member
Fantastic build you have here, this is going to be a proper wolf in sheeps clothing, awesome keep up the good work :bo:
Thanks mate
stephenvenning
Well-Known Member
Little update today.
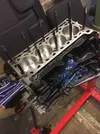
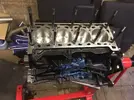
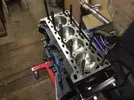
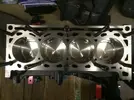
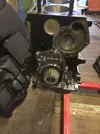
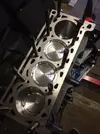
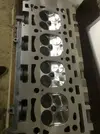
Picked my block up from Engine Dynamics today, looks great and could hardly recognize it Its been machined to 83mm bore to suit wossner forged pistons coupled with ZRP rods. ARP stud kits used throughout with Kings racing bearings and new oil squirters. This week Ill start finishing the engine by bolting on the head and then finish all the auxiliaries.
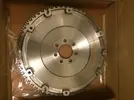
Gearbox parts will finally be back from shot peening after a short delay next week, along with my Helix Paddle Clutch kit, At this rate the conversion should commence close to the Xmas period.
I'm pretty excited now
Thanks again.
Picked my block up from Engine Dynamics today, looks great and could hardly recognize it
Gearbox parts will finally be back from shot peening after a short delay next week, along with my Helix Paddle Clutch kit, At this rate the conversion should commence close to the Xmas period.
I'm pretty excited now


Thanks again.
stephenvenning
Well-Known Member
UPDATE:
This week I have spent time getting the engine pretty much assembled. I installed a 1.6mm MLS head gasket to compensate for the 0.3mm taken off the cylinder head. The ARP head studs were wound in hand tight into the block. The cylinder head was then given another clean and placed onto the engine block. ARP moly lube was then applied to the studs, washers and nuts, these were then torqued down to 105 ft ib in three equal steps of 35 ib ft. It was then left 30 mins before final torquing to 105 ft ib.
The water pump was installed and bolts tightened to 17Nm, then tip-ex applied to the bolt to show it has been torqued up. The thermostat housing was installed in the same manner but torqued to 12Nm according with the workshop manual. The uprated timing belt tensioners were installed and the fixed tensioner pulley was torqued to 50Nm.
This week I should finish the engine bar getting it timed up. The only thing holding the build back is the fact I'm still waiting on some Max tuff assembly lube, once this arrives I can install the camshafts and rocker cover.
The engine is looking rather tasty now
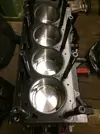
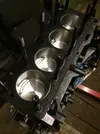
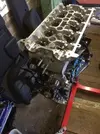
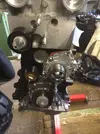
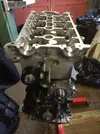
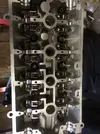
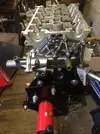
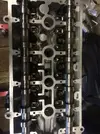
Thanks
This week I have spent time getting the engine pretty much assembled. I installed a 1.6mm MLS head gasket to compensate for the 0.3mm taken off the cylinder head. The ARP head studs were wound in hand tight into the block. The cylinder head was then given another clean and placed onto the engine block. ARP moly lube was then applied to the studs, washers and nuts, these were then torqued down to 105 ft ib in three equal steps of 35 ib ft. It was then left 30 mins before final torquing to 105 ft ib.
The water pump was installed and bolts tightened to 17Nm, then tip-ex applied to the bolt to show it has been torqued up. The thermostat housing was installed in the same manner but torqued to 12Nm according with the workshop manual. The uprated timing belt tensioners were installed and the fixed tensioner pulley was torqued to 50Nm.
This week I should finish the engine bar getting it timed up. The only thing holding the build back is the fact I'm still waiting on some Max tuff assembly lube, once this arrives I can install the camshafts and rocker cover.
The engine is looking rather tasty now


Thanks
Andyquadra
Well-Known Member
Wouldn't they be stretch bolts on a modern engine and not need re torquing?Check head bolt torques after its run a heat cycle, the heat expansion of the metal crushes the gasket still further and when it cools off the torque on the head bolts drops back, sometimes quite a lot!
Marinemackay2003
Active Member
if its like the clio, you cant do it any way as the cam cover will not come off with out taking the cam pulleys off / cam belt
as the cam cover holds the cams in place
as the cam cover holds the cams in place
stephenvenning
Well-Known Member
UPDATE:
Hello guys
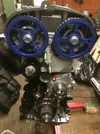
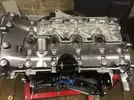
Been a busy week on the engine build. Ive first managed to install the cams and bolt down the rocker cover, I used Tuff Purple assembly lube on all the rockers, cam lobes and journals. A layer of rhodorseal was applied to the rocker cover mating surfaces and was bolted down to a torque of 12Nm in accordance with the user manual.
The cam seals were now installed. The surfaces were cleaned thouroughly and assembly lube applied to the inside of the seal. They were then pressed into the cylinder head recesses until they stopped. Both cams turn over easily and all the valves open.
Next up was to bolt on the breather cover but when tightening down the bolts they chipped the paint really badly so Ill have to repaint them with stronger paint I thank, strange as the rocker cover was fine.
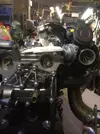
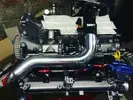
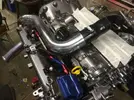
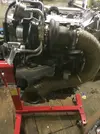
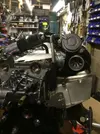
The turbo and associated oil and coolant lines were now bolted on along with the down pipe just to check alignment of everything. With it at this stage I couldn't resist bolting on the inlet manifold and boost pipes just to see how it will look in the car, looks so good, definite improvement over the current engine bay.
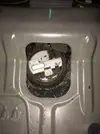
Also turned my attention to the fuel sender access hole today, a few weeks back I bought a air nibbler but just never got the chance to cut the hole bigger. I put down a wet rag over the sender and had a fire extinguisher on stand by I cut the rough hole out with the nibbler, then followed up with a half round file to neaten up the edges. Tomorrow Ill neaten the edges with rubber edging trim. Then in the week Ill make up a new panel to cover the larger hole.
Also next week Ill hopefully finish the engine and start rebuilding the gearbox. Then its conversion time
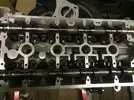
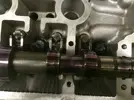
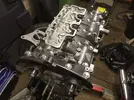
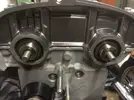
Thanks as always
Hello guys
Been a busy week on the engine build. Ive first managed to install the cams and bolt down the rocker cover, I used Tuff Purple assembly lube on all the rockers, cam lobes and journals. A layer of rhodorseal was applied to the rocker cover mating surfaces and was bolted down to a torque of 12Nm in accordance with the user manual.
The cam seals were now installed. The surfaces were cleaned thouroughly and assembly lube applied to the inside of the seal. They were then pressed into the cylinder head recesses until they stopped. Both cams turn over easily and all the valves open.
Next up was to bolt on the breather cover but when tightening down the bolts they chipped the paint really badly so Ill have to repaint them with stronger paint I thank, strange as the rocker cover was fine.
The turbo and associated oil and coolant lines were now bolted on along with the down pipe just to check alignment of everything. With it at this stage I couldn't resist bolting on the inlet manifold and boost pipes just to see how it will look in the car, looks so good, definite improvement over the current engine bay.
Also turned my attention to the fuel sender access hole today, a few weeks back I bought a air nibbler but just never got the chance to cut the hole bigger. I put down a wet rag over the sender and had a fire extinguisher on stand by
Also next week Ill hopefully finish the engine and start rebuilding the gearbox. Then its conversion time


Thanks as always
Marinemackay2003
Active Member
Are the cam seals supposed to go all the way in ? I thought they are supposed to sit flush
stephenvenning
Well-Known Member
Are the cam seals supposed to go all the way in ? I thought they are supposed to sit flush
Yeah they were wrong, the manual didnt really show it that well. I re installed the cam seals today so they were flush with the head.
stephenvenning
Well-Known Member
UPDATE:
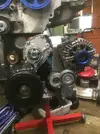
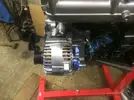
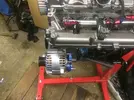
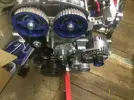
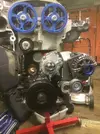
As promised Ive got another update as Ive been pretty busy this weekend on the engine. Today I sprayed the alternator mounting bracket and bolted and torqued that up, marked all the bolts with tipex to show that its torqued. The alternator was then bolted in with one bolt, the other will be installed when putting the aux belt on. The AC pump from my clio will be used as I still like my creature comforts
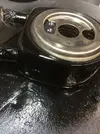
The oil cooler was pretty filthy and ive been putting it off to clean for a while. I cant shot blast like most things on this build because grit will most likely get lodged in the fins and plates within the cooler, this could cause engine problems on first start up. Therefore out came the wire brushes and degreaser. Once clean the cooler was etch primed, then sprayed gloss black followed by 3 coats of lacquer. Ill install it once its dried sometime this week.
Pretty much finished now, the box of bits and bolts is getting less and less
Thanks
As promised Ive got another update as Ive been pretty busy this weekend on the engine. Today I sprayed the alternator mounting bracket and bolted and torqued that up, marked all the bolts with tipex to show that its torqued. The alternator was then bolted in with one bolt, the other will be installed when putting the aux belt on. The AC pump from my clio will be used as I still like my creature comforts
The oil cooler was pretty filthy and ive been putting it off to clean for a while. I cant shot blast like most things on this build because grit will most likely get lodged in the fins and plates within the cooler, this could cause engine problems on first start up. Therefore out came the wire brushes and degreaser. Once clean the cooler was etch primed, then sprayed gloss black followed by 3 coats of lacquer. Ill install it once its dried sometime this week.
Pretty much finished now, the box of bits and bolts is getting less and less


Thanks
Similar threads
- Replies
- 1
- Views
- 489
- Replies
- 23
- Views
- 6K
- Replies
- 83
- Views
- 8K
