There is more to life with TurboRenault.co.uk

Register a free account today to become a member! Once signed in, you'll be able to participate on this site by adding your own topics and posts, as well as connect with other members through your own private inbox!

Clio Campus 172 build

I've got myself back into the habit of getting into the garage in the evenings, and over the last week or so I've made a bit of progress.

Engine and box have fluids, most of the wiring loom is routed and connected and I've made up some new earthing cables.

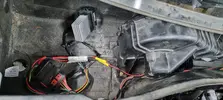
I decided to stop messing about tonight and aim for a start. After my first turn of the key, I realised the Campus UCH was still connected. Swapped that, second attempt and the footwell fuel connection was disconnected. Third attempt...


Happy with that! I'll get the cooling circuit connected up next, then onto the rear beam this weekend.

Also, the OS drive shaft has a split inner boot, so I've stripped the shaft down and ordered a universal stretchy boot. Hopefully it fits.
 
Quite a number of posts ago, I mentioned issues regarding the campus blower unit vs the 172 climate control wiring loom.

My issue was since the Campus was a non AC car, it didn't have the removable bulkhead panel, which meant I couldn't use the 172 blower unit etc.

The 172 blower unit has a little loom extention with a resistor pack, which I've retained. And from that, I've cut off the 2 pin plug that goes to the blower motor and replaced it with the Campus plug and plugged in the campus blower unit. So technically I've just changed the blower motor at the end of the circuit.

It's working spot on and running at all the speed levels. I just need to trim the plastic to fit the 172 resistor pack into the campus unit.
 
A few pictures of the recent progress.

Blower unit setup. I'm tempted to run the resistor pack externally and mount it to the bulkhead with some 3M tape.
20230720_225245.webp

New brake pipes connected up to the existing campus pipes. Neat and tidy, using the original mounts etc.
20230720_225447.webp

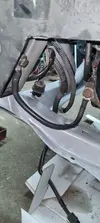
New earth straps made up. A pic of the main one which is the common failure. I used a 16mm2 cable for this.
20230720_225339.webp

I got the hose kit mocked up tonight too.
20230720_225232.webp
 
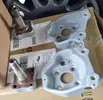
As usual for a 1*2, the ECU mounting plate is in a bad way. One of the lower fastening tabs has broken off, the top tab at the strut tower has snapped and I'm missing the angled bar that runs down to the slam panel.

I had a spare length of stainless tubing that I figured I could fashion into a support. My TIG still isn't the best but it's good enough after some grinding 😆. I'll make another little tab for the snapped upper tab too.

20230723_175349.webp

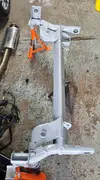
Finally got round to starting to refurb the rear beam. The stub axle cups that the caliper and ABS sensor fit to were in a right state. A lengthy sesh with a wire wheel on a grinder and a flap wheel sorted them out. I got started painting them all today.

20230723_175324.webp
20230723_175339.webp
 
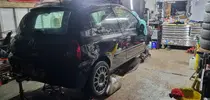
I've made a bit more progress over the last week or so with getting this little shed closer to being on its wheels.

I had bought Febi OE spec rear beam bushes, but after measuring them, the interference fit was huge. To the point where I'm not sure I'd have even got them started in the hole. So I ordered Whiteline polys. Again though, the fitting wasnt straight forward. The pics on the website show the bush with a machined collar that goes into the beam, and I assumed they'd be a similar setup to the powerflex versions. But the ones that arrived had the poly insert bonded to a press formed steel collar (closer in design to the OE ones).

IMG-20230804-WA0007.jpeg

Again, after checking dimensions, the beam hole wasnt true. Varying by 0.15mm. I had tried brute force with a bush fitting/removal tool, but it was a non starter. So I decided to take the rotary file to it and get it as close to true as I could. After that, I managed to drive them in with a dead blow mallet. Nothing is ever straightforward.

20230805_162907.jpg
20230805_135609.jpg

I fitted the stub axles along with a PMS spacer kit. I was surprised how much slop there is when fitting the stubs. All just wobbles about until its nipped.

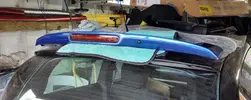
Won a 172 Cup spoiler on ebay for £45!
20230805_162844.webp

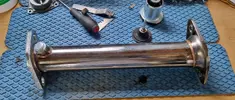
And bought a 182 manifold to 172 exhaust link pipe from a chap on CS.
20230805_162935.webp

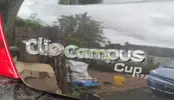
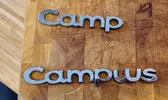
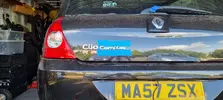
I'm fancying a play on OE style badges as a hint to the car not being a standard Campus. This is my first attempt.

Also considering removing the "Clio". Not sure yet.
20230805_162850.webp
 
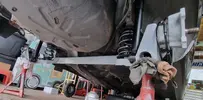
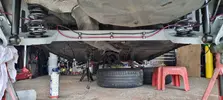
Now the beam is in place my plan was to build the rear end up completely. I had the ABS sensors in place and I connected the brake line up to sus out a way to secure them. I drilled 3 holes on the beam and tapped an M6 thread, then mounted two P clips per hole. Turned out good. Might need to adjust the lay of the brake lines, but they are giving nice clearance everywhere at the mo.

Dug the rear discs out which turned out to be heavily pitted. New ones on the way.

20230819_175839.webp

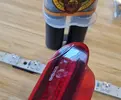
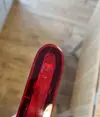
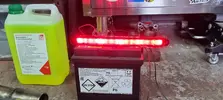
The cup spoiler brake light was knackered and I'm not the kinda person who's paying £225 for a replacement. I had the flamer 172 spoiler sitting, so I took the grinder to the brake light and removed the LED strip. It's overall the same size but the mounting holes are different and there are more LEDs. I had to trim the clear diffuser thats located within the cup spoiler to accept the new LED unit. But I can't see any detrimental effects since its clipped in place. The downside, I cracked the unit removing it from the spoiler 😢 a bit of epoxy and a sand and polish has it sorted.

IMG-20230815-WA0003.webp
IMG-20230815-WA0012.webp
IMG-20230816-WA0017.webp

The new LED unit power connection is a little different but can be retained with a little modification. Win.

I also grudge £175 plus for an intake kit. Ive ordered some alluminium tubing and a filter to make my own.

Started monkeying around with the "Camplus" badging.
IMG-20230820-WA0014.webp

Unfortunately the car won't be ready for CSF. But my mate @Martin_172 has been building a Ph1 RSi to take down. Complete with early 2000's era mods! 😄
 
After attending CSF, the force is strong. I need to pull my finger out and get this little nugget on the road.

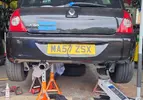
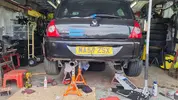
On the Sunday morning after the show, I was out at the car early to square the rear beam off. I had ordered new rear discs and OE brembo pads from MTec. All together with no dramas. Although the threaded holes on the stub axles brackets are in a bad way, may revisit this with a helicoil or an insert.
IMG-20230827-WA0003.webp

Next was the 172 fuel pump to be fitted, then filled with coolant (which I'm short of, now waiting on more coming).

Then time to have a look at the cheap exhaust. It's a custom one from an unknown shop. Overall its not a bad fit but will definitely need a little alteration. The rear section sits good, just the middle to address.

IMG-20230827-WA0008.webp

So all in all, I'm quite close. There's a crowd of mates heading to knockhill for a trackday on the 24th of Sept. I'd at least like to head along in the camplus! So that's the date to aim for.

IMG-20230827-WA0008.webp
 
Best laid plans and all that.

I haven't achieved anything close to what I aimed for through September unfortunately. Although I spent a week in Greece which was mint.

My extra coolant eventually arrived after the first shipment got burst in transit. So I topped the system up and left it to sit. Over the course of a week or so, it was dropping the header tank level. I found a leak at the thermostat housing, so pulled it off, double checked all the surfaces were nice, back together and it still leaked. So I've ordered a genuine thermostat. I feel the profile of the Gates seal is too small and not squishing up when tightened.

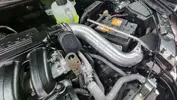
Intake wise, I grudge the cash that companies ask for. So I ordered tube and called in a favour. My mate is much better at welding than me and he has an ACDC machine. I'm pretty chuffed with the result tbh. Ive still to incorporate a little rubber bobbin at the hanger for movement.
20230918_164059.webp

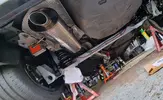
Whilst my mate was over, I got a hand to eyeball the cheap exhaust. We decided it would take more than a little adjustment. So I bit the bullet and ordered a Piper system with 2 silencers and a stealth tip. The fitment was spot on with lots of adjustment. Really pleased with it.
20230922_153430.webp

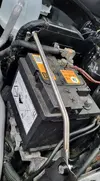
I've carried on with the EPAS wiring and adjustable controller (for the mo). I ran the power cable from the battery through the bonnet catch gromit which was ideal. Just an ignition source and earth to connect.
20230922_155755.webp

20230829_223235.webp

Getting there!
 
My theory of the Gates thermostat seal being too slim was correct. The OE Renault item is maybe 1.5mm thicker. On reassembly I put a thin smear of sealant on the metal to metal faces just for a belts and braces approach. So far so good.

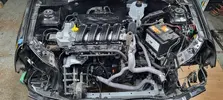
So I went out the other evening to top the coolant up, slip a decat to exhaust gasket in and get it running. And here we are.


I ran it for maybe 15 mins until the idle settled down, letting it burn off the oils and grease etc. Then realised I hadn't fitted the cooling fan, so I knocked it on the head for the evening.

Went out to the little turd yesterday, fitted the fan pack and now it won't start! It's not doing the 3 cranks and stopping like immobiliser issues display, it's priming the fuel system. Every second attempt to start, it sounds like it wants to go. I've taken a stab in the dark and ordered a new TDC sensor. Fingers crossed.
 
Back
Top