There is more to life with TurboRenault.co.uk

Register a free account today to become a member! Once signed in, you'll be able to participate on this site by adding your own topics and posts, as well as connect with other members through your own private inbox!

Clio Campus 172 build

I've been spurred on with getting the servo and pedals fitted and getting into the garage whenever I can.

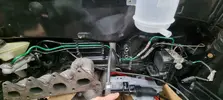
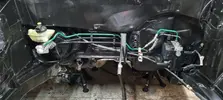
I refitted the ABS pump and lines along with the brake master cylinder. Giving things a scrub as I went. I decided to paint the vac pipe bracket as it was rusty AF.... like everything else from that 172.
20230124_215503.webp

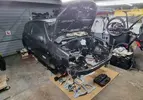
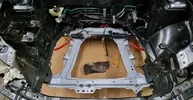
I've had the subframe sat on a bench for a couple of weeks ready to go, until I realised the inner ARB bushes were too small. So I ordered some Powerflex ones and got them fitted yesterday. Much easier doing them on a bench than on the deck! This let me get the subframe mounted to the car loosely and also means I don't need to walk around it anymore.
20230125_173911.webp

Before the engine goes in, I need to sus out a heat shield. The campus one can be used, but I'd like to extend it up round the master cylinder. I'd also like to fit the shield that goes over the rack but I'll need to make some mods to fit the 3rd fastener.

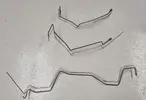
Brake pipes are another thing I need to get in before the engine. No surprises that the 172 ones were mega crusty so I've remade them from Cuni. Got three of them done last night, copying the originals. I'll need to shoot from the hip with the nearside front as it was a copper one on the 172, so nothing to copy.
20230126_003618.webp

I've not confirmed it, but I'm fairly sure that from the brake line joint under the passenger footwell to the rear bracket is the same between 172/Campus. Fingers crossed, as it would save a job.

Had to order a new flaring tool as well since the one I have is SAE fitment only.
 
Worth buying a sheet of nimbus to make a new heatshield. Its pretty cheap and dead easy to work with.

Also r.e. brake lines, i ditch the oem female connector and run a male to male joiner to make life easier if you can only do one type of flare, also i dont think a lot of mot testers are keen on a remade copper female/male joint as its better with steel, all from memory mind.

I was thinking about nimbus after seeing some bits on CS.net. I could possibly rivet it onto the campus heatshield which would fix it to the bulkhead.

Thats a good shout, I'll look into that. I done a bit of searching online last night about a female DIN flare and I couldn't find anything definitive. Lots of things saying the SAE double flare accepts a DIN male. But the tapers on the faces are quite different.
 
Been chipping away at the little jobs but unfortunately some home DIY has got in the way.

I got my DIN flaring tool and finished the four brake pipes that leave the ABS pump. Just the heatshield to figure out.

20230212_214131.webp

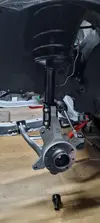
I've misplaced my hub/damper bolts so I'm waiting on a second hand set coming in the post as renault have discontinued them. Once they arrive, I can loosely assemble the front end.

20230212_214057.webp

With a stroke of luck, a new LUK clutch popped up for sale on marketplace. It turned out the guy was at the end of my road and landed it for a bargain price.

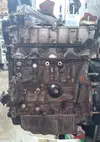
Turning my efforts to scrubbing the engine, getting rid of the surface rust and give it a paint. Then it'll get belts etc. And there's also this...

20230212_214159.webp
 
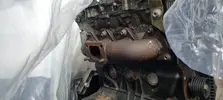
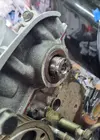
Got stuck into the nasty side of the engine block over the past few days. It went from a wire brush, to one on the drill, to chipping bits away and then onto a rotary file. It was nasty.

First pic was after about 4 hours at it lol
20230214_180237.webp
20230215_213615.webp
20230220_235056.webp

Moving onto the rear tomorrow. It's pretty tidy since the cam cover has been providing constant lubrication.

An 04 plate 172 appeared at my local upullit a few days back which is pretty rare. I was needing a starter motor and a cruise control squib, as both were damaged from removal/laying about the garage.

The 172 was actually quite tidy and I was the first to get to it. Got what I needed plus the clutch pedal switch for cruise (which you don't actually need for operation) and very new looking OE plug leads and coil pack. £43, bargain.

I built the squib back up tonight with a ph1 horn stalk to run an aftermarket wheel and put all the trim back together. Hopefully I've manage to align the bits to keep the dash lights off.

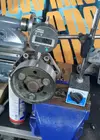
Moved onto the water pump pulley, it was in a bad way with surface corrosion etc. I had considered an aftermarket one but it's cash I don't really need to spend. Thought I'd attempt to machine a new face on it using the lathe.

20230220_224416.webp
20230220_231710.webp

Turned out well. Clocked okay too, 0.05mm max.

Next big job will be belts, dephaser etc. I've ordered a new crank pulley for when I do it, the fact they now have a key way makes it appealing. Also plan to reseal the cam cover whilst I'm there.
 
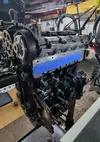
Made a start on the timing belt etc today after finishing painting the rear of the block. Fortunately a mate of mine has a set of genuine tools that I've got a loan of to do the job. I dropped the ball a bit and didn't realise until today that I hadn't ordered new fasteners and seals for the cam pulleys. KAM are one of the few places with stock of the kit so I've placed an order....... at £68 🤢

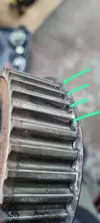
This is my first time having an F4R in bits further than an aux belt swap so it's all a bit new. Using the manuals for everything to keep me right. So I set about checking the timing before going ahead with anything else, and it was out by a fair margin. I carried on and removed the belt and prep'd for removing the dephaser and exhaust cam pulley, the dephaser was no bother but the exhaust cam pulley nut was crazy tight which has caused the locking tool to damage the exhaust pulley.

WhatsApp Image 2023-02-23 at 22.17.03.webp

I've bought a second hand pulley on ebay tonight as I'm not keen to reuse the damaged one.

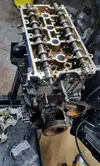
The cam cover was caked in squished sealant and had been leaking oil, after some advice from the forum I've got a tube of the correct loctite to reseal it. One thing I was unsure of was the cam position for slackening the cam cover, and the manuals don't mention anything. So I left them in their natural spot close to the timing position and slackened them off in reverse tightening order. Made a start cleaning the faces up but got stopped due to a sleep dodging baby...

I'll hopefully get back into it tomorrow and get the cam cover refitted.

WhatsApp Image 2023-02-23 at 22.43.05.webp
 
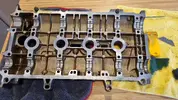
Been focusing on the cam cover over the last few days, mostly just cleaning the burnt sealant off the face of it.

Started off with a plastic scraper, then onto soft scotchbrite and occasionally a Stanley blade for the stubborn bits. A tedious job to say the least.

IMG-20230225-WA0017.jpeg

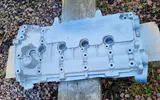
Gave it a good degrease afterwards and wire brushed the flakey black paint off. Then a couple of coats of Hycote Alluminium paint (currently £3.29 a can at ECP). I've never used it before so unsure how it'll last.

20230225_163345.jpg
20230226_120028.jpg

Turned out okay for a budget freshen up.

The new sealant came today so i was keen to get things back together. I lubed the journals, lobes and rollers and applied the new sealant to the cam cover. I think I've maybe been a little heavy handed with the sealant, but nothing extreme. Torqued it up as per the manual, so now just waiting on an exhaust cam pulley and cam seals/fasteners.

20230226_230449.jpg
 
Exhaust cam pulley and fastener/seal kit arrived today. So I managed a half hour in the garage setting thing up in prep for timing the engine.

When I tightened the cam cover down last night, I kinda blindly followed the manual and in hindsight should have maybe approached it a different way.

I placed the cover on, lined up the dowels and tapped it down by hand as far as it would go. Lobes in the valve open position lifting the camshafts up out the journals. So then moved to the torque sequence as below.

Screenshot_20230227_212857.webp

I finished what I was doing, stepped back and thought to myself, didn't draw it down uniformly. I just moved onto the first 4 fasteners and torqued them to 8Nm.

This brought the cover into contact a corner at a time if that makes sense. I feel i should have went round them all bit by bit, pulling the whole cover down square. Anyway, not much I can do about it now. I've attached the pulleys and spun them over by hand and all seems fine. Over thinking things lol

I'm hoping for another good run at it on Wednesday to get the timing belt squared away and fit some tasty PMS parts.

20230227_203448.webp
 
Dont worry about fitting cam cover like that, it will be absolutely fine.

Make sure cam seals stay very slightly proud of the edge when fitting especially on inlet cam. Pics of mine installed on the kangoo thread for ref if needs be,
 
Dont worry about fitting cam cover like that, it will be absolutely fine.

Make sure cam seals stay very slightly proud of the edge when fitting especially on inlet cam. Pics of mine installed on the kangoo thread for ref if needs be,
Will do, cheers 👍. I need to knock up a a seal driver as the ones I've got dont have a centre hole big enough to allow the end of the camshaft through. Is it worth giving them a wee smear of silicone grease on the wear face?
 
Bit of grease wont hurt, they usually have a bit on from new to stop chafing when fitted. Can use the crank pulley to push the seals in if non keyed version, if not can usually push them in easy by hand as not really tight fit from experience.
 
Got out today and got the cam seals fitted up. Degreased everything and fashioned a seal driver with an old bearing race from the Megane gearbox, worked a treat. Left 0.5mm or so protruding as suggested.

20230301_143326.webp
20230301_143528.webp

Since the engine is on a stand at the minute and the flywheel removed, I've no way of locking the crank to tension the lower pulley bolt.

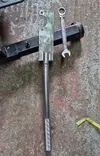
So I knocked up a bar/plate that bolts to the same face at the flywheel and allow me to lock/hold it. I'll put a couple of little welds on it tonight at work.

IMG-20230301-WA0018.webp

Hopefully my next stint in the garage will finish the belt and have the engine sitting ready to be slung into the car.
 
Its more or less impossible to lock flywheel on a meg when box is on with anything else so really only option. Have faith in the pin, mines done several including removal no issues.
 
Didn't manage into the garage yesterday to finish the timing belt unfortunately, there doesn't seem to be as many hours in the day when I'm nightshift.

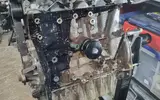
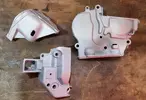
However, I did manage to get some paint on the timing cover, PAS pump bracket and engine mount bracket.

20230303_024619.webp

Looking forward to getting all this sort of stuff bolted back on!
 
Had a free afternoon yesterday which was ideal for starting the timing belt.

I used a Gates kit as opposed to the genuine Renault stuff just as a cost saving effort. It was Dayco kit that was on it previously and some of the idler spacers were different, which was a bit confusing at first.

Anyway, I got at it and as I expected, on my first try the timing was a little off. I was using both the 172/182 guide and also the 197 era guide as I fitted a keyed crank pulley.

The process is fairly straight forward but I quickly realised that following the workshop manual wasn't going to work. There's a fair bit of play between the tooling and the cam slot which I tried to account for with 0.13mm feeler blades which did get me a little closer to rhe mark. Lots of head scratching, reaching out on the group chat and some swearing, so I parked it for the night.

Came back to it today. As it stood, the belt tension was acceptable, crank pinned, horse shoe inserted and cam pulleys slack.

I locked the exhaust cam pulley and torqued it. I then locked the inlet cam pulley and removed the horse shoe from the exhaust slot. I then moved the inlet cam clockwise with the horseshoe so it was sitting a couple of degrees before horizontal, I held it there and torqued the cam pulley. And after 2 spins, we are now in spec, no resistance when checking with the horseshoe.

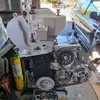
Thats where I've left it today. Well... I bolted on some PMS stuff as a celebration lol

20230304_181120.webp
 
The belt drama continued today. I had a busy weekend with other things so I had left the belt in a position where all I had to do was final torque....

Double checked everything, applied the final torque to both cam pulleys, spun the engine and....... timing off. Back to the drawing board.

I was pretty scunnered with it all by this point but kept at it and managed to get it fairly good. So I started to button everything up and went for a cuppa. My pernickety side got the better of me and I decided I wasn't happy with the timing being nearly spot on. So I went back to the garage and faffed about some more until the horseshoe slipped in and out with ease.

With that put to bed, I fitted the PMS AC delete kit and PAS delete kit. Nice gear and fits together really well, although the aux belt is mega tight to get on the pulleys. Once it's running, I'll double check the tension to see if it eases off.

20230306_141430.webp
 
Back
Top