There is more to life with TurboRenault.co.uk
You are using an out of date browser. It may not display this or other websites correctly.
You should upgrade or use an alternative browser.
You should upgrade or use an alternative browser.
5 GT Turbo Blue - R5GTT - Build
- Thread starter Iain
- Start date
Mark Davis
Brapmaster extraordinaire
Cool 5 mate, keep up the good work.
Iain
New Member
Today I took the dash loom out and some wires that had been damaged by the green clips caught my eye.
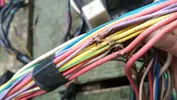
Even with this damage everything was working before I took it out which is surprising, I repaired all the damaged wires with crimps and heat sleeve. I also checked the rest of the loom for damage, sorted a few rough bits and replaced most of the tape holding it all together.
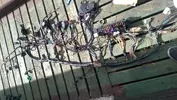
Next I started to fit the loom to the dash and after a fair bit of fiddling it was all ready to go in the car.
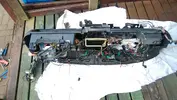
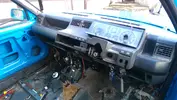
I got it in pretty easily although it's not quite set in place and I forgot to put the air pipes in so I'll need to do that before it goes in permanently. I connected everything up and it all seems to be working except the horn, the solenoid clicks when I push the horn, I had the same problem with the solenoid for the radiator fans and it was just bad connections in the solenoid itself so it may be the same problem. The windows were working and when I went to test them with the dash in the worked for a second but stop and haven't worked since it might be the battery as its old and fairly flat but I'll need to look into it.
Overall it's looking good the engine turns over and the fans work on a switch, front indicators don't work but it could be the bulbs I'll need to check them or maybe it's the same problem effecting the horn!?
Now the dash is more or less in I feel like I've broken the back of this project and most of the graft is done and assuming I built the engine properly the only real challenge will be to finish off the turbo and get the VNT and carb working together properly.
Next goal will be to finish the dash off and get the gauges in and the interior :bp:
Time for a well earned rest, cheers for the feedback

Even with this damage everything was working before I took it out which is surprising, I repaired all the damaged wires with crimps and heat sleeve. I also checked the rest of the loom for damage, sorted a few rough bits and replaced most of the tape holding it all together.

Next I started to fit the loom to the dash and after a fair bit of fiddling it was all ready to go in the car.


I got it in pretty easily although it's not quite set in place and I forgot to put the air pipes in so I'll need to do that before it goes in permanently. I connected everything up and it all seems to be working except the horn, the solenoid clicks when I push the horn, I had the same problem with the solenoid for the radiator fans and it was just bad connections in the solenoid itself so it may be the same problem. The windows were working and when I went to test them with the dash in the worked for a second but stop and haven't worked since it might be the battery as its old and fairly flat but I'll need to look into it.
Overall it's looking good the engine turns over and the fans work on a switch, front indicators don't work but it could be the bulbs I'll need to check them or maybe it's the same problem effecting the horn!?
Now the dash is more or less in I feel like I've broken the back of this project and most of the graft is done and assuming I built the engine properly the only real challenge will be to finish off the turbo and get the VNT and carb working together properly.
Next goal will be to finish the dash off and get the gauges in and the interior :bp:
Time for a well earned rest, cheers for the feedback

Iain
New Member
Before I took the loom out the temp gauge was tap dancing I'm guessing that may have had something to do with it. It took about 9 hours to do this lot but the more I work on the car the more I enjoy it so I don't really see it has work anymore :bv:Flipping eck , some work there in that loom repair !
I'm on holiday until Monday so it's great getting full days on the car while I can

Iain
New Member
Do you guys think I will need to have a custom elbow made and if so is there anyone who could do it via post, it basically needs to be the same as a standard elbow but with the 3" vband flange instead of the 4 bolt flange. I've read there are adaptors but they will push the down pipe too far back, it needs to be as compact as the standard elbow, it's the only headache left as the rest if the work to finish the project should be fairly straight forward, touch wood :bj:
Iain
New Member
Yes it's a Garret vnt and I think the original exhaust housing was replaced with the one that's on it now to give more flow. Here is the info from the eBay add where I acquired it, it's the only info I have on the thing.What brand is the turbo? Defo a garrett?
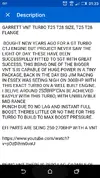
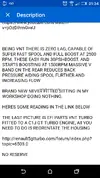
And here's some pics of the turbo
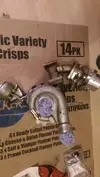
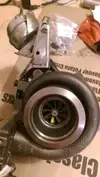
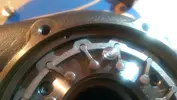
There's also some good news in regards to the turbo, I got in contact with Matt Rowley (Fusion fabrications) he has the front end of a 5 in his workshop and fabricates things for people. I've sent him the turbo, wastegate and old down pipe and all the necessary information required for him to fabricate a new down pipe, v-band and screamer pipe.
I've seen some of Matt's work and I'm quite hopeful, once he has worked his magic and I receive all the parts back it should just be a case of bolt on and smile

In the mean time I need to sort out an actuator setup, I made a bracket and mounted the vacuum actuator that came with the turbo underneath, this way as the actuator pulls it opens the vanes with the grub screw on the turbo allowing me to set the amount the vanes are initially open i.e where in the revs the turbo begins to boost.
I had a problem with my initial attempt to mount the actuator, the actuator was too long and with the turbo on the car the actuator was fowling on the gearbox, so I either need to shorten the actuator length or buy a pressure/boost?! actuator and mount it on top of the turbo so it pushes the vanes open, which I think will be better as I think it will be easier to adjust and set a limit on how far the vanes open to stop over boosting.
I'm not really 100% sure I full understanding how the vnt and actuator will work together in a controlled fashion to deliver smiles and I probably won't be 100% sure about how to control the vnt until I actually get it working so if I'm misunderstanding anything please tell me :bv:
I was also thinking a twin port actuator, mounted on top, that pushes the vanes open would give good smooth results or maybe using electronics and programming a micro controller to control vane behavior in relation to boost pressure.
I open to advice but until I get the turbo back I won't be able to do much in this direction.
On a side note I got the air ducts in (should have put them in the dash before I put the dash in the car:bv
DaveL485
Staff member
A VNT basically gives you a small turbine housing at low throttle for spool and a big turbine housing at high throttle for flow.
Normally a small turbine housing chokes a car at high revs and throttle, and a big turbine housing gives you crap spool.
The actuator is what transitions it from "Small turbine housing" to "Big turbine housing".
Normally a small turbine housing chokes a car at high revs and throttle, and a big turbine housing gives you crap spool.
The actuator is what transitions it from "Small turbine housing" to "Big turbine housing".
Iain
New Member
I do understand the difference between a normal turbo and a VNT, what I'm still figuring out is the best or at least a good method of controlling the vnt. I do need to research more as fueling comes into play as well and I'm not that clued up on the carb.
What exactly happens with the turbo when there is a spike and do spikes effect drive-ability at all?
Also the waste gate should provide an escape for excess gas when/if there is a spike.
What exactly happens with the turbo when there is a spike and do spikes effect drive-ability at all?
Also the waste gate should provide an escape for excess gas when/if there is a spike.
Last edited:
What exactly happens with the turbo when there is a spike and do spikes effect drive-ability at all?
Your fuelling goes to pieces and it runs lean , the turbo surges and you panic.
The only things I managed to do to control the VNT was an electronic boost controller so it was within a PSI of what I wanted boost wise ( negligible creep in boost ) and I knocked the TDC sensor off its standard pegs and slid it all the way forwards.
Then I listened with det cans when giving it WOT in 4th trying to drain the carb bowl. I got to around 17PSI without det/knock and keeping the AFR around 11.7
Iain
New Member
Thanks, going efi would be much better for vnt, right?Your fuelling goes to pieces and it runs lean , the turbo surges and you panic.
The only things I managed to do to control the VNT was an electronic boost controller so it was within a PSI of what I wanted boost wise ( negligible creep in boost ) and I knocked the TDC sensor off its standard pegs and slid it all the way forwards.
Then I listened with det cans when giving it WOT in 4th trying to drain the carb bowl. I got to around 17PSI without det/knock and keeping the AFR around 11.7
Iain
New Member
Iain
New Member
Wee update, while waiting on the down pipe, I've been busy going over the wiring and dash to finish it up nicely. The carpet, centre console and rear seats are in as well.
I also wired up my boost, oil pressure and afr gauges and put a tipple pillar pod in, front window and all the trim sorted as well.
There's a fair bit still to do, but everything seems to be working, once the down pipe is here I should be able to turn the key and see if it starts :ck:
Few pics
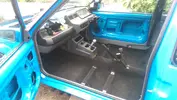
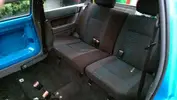
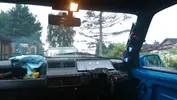
I also wired up my boost, oil pressure and afr gauges and put a tipple pillar pod in, front window and all the trim sorted as well.
There's a fair bit still to do, but everything seems to be working, once the down pipe is here I should be able to turn the key and see if it starts :ck:
Few pics


Iain
New Member
Thanks, yeh I could do this all day everyday :ag:Some good progress there mate. Still enjoying it ?
Iain
New Member
Little update, done a fair bit of tinkering. Down pipe arrived so I sorted that out with some heat wrap and bolted the lot up, there was a bit of effort involved to get it sitting right but is looking pretty good now. Quite happy with the pipe work from Matt (fusion fabrications). 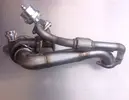
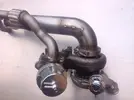
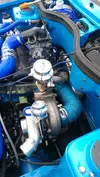
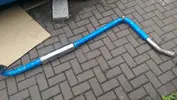
I haven't taken anymore recent pictures but since these I've also wrapped the dump pipe and cut a little more off the coolant heater pipes to make a bit more room. Quite happy with how it's all sitting and it'll be getting tested again shortly.
After I got the exhaust system on the first time I attempted to start but had bad fuel pump wiring so I fixed that and initially it wouldn't start, which turned out to be the distributor / cam / oil pump gear, it was 180 degree off (oops)... after I sorted that it fired right up for the first time no problem (yaaaay!)
After running it for a bit I discovered an oil leak at the oil filter sandwich plate, which it turned out had no seal (also oops).
I was also getting no oil pressure on the clocks (probably crap wiring, or the nut missing off the back of the clocks... in any case I have an aftermarket oil pressure gauge and sender which I have tested and get a reading of 3.7 bar cold tick over.
Because the radiator / fan get in the way of the after market oil pressure sender I will need to relocate it but I think I have found a means to do this.
Once I get the new sandwich place seal and relocate the pressure sender I should be able to put the inter cooler/rad back in for more testing and if all good should be rolling soon after.
Might also add I'm running a Piper 285 I think I set it at 114 degrees and that tappets are set to .20 inlet and exhaust and it sound alright to me when it's running.
I'll update once I'm up and running again.
Cheers

Similar threads
- Replies
- 4
- Views
- 342
- Question
5 GT Turbo
Renault 5 gt turbo radiator options
- Replies
- 13
- Views
- 183
- Featured
- Replies
- 74
- Views
- 2K
- Replies
- 2
- Views
- 256
- Question
5 GT Turbo
5 GT Turbo driveshaft thickness
- Replies
- 7
- Views
- 107
