There is more to life with TurboRenault.co.uk

Register a free account today to become a member! Once signed in, you'll be able to participate on this site by adding your own topics and posts, as well as connect with other members through your own private inbox!

5 GT Turbo Another Red Renault 5 GT Turbo On It's Way Back To The Road

Time for an update

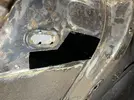
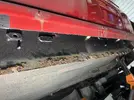
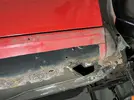
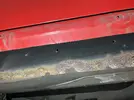
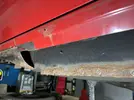
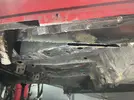
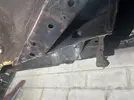
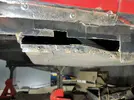
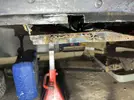
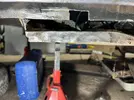
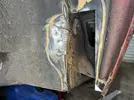
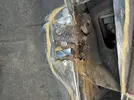
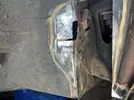
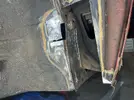
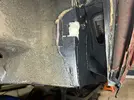
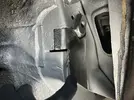
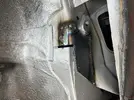
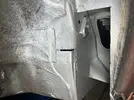
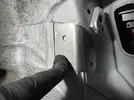
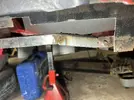
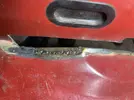
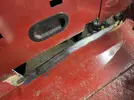
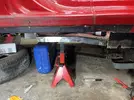
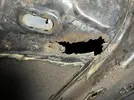
I've cut out the worst of the rot from under the jacking point.
IMG_0077.webp

IMG_0079.webp
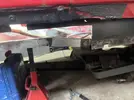
IMG_0078.webp

The floor is is thinner than the steel I had in stock so I couldn't repair this just yet.

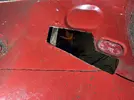
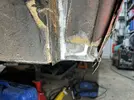
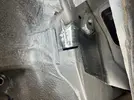
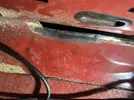
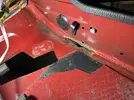
I then started poking and prodding...as you do...and uncovered another hole. Again, this will have to wait until I get some thinner plate.
IMG_0080.webp

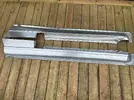
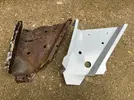
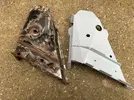
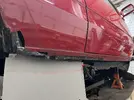
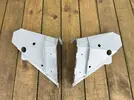
Then I was chuffed to take delivery of the first repair panels - a pair of outer sills and a pair of front jacking points.
The jacking points are very well made but the sills leave a bit to be desired. Oh well, you pays your money and all that. I'm just happy to be getting on though! :yes3.gif:
IMG_0086.webp
IMG_0085.webp
IMG_0087.webp
IMG_0088.webp
 
Zip! off with the lower half of the outer sill.
IMG_0098.webp

IMG_0092.webp
IMG_0093.webp
IMG_0094.webp

The inner sills seem pretty good. I think I'm going to repair the lower section of the inner sill then join the outer sill just below the swage line.

I decide to start at the rear so I can use what is left of the lower lip of the inner sill as a guide. I cut out the last of the terminal rot from this section.

IMG_0132.webp
IMG_0131.webp

I then used a laser level, lined up with the existing sill, to create a template for the rear section of the inner sill/inner rear quarter.

IMG_0214.webp

Am I right in assuming the inner sill is straight all the way across like this? I've seen photos that seem to show a kind of tab that comes down where the rear jacking point slot is. Anybody know if this is the case? Cheers.
 
Those pictures are perfect thanks @Duncan Grier I knew I’d seen it like that. I can’t seem to see a repair panel that shows the tab though. Maybe some don’t bother with it. I’m making my own anyway, so it’s no bother.
I’ve no been through so many threads, I’ve lost track of where I’ve seen what. I aught to start nicking pictures and save them to a for-reference folder.
Thanks again for your help! 👍🏻
 
Yes I made my own and think most copies while have the holes cut are missing the tab, yours looks like it makes a lot more sense to just replace the bottom edge
 
@Leigh5t I dunno if you feel the same but I felt like some kind of wiz kid with Renaults untill I came on here and was over shadowed by the amount of knowledge and experience these guys have!! Some absolute legends on this forum!
Ha ha I can’t say I’ve ever felt like a wiz kid…quite the opposite 🤣. I know exactly what you mean though and I absolutely agree with the knowledge some of these guys have! 🤯
I’m grateful for the advice! I’d be doing a lot more head scratching without it, that’s for sure.
 
Yes I made my own and think most copies while have the holes cut are missing the tab, yours looks like it makes a lot more sense to just replace the bottom edge
Cheers mate, appreciate it.
I have a reference of where the rear jacking point sat, plus the cutout in the outer sill, so I should have enough info to make the tab on the new inner sill. I’m planning on recreating the overlap where the front and rear inner sills meet. I’ll do the rear section first, using the in tact middle section as a guide, then make a template of the middle section so I can replace the rest. I have noticed the original front section looked slightly different to the repair panels that are available too though. I’ll have to cross that bridge when I get to it. 🤷🏼‍♂️
 
A bit more progress on the rear section of the inner sill


IMG_9983.JPEG
IMG_0099.JPEG
IMG_0105.JPEG
IMG_0288.JPEG
IMG_0291.JPEG

Then I needed to expose the rearmost section of the inner sill to see what fun lies beneath.

Wherever possible, I am trying to chop it out in sections that are manageable for me to remake. This area looked daunting to me but when broken down in to sections it wasn't so bad.

IMG_0215.JPEG

The little scab that spidey was hiding was the tip of a rusty iceberg!
IMG_0219.JPEG
IMG_0221.JPEG
IMG_0222.JPEG

Luckily the inner sill and seatbelt mount are solid!
IMG_0223.JPEG

A lick of hydrate
IMG_0266.JPEG

Patch made and a couple of coats of weld through primer on the back sides.
IMG_0275.JPEG
IMG_0276.JPEG
IMG_0277.JPEG
IMG_0284.JPEG
IMG_0287.JPEG

I was just about to weld this section on and I thought.....what if that strap to the left is hiding more rust? And also, how on earth am I going to blend in the underseal to make it look right? This got me thinking, should I "just" remove ALL of the underseal? I know I'm getting sucked in here...I know...but I just can't see how it's ever going to be right without removing it all. Somebody please stop me if that is a stupid idea! Otherwise, I'm not sure I'm going to be able to resist removing it all.

Anyway, thanks for looking guys and any comments are welcome. Cheers.
 
Great progress and looks good, keep going 💪

I fully get the pull to strip back and know it is right and catch anything before dreaded ringworm travels....

Depends really on when you need the car back in use and long term plans, the time/cost as doing yourself to remove underseal and if nothing else clean treat metal and reapply underseal I would find hard not to.......but then look how I ended up lol 😂

Your making steady decent progress so if you can maintain this and ok having the car off the road bit longer would certainly clean up the joins and maybe leave the big flat areas but only you know what is best for you 🫣
 
Looks great, doing these little sections , chasing out the grot, takes the time before you put the bigger outer parts on.
If it isn't bulging leave it be, as you are , you're taking the car into the top few percent of 'right' 5's in my eyes, chase it, clean it, treat it, weld it.

I use Mirka single pack seam sealer, messy 'orrible stuff, don't over tool it, get it on, build gravitex up in thin coats, let it flash off before you go over it, splash of thinner in nearly empty can of it and blow it over rest of original coating to blend it all in black same.

Good going over with quality cavity wax and keep car dry it'll last for as long as we're about.

Lovely work, I'm impressed, you'll knock this car off , no drama
 
Cheers @Duncan Grier

Yes, the pull from the rabbit hole is strong!

To be honest, I've got no real plan for the car. It's been off the road for so long now that I can't actually imagine it being on the road. However, I don't think it would be a good idea to drag it out for multiple years, especially for my first "restoration". I think I need to keep fighting the urge to go unnecessarily deep, otherwise that will happen. Cleaning up all the joints seems like a sensible approach, then take it from there.

Thanks!
 
Thanks @Turbell

Those small sections are definitely taking me a while because I'm a bit of a faffer. I'm sure I'll speed up throughout this though.

"If it isn't bulging leave it be" I'm gonna get this on a t-shirt! 🤣 You're dead right though. In order to get every bit of rust out I would have to separate all the seams, and that just aint happening.

Thanks for the advice re the seam sealer, I'll have a look for those product. It's good to know that I may be able to blend it in at least.

Thanks again for your kind words, much appreciated! It means a lot coming from you guys that have been there and got the t-shirt skinned knuckles/metal splinters/grey hairs 👍
 
Couple more hours in the garage this morning.

I continued along the floor lip. The rot here went slightly up in to the cabin so I cut and bent a patch. I've not got a shrinker stretcher to be able to do the compound bend so I cut the angle segment out instead.

IMG_0305.JPEG

IMG_0306.JPEG
IMG_0307.JPEG

IMG_0308.JPEG
IMG_0309.JPEG

IMG_0310.JPEG

I've not welded the lower join of that ramp because I will need to cut more rot out once I remove the sill.

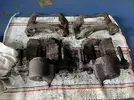
I then decided on a slight change of scenery and dismantled the front brake calipers

IMG_0315.webp

I didn't get a picture but the pistons are in excellent condition, especially considering how rusty the calipers are.

IMG_0316.webp

Look at the pads! Motormania, circa 2007 those bad boys are. I reckon there's more life left in them than I've got left in me! 🤣
 
Just as a rule of thumb I use, if you're still tempted to go balls deep and strip under sealing off, if it's a bastard to get off ( factory two pack applied ) you're unlikely to get anything on it better at home , if it peels off like a lepers skin ....off ...off....off
Get an electrolysis tank set up for those calipers, cheap, thorough, easy ......cheap, do you see a pattern with my methods?
 
Cheers @Turbell

That’s a fair point with the level of difficulty required to remove the underseal.
If it’s taking some getting off, it’s probably still doing its job.

I’m thinking along the same sort of lines when it comes to how much of the original bodywork I disturb. You can just never truly replicate it, even if you had genuine panels. I didn’t enjoy cutting the outer sill because so much of it was still in great condition. I had no choice though in order to get to the inner.

I see your methods and I’m all for it! A measured but high quality, practical approach. 👍🏻

An electrolysis setup is not something I’d considered. I was just going to have at them with the wire wheel. I also have a bottle of rust remover stuff that I’ve never used but I’m not sure about that. I’ll think about an electrolysis setup though as I’m pretty sure I have everything I need. I’ve never done it before so it’ll be another school day, which is never a bad thing, depending what type of week you’ve had.

Thanks again for your advice. Always appreciated.
 
Back
Top