There is more to life with TurboRenault.co.uk
You are using an out of date browser. It may not display this or other websites correctly.
You should upgrade or use an alternative browser.
You should upgrade or use an alternative browser.
5 GT Turbo Another Red Renault 5 GT Turbo On It's Way Back To The Road
- Thread starter Leigh5t
- Start date
Leigh5t
Well-Known Member
Agree @Turbell .I'm not planning on welding through the primer, its is just to do the back or any plate I put in. It would make sense to remove the plate to that overlap If mine had one. I wonder why they're different. I know manufacturers swap and change things throughout production runs, using different suppliers and what not, so maybe that's it.
Duncan Grier
Well-Known Member
Also have a look on @Chris74# build thread he had some fun in this area, but took it all out to make a replacement section
@Turbell I constantly struggle with weld thru primer.....thought it was just me, I continue to use to balance a decent coating between plates but def clean up around the weld areas to get a good decent bit of penetration first I find helps
If in doubt take out in sections and record what you are doing for reference after
Exciting times, remember this section well, be worth taking your time and doing right now......also gives a chance to get inside a good once over and treat
Got a load more pics if you need anything specific, just give us a shout
Duncan Grier
Well-Known Member
Post in thread 'R5 GT Turbo - Complete strip down and re-build #1' 5 GT Turbo - R5 GT Turbo - Complete strip down and re-build #1
Might be some in previous pages but think covers that area from here for more pics if not seen already?
Might be some in previous pages but think covers that area from here for more pics if not seen already?
Turbell
Well-Known Member
If you want to look at Camprust, feck me, nearly six years ago....
3 Door 5 Campus
Just picked this up for my son, he's not 17 for a few months yet, staying on at school and doesn't really have a bean to his name. He's into the retro car thing , so I'm gonna do the welding and let him fart about with the rest...learn a few bits and bats ....something for him to aim for other...
turborenault.co.uk
Leigh5t
Well-Known Member
@DaveL485  . Although, your sills look more intact than mine. Having looked through a fair few resto threads, there are obviously lots of common problem areas but also some areas that are bad on one car but fine on another.
Around my petrol flap disintegrated but I’ve not seen that on many others
Around my petrol flap disintegrated but I’ve not seen that on many others
Leigh5t
Well-Known Member
I've not been able to get out to the garage since Sunday and it's been driving me mad! I finally squeezed an hour or so in tonight and this happened...
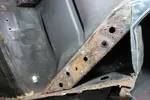
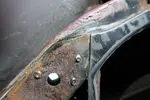
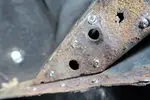
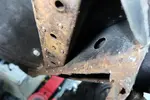
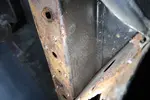
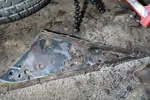
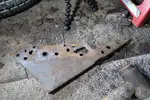
Grabbing a hour here and there is definitely the way this project is going to progress. The skin came off with no drama and I'm happy with where I made the cut as it looks fairly clean there


Grabbing a hour here and there is definitely the way this project is going to progress. The skin came off with no drama and I'm happy with where I made the cut as it looks fairly clean there
Duncan Grier
Well-Known Member
Progress is progress 
Can relate
Can relate
Leigh5t
Well-Known Member
Cheers lads. I agree, the worst thing you can do is think "it's not worth getting my scruffs on". Even 10 minutes tidying up is worth it.
I'm not sure how much of the rail needs cutting out as I've not cleaned it up yet. I'm chuffed it's not gone up the sides of the rail though. Good idea to use the bolts to hold the panel in place. I like it.
I'm not sure how much of the rail needs cutting out as I've not cleaned it up yet. I'm chuffed it's not gone up the sides of the rail though. Good idea to use the bolts to hold the panel in place. I like it.
DrKd
Member
Always keep your end objective in mind; you'll be surprised at how much progress you'll have made, even if you're only chipping away at it when you can. Also, if you are wondering whether a panel should be removed, the answer is undoubtedly yes. I've been working on my GT for more than ten years 
Leigh5t
Well-Known Member
I've been grabbing an hour here and there over the past couple of weeks to keep things ticking over.
I cleaned up the area under the rear beam mount plate.
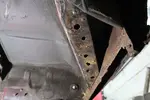
Most of it seemed solid, apart from the section where it has eaten through.
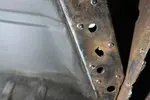
So that had to go.
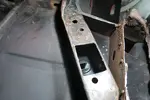
It was pretty clean inside, but I gave it a coat of hydrate 80 for good measure.
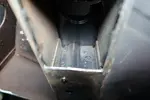
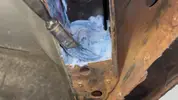
It looked rough where the cross member meets the rails.
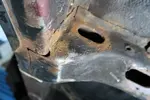
So I cut a section out to peek inside. It was scabby, but not rotten. Again, I gave it a coat of hydrate inside the frame section.

I then noticed this guy, who appeared to be hiding something....

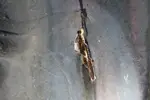
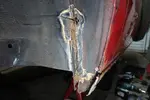
That looks like it'll be a tricky repair
I'm conscious of getting too carried away removing material and getting myself overwhelmed, so I thought I aught to get some fresh steel in before going any further.
The Meg coming through as a van again, collecting some 18 gauge and doing a tip run

Cut a patch for the beam mount rail and gave the back side a coat of weld through primer.
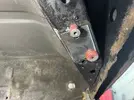
I'm certainly no welder and it's been a while since I last picked up a torch so I was a bit nervous. I think it went ok for the first attempt. I'll improve throughout this, I'm sure.
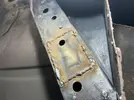
I was having a few issues with the crappy regulator on my disposable bottle so I think I'm going to bite the bullet and take your guys advice and get a decent bottle and regulator setup before doing any more.
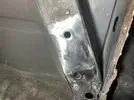
I'm not sure what to protect the fresh steel with though. Should I be priming it, or wait and do it all in one go?
Cheers guys.
I cleaned up the area under the rear beam mount plate.

Most of it seemed solid, apart from the section where it has eaten through.

So that had to go.

It was pretty clean inside, but I gave it a coat of hydrate 80 for good measure.


It looked rough where the cross member meets the rails.

So I cut a section out to peek inside. It was scabby, but not rotten. Again, I gave it a coat of hydrate inside the frame section.

I then noticed this guy, who appeared to be hiding something....


That looks like it'll be a tricky repair
I'm conscious of getting too carried away removing material and getting myself overwhelmed, so I thought I aught to get some fresh steel in before going any further.
The Meg coming through as a van again, collecting some 18 gauge and doing a tip run

Cut a patch for the beam mount rail and gave the back side a coat of weld through primer.

I'm certainly no welder and it's been a while since I last picked up a torch so I was a bit nervous. I think it went ok for the first attempt. I'll improve throughout this, I'm sure.

I was having a few issues with the crappy regulator on my disposable bottle so I think I'm going to bite the bullet and take your guys advice and get a decent bottle and regulator setup before doing any more.

I'm not sure what to protect the fresh steel with though. Should I be priming it, or wait and do it all in one go?
Cheers guys.
Turbell
Well-Known Member
Looks good enough, upside welding isn't the easiest, I'd keep surrounding area to where you want to weld cleaner, that includes underside of what you're welding, it burns and produces shite, your gas is a shield against crap , but if what you're welding isn't clean , you're not off to a good start.
It's a balance because you want to treat inside whilst you can get in, but don't want it where you want the welds.
Hydrate 80 on your new bits is fine, if it's scratched up well it etches nicely.
And your new little friend will travel up the seat belt mount, burn sealant away and chase rot out, it's a little minkey that one.
You'll bosh this off no drama when you get some traction, be done by Christmas
Leigh5t
Well-Known Member
Cheers @Turbell I appreciate it.
I’ve got a peashooter type flow gauge and I was struggling to maintain more than about 5l/min flow. Even on fresh steel that was well prepped I was having issues. I’ve ordered a new reg and hopefully go get a tank at some point this week.
I’ll clean up as much as possible next time to give me the best chance possible.
Thanks for the advice re hydrate on the fresh steel
I know what you’re saying about welding upside down. Not fun when a spark lands down your collar! Although, I find not being able to get enough light in there to be able to see properly frustrates me more than anything.
I’ve got a peashooter type flow gauge and I was struggling to maintain more than about 5l/min flow. Even on fresh steel that was well prepped I was having issues. I’ve ordered a new reg and hopefully go get a tank at some point this week.
I’ll clean up as much as possible next time to give me the best chance possible.
Thanks for the advice re hydrate on the fresh steel
I know what you’re saying about welding upside down. Not fun when a spark lands down your collar!
Duncan Grier
Well-Known Member
What @Turbell said 
Great to see some progress and if it makes you feel better weld thru primer hates me welding near it
I went with the clean areas best I could and blast a load of hydro80, also getting primer on after in places. Clean is key and worth tarting up the treated section for weld
I would be tempted to turn the heat up a touch but you will have had a better view on penetration while welding and of course you selected the red hot bird poo dropping option so there is no nice
Some more gas will help also
Looking forward to seeing your next installment
Leigh5t
Well-Known Member
Thanks @Duncan Grier
I agree my weld seems a bit 'cold'. I don't have many settings on my welder though so it's somewhat all or nothing. I'll have a play around once I've got my new gas setup sorted.
Red hot bird poo Trying to get out from under a car, with a welding mask on, whilst your neck is melting is no laughing matter. Not at the time anyway!
I agree my weld seems a bit 'cold'. I don't have many settings on my welder though so it's somewhat all or nothing. I'll have a play around once I've got my new gas setup sorted.
Red hot bird poo
Leigh5t
Well-Known Member
I have cut a little more out of the sill to both understand how it's constructed and to determine what I'm going to replace.
I've separated the rear quarter from the front section and It's starting to make sense.
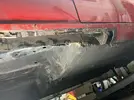
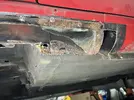
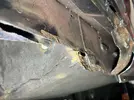
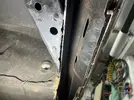
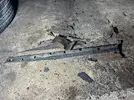
That's the last of the MOT patch on this side
I've ordered a pair of outer sills today from GT Turbo spares but I'm not sure how I pay?
I've separated the rear quarter from the front section and It's starting to make sense.


That's the last of the MOT patch on this side
I've ordered a pair of outer sills today from GT Turbo spares but I'm not sure how I pay?
Turbell
Well-Known Member
When I welded upwards I went with a bit more wire speed, but probably like you my SIP only has toggle switch for power, so it tends to step up.....I can't just crank it up a touch.
Better shielding gas delivery will help you, you'll do your best welds at the end, just how it is, you'll feel what works for you.
Your not welding a bridge or a crane, as long as you're not splattering rolled up beads of chewing gum on with little or no penetration it'll be reet.
I've made lovely repair plates, then it all turns to shite when I've started welding them up, I've just made some mounting plates with some nuts than needed welding on, but realised my Dad has bottle and reg for MIG, no drama I thought......I'll TIG them on, cos I've got another reg and pure Argon hard plumbed on it, been a while since I used TIG......suffice to say, one went straight in the bin......fookin meltfest, absolute dog shite.
Just do your best, if it goes bad, walk away and come back to it with a fresh head, it's playtime,not life and death time
I think you're cracking on great.
Similar threads
- Replies
- 1
- Views
- 66
- Featured
- Replies
- 89
- Views
- 2K
- Replies
- 4
- Views
- 383

