There is more to life with TurboRenault.co.uk
You are using an out of date browser. It may not display this or other websites correctly.
You should upgrade or use an alternative browser.
You should upgrade or use an alternative browser.
5 GT Turbo Another Red Renault 5 GT Turbo On It's Way Back To The Road
- Thread starter Leigh5t
- Start date
Leigh5t
Well-Known Member
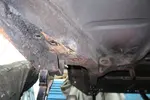
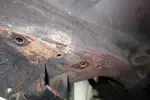
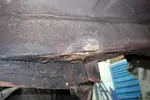
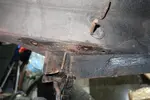
Cheers @andybond I had visions of it being a complete wreck underneath so I'm chuffed with what I've seen so far. However, I'm still expect it to escalate once I start digging. I'm looking forward to the challenge though.I think they might be differing levels of ropey here! It doesnt look as bad as some I have seen!
Turbell
Well-Known Member
Drivers side is bulging, so deffo chassis rail will have rot, there's still plenty of strength there.
Up to you if you dig, the rail is a U section, the plate you see that is bulging joins onto the inner sill, from memory, I'd bare metal it, find and drill spots and carefully removed it, this will leave you looking at the underside of the rail.
They'll be some big bran flakes and the rail will be slightly holed and thin, cut out the weak metal, repair it and plug weld the saved outer plate back if it hasn't suffered too much.
You'll have to drill out the spots for the jacking point and remove it as it's welded to the above mentioned outer and then onto the inner sill.
I'd tackle that drivers side mount first, leaving the jacking point off and obviously not welding to the inner sill until you've put some new metal in.
The jacking points will save easy.
Remember, drill out the spots, pick it apart and it'll all make sense, deconstruct it carefully, don't welt into it with slitting discs and cold chisels throwing out good metal having to buy replacements , all you'll need is a pair of outer sills and some 1.2mm sheet, I'll bet inners I'll need rearmost a couple of inches letting in and a few areas towards front jacking points.
Good luck.
Turbell
Well-Known Member
Knotted wheel on angle grinder, Toolstation sell wire brush attachments for drill that are pennies, work really well when new, soon as bristles roll over they're only good for getting hard skin off your feet, but they're keen new.
Be careful with your mince pies, and always have a back up to the back up if you're under the car, lob the wheels under, I'm not underestimating your competence, it's just shit happens and old cars aren't worth hurting yourself over, I always think twice these days.
Be careful with your mince pies, and always have a back up to the back up if you're under the car, lob the wheels under, I'm not underestimating your competence, it's just shit happens and old cars aren't worth hurting yourself over, I always think twice these days.
Leigh5t
Well-Known Member
I've already got knotted and wire wheels for my grinder...although I think they're evil bloody things! I have a variable speed grinder these days so they're not as bad. Terrifying on a full speed grinder though! I generally wear safety specs when sparks start flying but I am guilty of employing a good old safety squint from time to time. So I fully appreciate your mentioning being careful with the old mince pies.
Don't worry about sounding like you're underestimating my competence. I appreciate your concern. Nobody is exempt from getting squished by a car. As tiny as the 5 is, I don't fancy it on top of me! I have 8 axle stands under it at the minute and I'm still asking it not to throw itself on the floor/me
Thanks again @Turbell
Duncan Grier
Well-Known Member
Post in thread '11 years later silver bullet comes home' 5 GT Turbo - 11 years later silver bullet comes home
Have a fish about in my thread if it helps as a reference, also dive into @Turbell thread as that helped me also along with his sound advice
Looking forward to when mine is back to tackle last of the rust......strangely miss it
Have a fish about in my thread if it helps as a reference, also dive into @Turbell thread as that helped me also along with his sound advice
Looking forward to when mine is back to tackle last of the rust......strangely miss it
Turbell
Well-Known Member
@Duncan Grier pics show what I'm referring to perfectly, and also where he put his cut on the outer plate as it extends up into wheel arch , which can stay put.
Leigh5t
Well-Known Member
Thanks @Duncan Grier for pointing me towards your photos. They're extremely informative and terrifying in equal measure!  As @Turbell says though, you photos show perfectly what I need to be doing. It's also massively reassuring that you guys have been there, done that, got the t shirt. Further confirmation that I'm in good company. Thanks again for your help!

Leigh5t
Well-Known Member
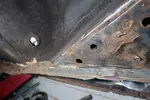
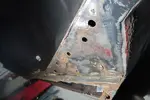
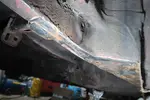
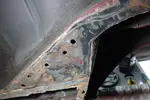
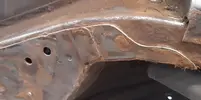
Managed to squeeze an hour in tonight. Not much of an update but quite a significant moment of making the first cut!
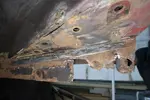
I thought I'd start by having a peek behind the driver's side MOT patch
Isn't she lovely
Isn't she wonderful
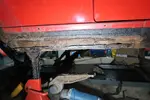
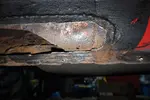
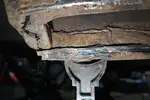


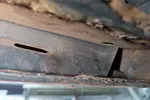
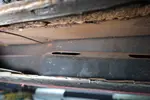
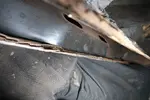
There's obviously a fair bit more to cut out of there but I'd rather take my time than to cut and regret. It's important for me to build an understanding of the panel positions and how it goes together.
I thought I'd start by having a peek behind the driver's side MOT patch
Isn't she lovely
Isn't she wonderful


There's obviously a fair bit more to cut out of there but I'd rather take my time than to cut and regret. It's important for me to build an understanding of the panel positions and how it goes together.
Turbell
Well-Known Member
Inner looks like it's been over plated, or at least overlapped, but none of it looks too bad .
I've never seen how the forward section of the sill should look like as OE where it goes under the rear quarter of the sill, so can't advise on that, this is why Mark uses two pairs of outer sills to put it back as it should be.
Don't think I bothered , I just plugged welded outer on to upper part that remains if you cut it end to end, but then mine was just a Campus.
If I were doing a GTT , think I'd take more care to go OE
It's exciting isn't it!?!
Leigh5t
Well-Known Member
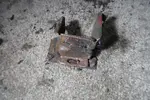
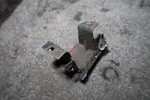
A few bits for the project arrived throughout this week.


The little battery cut-off tool has proven pretty handy so far. It's great when more control is required or you're in a tight space that the angle grinder won't fit. It was dirt cheap so It'll be interesting to see how it lasts. I would recommend so far. I got some more bags for archiving bits and bobs as I remove them. Spot weld drill bits too.


The little battery cut-off tool has proven pretty handy so far. It's great when more control is required or you're in a tight space that the angle grinder won't fit. It was dirt cheap so It'll be interesting to see how it lasts. I would recommend so far. I got some more bags for archiving bits and bobs as I remove them. Spot weld drill bits too.
Duncan Grier
Well-Known Member
You might want to consider a bigger hobby size bottle, you can get through the small ones quickly and adds up......but hopefully you won't need to much metal glue action 
Leigh5t
Well-Known Member
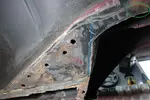
I just need to decide where to cut the plate to get to the rot. I think I need to remove pretty much the whole plate.
I was thinking of cutting it where the blue line is but I'm a bit worried about the small section where I've circled in green. How far in to the wheel well does this plate go? It looks clean all along where it turns up in to the wheel well so I don't really want to be removing past that point but if it only goes up a short way then it might be worth going that bit further.
I hope this makes sense.

Leigh5t
Well-Known Member
Yeah I know they're terrible value for money aren't they. Although, this I the biggest hobby sized bottle (220L) so it'll last me a little while. I toyed with the idea of upgrading, went round and round trying to decide, then thought stuff it I'll stick with this for now and sort it if I get through it too fast.You might want to consider a bigger hobby size bottle, you can get through the small ones quickly and adds up......but hopefully you won't need to much metal glue action
Last edited:
Turbell
Well-Known Member
Yes, that's where I'd cut, can't remember if I went all the way up and took the lot off? Don't think I did cos it disappears under seriously thick mastic.
Thinking about sill/ rear quarter seam , I reckon it's more there for assembly/ accident repair, I'd ditch it, keep the seam where it is in the door shut so it looks OE, plug into what runs left to right at bottom rear quarter, it'll make sense when your in there, refer to @Duncan Grier or my pics.
Hobbyweld cylinders are pretty economical for home use, first one is/was about 130 quid, about 40 quid a fill, no rental and you can sell it on if you want, cheap reg about 35 , does me fine.
Leigh5t
Well-Known Member
Similar threads
- Replies
- 1
- Views
- 68
- Featured
- Replies
- 91
- Views
- 2K
- Replies
- 4
- Views
- 387

