There is more to life with TurboRenault.co.uk

Register a free account today to become a member! Once signed in, you'll be able to participate on this site by adding your own topics and posts, as well as connect with other members through your own private inbox!

Alpine A610 Turbo - Megasquirt Conversion

Hehehehe...
Yep. I think I've got it now! Everything works until I connect that earth, with the aux water pump in circuit. If I remove the aux water pump relay, I get no spark when I reconnect that earth. Plug the relay in and "boom".
Next I will try disconnecting the aux water pump, but leaving the relay in situ, with the troublesome earth connected.
I think the aux water pump shares its earth with the rear lights. They are all clues. I will also try disconnecting the rear lights and see if the pump still earths too. But I suspect the issue is all to do with the aux water pump.
No resistance between the body earth giving all the trouble and a known good earth (same as MS).
Interestingly, the aux water pump gets its power from the fuel pump relay when the latter is "off".
It's gonna take me a while to get my head round it, but I think it's almost certainly a problem caused by the aux pump. I can live without it for the MOT!
Meanwhile I ordered a replacement blower motor controller. Mine's definitely dodgy. In fact, I seem to remember it intermittently not working at one point before I messed around with everything!
Andrew
 
A quick update!
MOT time today. Failed ;-(
  1. Horn not working (I forgot to plug it in)! I disconnected it because it's the alarm and is triggered every time you turn the power on for the battery
  2. Rear fog telltale not working
  3. Rear fog light not working
  4. Stop lamp not working nearside rear
  5. Indicator not working nearside rear
  6. Nearside rear stop lamp adversely affected by operation of another lamp
  7. (2-6 probably mean a missing earth or something)
  8. Rear brake application uneven
  9. Brakes unbalance across axle rear
Strangely, it drove well down to the test centre but very badly on the way back, misfiring quite a bit. No idea why. Again, two steps forward and one back!
I figured out the cause of the fuse blowing... I assumed the evap solenoid was earth triggered, but it's not. It's positive triggered. In fact, that means that I wired the earth straight the +ve for the ECU. That'll do it!
Now need come up with an alternative circuit or rewire it to be -ve triggered
Now got to find out what to do with the rear calipers. I'm not sure which one is working better than the other. He said the nearside
Andrew
 
Now need come up with an alternative circuit or rewire it to be -ve triggered
Do you though? The solenoid triggers from a circuit being made, right? So feed it an ign positive, and take the earth to the ECU for a switched earth trigger.

Unless it earths through the casing, then you're going to have to wire up a relay on a switched earth to the ECU, then when the relay triggers it throws a +ve feed to the solenoid input.
 
I need to do one or the other! Rewire to it's -ve triggered is probably easier, although it means adding a new wire through the loom. Its earth is shared with other stuff currently and is what caused the problem. It doesn't earth through the casing.
 
I managed to get 5 mins on the car as I was putting it away. Turns out the misfire is one of the coils being intermittent. Not sure what the issue is yet, but at least I have identified which coil is at fault!

Also on the drive to/from the MOT station, I noticed the speedo wasn't working. Oh dear ;-(
No idea how I could have broken it, but it's now down to tracing and troubleshooting everything, from the sensor forwards. It may just be something simple like no power. The rev counter works, though! It's a huge pain to get to the speedo. Not looking forward to it.
I'm going to need to put this project to the back of my mind for a bit as my personal life is going to get pretty busy for a bit...
 
Right! It's update time. At last!
Several posts here all in one:
Due to other projects (getting married, preparing to put my house on the market, making a baby(!) and a Rolls-Royce Silver Spirit), things have been a bit hectic lately.
Now with my need to move house I need to get my A610 mobile again.
So far, I have got it running (very nicely, I may add). It starts, warms up and idles better than it ever did. I think getting rid of the original fuel injectors (I used Siemens Deka 630cc) and the distributor (I used Chevrolet LS1 coils in a wasted spark configuration), have made all the difference.

I took it for its MOT a few months ago but it failed - first on the rear lights (oops - I had messed up the wiring) and then the rear brakes - the offside caliper was ineffective. Lights were easy to fix, but not the caliper. I had rebuilt it myself about a year ago, but it obviously wasn't successful. So I removed both and have sent them off to Bigg Red. Now awaiting their return.

While saving up (life's been expensive!), I decided to take a look at the heater blower. I found that it sometimes stopped working. I couldn't figure out why. At first I thought it was something I'd broken, but its failure was not connected to the work that I'd done. I eventually traced it (via checking the blower PWM (resistor) module), to what I thought was a faulty connection under a black plastic cover on top of the blower unit. Nothing for it but to remove the whole unit as the captive nuts that were holding the bolts just turned round in the plastic of the unit so I couldn't remove them.

I removed the fuel tank and the bulkhead, after breaking one of the bolts holding that on....

Then investigated further. Under the cover, everything was fine. It was only when investigating the blower motor itself that I found that someone else had been there before me! They'd replaced the original connector with spade terminals. They are different sizes but the wrong size had been used for the smaller connector, meaning it was very loose. This led to an intermittent connection. What a pain! I could have fixed that without removing the bulkhead and breaking stuff as I did so!

On the plus side, I was able to check the front crossmember (this is a common spot for rust on Alpines as it's covered in fibreglass and completely invisible without removing the fuel tank and loads of other bits). Good news is that it appears very solid indeed, so I can put my mind at rest over that.

When removing the heater box, the left-hand side of it (nearside) broke off. Old plastic was too brittle. So I bodged a new bracket up to hold it all in place over that side. I was able to remove the bulkhead and heater without disconnecting the AC pipes or the heater matrix. That was a two-person job, however. The heater box is now loosely in place now, so I need to bolt it all back in place properly and drill out the bulkhead fixing bolt that I broke. I may just replace it with a pop rivet as there are other pop rivets elsewhere anyway.

Then fuel tank back in, rear calipers on and brakes bled and we should be in business!

My initial drives to the MOT station were very positive. The car responded well and the Megasquirt auto-tune was working very well indeed. Plan is to get it MOT'd then to drive it carefully everywhere, trying to visit every tuning site in the map that I can. I have disconnected the electrical connections to Amal valve for now. Slightly annoying is that the MS pulses it so that it's open under normal running conditions - for best boost response, but the resultant clicking is rather loud.
 
Now going to squirt some wax into the crossmember before finishing the assembly. It does look very solid indeed.

The MS requires a wideband lambda sensor to do the Autotune thingy - I have one installed, although I may have to move it because it's very, very close to the exhaust manifold on that side. I had to install it quite a way downstream of the turbo. Apparently, wideband O2 sensors don't like hot exhaust temperatures.

The auto-tune measures the lambda at the current MAP and RPM. It tries to optimise it to a pre-defined air/fuel ratio at the various points in the map. It requires repeated visits to each point in the map in order to slowly change the amount of fuel injected at each site.
 
Anyway - the good news is that the car (eventually) passed its MOT on Monday!

It failed on Saturday due to:

Directional rear tyres fitted the wrong way round (oops! my bad)
Emissions - CO waaay too high...
Incorrect beam pattern nearside headlamp
Offside rear fog light not working
Left-hand rear indicator not working

Aargh. After I'd worked so hard on it!

The rear tyre issue was easy to sort.
Emissions - the Lambda sensor stopped reading part of the way to the MOT station - bear in mind that this was the furthest I had driven the car up until now. My suspicion is that the sensor is too close to the left-hand exhaust manifold and is getting too hot from radiated heat. This is borne out by it working just fine (subsequently) at night! For the retest I managed to reduce the fuelling at idle.

Incorrect beam pattern - I had fitted HIDs at some point. Initially, I was very pleased with them, but I found their startup time annoying when switching from main beam back to dipped - a few seconds of near blindness wasn't fun! And the light output of the standard headlights may have been worsened by a PO fitting some anti-chip film over them. So I just decided to go back to standard halogens. I can report that they seem much better since I removed the film. It's not as if the headlights are exposed to stones most of the time anyway! Plus I have a spare set.

The rear lights not working was particularly annoying. For some reason, the connectors seem very vulnerable to corrosion and bad electrical contact. Since taking the car off the road to do the MS conversion, I have found all sorts of connections go bad. The car really seems to suffer from not being used - even being kept in a dry garage doesn't seem to prevent these troublesome issues!

Initial driving impressions? The car is so, so much easier to start. I still need to do some tuning of the cranking parameters but I now know that the car will always just start. Last night, it started immediately I turned the key. It has never done that before. In some instances in the past I would have been afraid that I would flatten the battery before it started. No such worries now.

It also idles much more smoothly than ever before. The Deka injectors seem to be really very special. Large flow yet controllable at very small pulse-widths. Nice job, Siemens!

Tuning the car seems to be going well too - I've even made some excursions into full throttle and medium boost territory, although the Amal valve is still disconnected. The tuning map is slowly sorting itself out and looks like this now:

Screenshot at Sep 20 14-15-48.webp

You'll notice that I haven't yet managed to visit the low RPM, high boost cells (unsurprisingly). Slightly worrying is that I do appear to have hit the high boost mid rpm cells - even up to 200kpa... Argh! I've just realised something. I am eventually hoping to run 2 bar of boost, so my tables are going to need to change to a 300kpa maximum. That's annoying. Miscalculation on my part.
I've noticed the car feels like it's holding back quite a bit under moderate throttle - that might be due to the lower boost than standard, or fuelling or ignition not being quite right.

What do people think on the granularity of the Y axis? If I evenly space it, the map running off boost occupies half the table; boost occupies the other half.

Do I need more resolution and accurate fuelling at part throttle, or is it more important to be bang on during boost? Or should I just split the table evenly?

Andrew
 
Yep - can do that! I doubt I'd ever reach these cells anyway. I've now extended the table to 300Kpa and driven it a bit more. All going well. Need to tune acceleration enrichment at some point - I get hesitation unless I'm smooth with the accelerator.
 
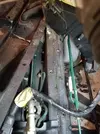
I wish I'd taken more photos but I was so focussed on the jobs! Here's the offending front crossmember. You can see it's pretty tight in there. I am dismayed at just how much has to come out to get to it. Right royal pain to get the heater box out too. You're supposed to disconnect the air con pipes and the heater coolant pipes but I didn't want to lose either of these so I managed to get away without doing so.
20170902_170101.webp
 
Ah transient throttle. A dark art! Good luck with that :)

Yes - but it's not too bad at the moment - certainly liveable with and much better than with the original ECU. I'd go as far as to say that the driveability is significantly enhanced, even with a very basic and non-optimised tune. Must be due to better controllability of fuel and spark.
 
Notice also the position of the brake servo. It's on the nearside, which necessitates a bar running across from the pedal to the servo! If the crossmember is rebuilt, it's critical to get the alignment correct, otherwise the brake bar will bind.
 
Need to tune acceleration enrichment at some point - I get hesitation unless I'm smooth with the accelerator.

If you're going in to boost I would do this sooner rather than later. When it's hesitating it's because you're running lean. All the senors take a while to respond so it won't be giving you enough fuel.

Not knowing MS ECUs I am guessing that there is a pedal derivative fueling option somewhere? So that if it sees a sudden input in the pedal it "overfuels" to counteract the slow feedback from the lambda sensor? I would keep increasing this until the hesitation goes away (add a little bit more to be safe) and just keep an eye on the lambda values.
 
Back
Top