There is more to life with TurboRenault.co.uk

Register a free account today to become a member! Once signed in, you'll be able to participate on this site by adding your own topics and posts, as well as connect with other members through your own private inbox!

3 Door 5 Campus

Cracking job, lots of work . I think I would of bailed along time ok but fair play for sticking with it . I used to use a two pack 3M sealer to seal it up , dear but good and you can make it look like reno . All that hard work needs preserving
 
Cracking job, lots of work . I think I would of bailed along time ok but fair play for sticking with it . I used to use a two pack 3M sealer to seal it up , dear but good and you can make it look like reno . All that hard work needs preserving
Yep, used 3M sealer before, always gifted to me though, great for tidy seams....this will get plenty of the Zinc 182 and then single pack mirka, it'll all be hidden. Final job after any paintwork is complete, will be Bilt Hamber Dynax S50 cavity wax.
I'm confident I can pretty much halt corrosion on this shell for good, I've looked for the rust, poking and prising, I hope that the shell will live on in whatever guise, and although I wouldn't cut corners for anyone else.....It's my flesh and blood that will be driving it.
A 5 is devoid of all the modern crash protection and safety features so commonplace in cars that you can pick up for under a grand even, so I think it's only right I put the effort in to make the shell as strong as it should be.
Thanks for positive comments, everyone, it does help.
 
Slow week, sorting out half term away trip for me and son, passport renewal....all takes up valuable welding hours...

So for a change, slap a bit of pudding on, three or four skims and then a skim of top stop when I was happy with shape, etched sills with Acid 8 primer.

2018-09-14 155705-2037072.webp

Garage is multi task configured.....( It's a shit tip, welding, fabrication,bit of paintwork, engine rebuild,motorbike repair, spare parts emporium) so it's a faff to get it anything like for paint.....even priming, fecking about sheeting up, cleaning gun, so I've just bought a couple of UPol rattle cans of primer.
It's not an economical way to prime as there's only a gnats bollock of actual primer in a rattle can., but saves on time and mess for now, so I put about three or four coats on and then a guide coat , I'll let it settle and flat back with 400 and see how it looks

2018-09-14 185246-2295200.webp

Jolly away to Lakes in pissing rain on bike tomorrow, so no welding this weekend probably finish fuel neck bracket area next, then there's quite a few postage stamp sized crozzles in boot......no doubt turn into a job and a half.
Aim is to have the doorpost backwards done by end of year, then doors, bumper on, and interior can go back in, then concentrate on front....frame off..etc
 
After last weekends two wheeled wet trip to Lakes, I couldn't wait to get back into it...................Ahem...nice place, shame about the weather, and Derek and Doris in their 30mph motorhome.

Midweek and I plated the inner arch where the filler neck bracket was, same story, the accident damage must have broke the sealant, already a mud trap so it ended up a nice big plate by the time i found sound metal, quick bracket with a nut tacked on.
Much hilarity getting my bonce avec welding helmet under arch....bang, helmet on arch...crack, head on brake drum., therefore a bit of blind mig torch waving, be reet...2018-09-21 183355-1723688.webp

Bit blury.....here, slap some sealant on it.

2018-09-23 115952-1937728.webp

Oh...thats clearer..

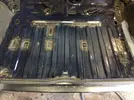
Boot floor, crozzles here and there, bulges indicating rust between skins.
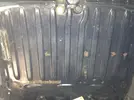
2018-09-22 163333-2237414.webp

Chop out where suspect areas are, clean and Bilt 'em
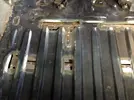
2018-09-23 120439-1478087.webp

Slip plates in from underneath

2018-09-23 143511-1606447.webp

Half done , well half the floor area, still loads to do, but a couple a night and by the weekend it'll be done.
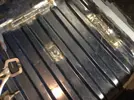
2018-09-23 165419-1469353.webp

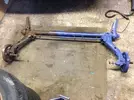
I've dropped the rear beam in preparation for the mounts, bit bulgy between the skins, and I can see branflakes from inside on the N/S......, O/S looks clean as a whistle.
I could tell everyone they were sound and wax them and it'd be fine for years.....for while I'm there I may as well have a gander.

I need to get some paint on the O/S soon , so that'll make a change if I get fed up, but my garage bird keeps me interested, just sits there watching, ......never moans, bless her

2018-09-23 165600-2205206.webp
 
Boot floor all plated, only eight in the end.....2018-09-28 162006-1628176.webp

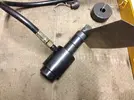
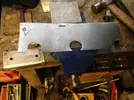
Gave me an opportunity to use one of my favourite tools, hydraulic hole cutter .....for the biggest plate, top left...

2018-09-26 185745-1673357.webp
2018-09-26 190129-2331971.webp

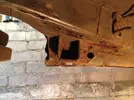
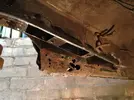
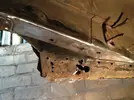
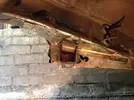
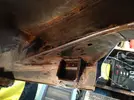
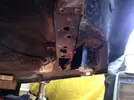
All those years farting about, but since this beauty came into my life, making holes is an event........talking of holes, I was concerned by the bulgy N/S suspension mount, and not knowing how it was constructed decided to pick it apart so I could repair as it needed....took some doing spots were mighty strong and I hate scrabbling about under cars....shit and rust and muck everywhere, here's before.....2018-09-29 160725-1661032.webp

And this is this shitstorm that awaits the intrepid fool.......

2018-09-29 184428-1715893.webp

Plate extends up, to the left of the picture which is in the rear arch, but I'm gonna slit it so I can butt weld the new in on the horizontal, as It must go a fair way up and is well sealed in.
I suppose it's a miracle it's not worse, there isn't a hint of any cavity wax anywhere.
I had a litre of paint mixed and bought what else I'll need, they'll be plenty for the patching in, with some spare if needs be, £70 all in.2018-09-29 123319-1720756.webp

I'm trying to get the rear plating done so I can gravitex the new sill and anywhere underneath whilst I'm at it, but i keep finding myself work.......I could do with some shiny though....give me a lift.....
 
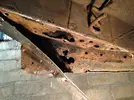
Dreaded this, upside down welding isn't my fave, chopped grot out, remainder was still in mostly in black paint, Bilt Hamber Hydrate 80 in everywhere i could reach anyway.

2018-09-30 142919-1478077.webp

Made card templates to fit holes exact, then replicated in some yellow plated steel, only cos free...magnet holds in place and then tacked, remove magnet and continuous weld.
Obvs working with gravity against me, but turning wire feed and power up a tads and then pulsing a little, before pool got too sloppy and tried to sag .....quite happy.

2018-09-30 153234-1380528.webp

Ground it all up nice and flush as closing plate needs to sit tight up, I can use the old removed panel to replicate, but won't tie into inner sill, as that will get cut out and replaced when I turn the car around and start the other side.....but that's a way off yet

2018-09-30 165657-1569004.webp

Other side will have to be done differently, It's not as bad at all but I fear inside will still harbour some branflakes, but remember I've already replaced inner sill section , so it's all plug welded in JP and the outer cover panel that's totally removed in the above pictures......ATM the only way I can think is to slit along the length, leaving the return still affixed to the sill and JP, but still be able to check and attend to inner chassis leg.....Hmmm.....I feel some standing and staring and thinking coming on....
 
Treated myself to a new welding helmet as old one, for some reason, kept getting my ever receding hair caught somewhere......right when you least expected it, I'd move my bonce and it'd grab a few hairs somewhere and tweaked 'em, in turn making me flinch and usually twat my head on something.......
2018-10-07 125613-2758312.webp

A little ironic ......." I'll BE BACK....."

Don't thing I'll ever leave....but amazing what a tad over twenty quid buys you theses days.
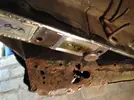
N/S beam mount area finished bar plugging it, and JP, into new inner when I replace sill.
2018-10-06 113456-1556461.webp

O/s side wasn't as bad.....

2018-10-06 130520-1458670.webp

Weeeelllll........you'd think .....but open up pandoras pants, and what do you find...?

2018-10-06 144355-1253201.webp

Shit and holes of course, blah, blah already done inner sill well plugged into JP and the return on this panel, so a different tact on this side,

2018-10-07 145504-1970605.webp

A right twazzer to get plate a tight fit as cuts were a little wonky, cos of JP fouling angle grinder, plus getting holes in right spot for bolts.

2018-10-07 171506-1276166.webp

All better.

A couple of little snaggets to tidy, then treat repairs, scrape loose, prep for gravitex etc.
Not bothered if there's loads more to do or not, just pleased to get these two areas sorted, I wouldn't have been happy until I knew they were bob on, hindsight i would have done both before touching sills, but at least I know how to tackle them, and it may give others a few pointers.
 
I look for trouble, others may not.
You poke a thirty plus year old car properly, you'll find trouble, unless it's been cavity treated or molly coddled.
We had a Clio Cup from nearly new and I had a good look under it at 12/13 years old before I got shut and I could see where it would start to go, as soon as you put a torch near a car it's a fast downward spiral, you create the perfect conditions for rust, as the heat burns all the protective coatings off and rust starts in a jiffy.
I reckon this Five had a plate every year, and if it'd never had a plate on from the start it would have been anywhere as bad as it is, the only reason the outer edges of the floor were gone was because the MOT standard welder had folded plates round the inner and outer and welded on to the floor.......thus stripping off the protection, and a waft of under seal ain't gonna help.
It's not the worst I've tackled.
When it came off the loader I joked there was 100 hours welding......not so funny now.
 
ALL RIGHT I'VE HAD ENOUGH.........................

I just can't go on any longer, everyone is right, I'm crazy to carry on like this.................

2018-10-14 103754-1937129.webp

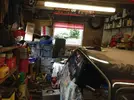
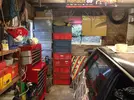
Bat cave has got beyond a joke...pissing it down, it just felt like a tidy up day, VAT free offer fell on door mat at MM, I'd looked at various options for some home tool chests, including S/H quality stuff ......but the Clarke Premium boxes looked about the best value.....and I know they aren't Snap On but with the VAT off I picked this set up for £300.

2018-10-14 133512-2476920.webp

I haven't got twenty grands worth of spanners so keeping it realistic I'm happy with this set up, I can now probably chuck a good quarter of it away, as now I'll be able to find it.......there must be easily a hundred screwdrivers....specialist tools like valve spring compressors and pullers can go in and free up space in other places.
In true hoarders style, I have just tidied it and stacked it higher.....but at least I've freed some floor up.
2018-10-14 174345-2479060.webp

Feck knows how.....assume rust travelled up seam, but rear seatbelt mount was showing slight signs of rust from the inside.......an hour later....

2018-10-13 125833-1628938.webp

All repaired now, rest of time other than garage make over ( don't get excited....I ain't painting the floor....) it's been scrape and treat rear underside, bit of dry atmosphere and I'll start painting.
I was going to strip and blast the rear beam, but it's all time getting it to blasters and fetching blah blah, so I've set the lad on with scraping and wire brushing it, new flexies tipped up on fleabay for a tenner the pair, paint beam and get it rolling after underside is finished.
 
Lol you had me worried with your opening line as this is one of my favourite threads :)

My problem has been with added drawers for tools all the single missing items loaned never to return or MIA and end up making more mess looking for them lol
 
VAT free offer fell on door mat at MM
I can't help but buy something every time. Last time it was a space heater and with the vat free discount I ended up buying one bigger than I should. It turns the garage into an oven on the lowest setting!

I went in there the other day for an air compressor fitting and came out with an air nibbler too lol
 
Finished the welding at the rear, couple of bits on the N/S leg, nothing major.
There's some on the rear inner wheel arch/ boot floor to deal with, but I'll sort when I turn car around to do sill and front floorpan.

2018-10-19 200523-1348117.webp

All sealed up, Bilt Hamber on rusty bits and repairs and Zinc 182 on same.

2018-10-20 143555-2037313.webp

Sill and and the rear all gravitex'd up, I was a bit heavy with it though....it's lifted the sealant in a few areas....and instead of leaving it to dry and sorting it out i couldn't resist picking at it..............I'll let all harden off and sort the little areas that I've fecked up in a week or two...

I'd originally wanted to strip rear beam out and blast, but I want to crack on with the shell, so decided it ain't a show car.....it'll never have a lot of value in it....so I set Lad off with the drill and a rotary wire brush and scraper, he stuck at it for a couple of hours, and it's allowed him some input, but as I wanted to keep it rolling, I put a new knotted brush in the grinder and whizzed round it for half an hour, that'll do.

2018-10-20 171127-3347399.webp

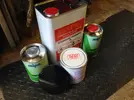
Bilt hamber again, I fecking love this stuff, it's really pissy so you can work it in everywhere, a little 500ml bottle does loads as it's so thin.
Rusty but solid metal can be treated, then topcoated and it lasts, won't go flakey, etches bare steel, really can't recommend it highly enough.
Goes on.....turns blue...

2018-10-20 174619-2062778.webp

Drys blackish, tempted just to rattle some satin on, I would use some satin chassis enamel, but it'll take ages, I'll see.

2018-10-21 181106-1820547.webp

Away on hols after next week, then at NEC for Lancaster Classic Car show week after, so progress will slow right down, but next two jobs are paint sill and quarter and refit beam and brakes and get it switched round for some more rusty fun.
 
Back
Top